Create custom houses quickly with simple controls and flexible customizations.
Stage Options
We can customize the height, roof line, pitch and other settings in the Panel under three sections: House, Full Roof and Roof Section.
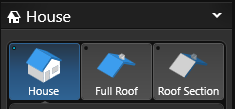 House: Customize the appearance of the house walls.
Full Roof: Customize the appearance of the overall roof.
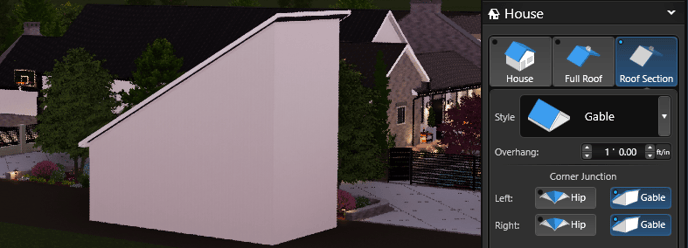
Roof Section: Customize the appearance of individual roof sections.
Creating complex houses? See our Advanced House Knowledge Base Article
House:
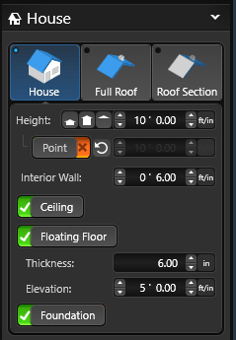
Height: Set the height of the selected house shape.
- One Story: Select this option to set the height of the selected house shape to a single-story house at 10 ft.
- Two Story: Select this option to set the height of the selected house shape to a two-story house at 20 ft.
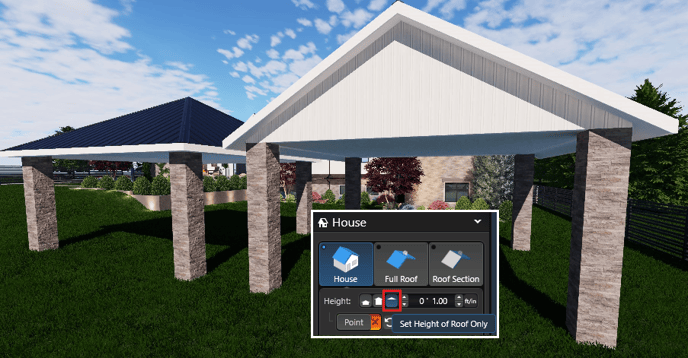
- Roof Only: Select this option to set the height of the selected house shape to 0″ and create a vaulted ceiling, perfect for creating patio covers.
Quickly create patio covers and pool houses with the Roof Only option. Set the style to Hip or Gable under Roof Section.
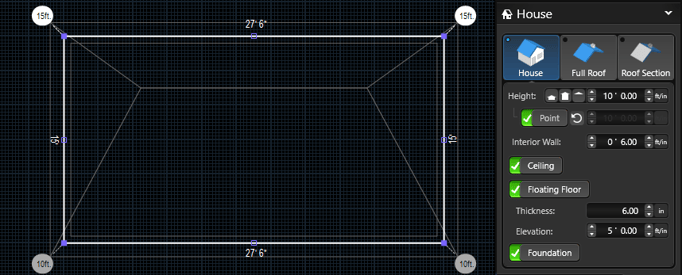
Point: Toggle to adjust individual walls of the selected house shape. When ON, Blue Points make it easy to adjust the wall: you can set a custom height at each corner or you can use the Blue Center Point to adjust the entire wall evenly.
Interior Wall: Set the wall width of the selected House shape.
Ceiling: Toggle to add a ceiling to the selected House shape. If Ceiling is set to Off, a vaulted ceiling is visible.
Floating Floor: Toggle to add a floating floor to the selected House shape. Adjust the thickness and elevation to place the floor where you need.
Foundation: Toggle to add a foundation to the selected House shape. This option will automatically cut away and flatten the Terrain inside of the house.
Full Roof:
Modifications made under Full Roof will affect the entire house shape.
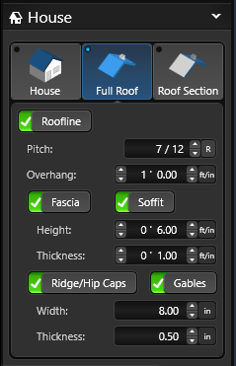 Roofline: Toggle to add roofline to the selected House shape.
Pitch: Adjust the angle of the roofline. Click R to adjust the angle by degrees instead of slope.
Overhang: Adjust the amount of overhang for the roofline.
Fascia: Toggle to add fascia on the selected House shape. The fascia is the long, straight board that runs along the lower edge of the roofline.
Adjust the height and thickness to create the style you need.
Soffit: Toggle to add soffit on the selected House shape. The underside of the overhang, when given a finished appearance, is known as the soffit, which means “something fixed underneath”.
Ridge/Hip Caps: Toggle to add ridge/hip caps on the selected House shape. A ridge cap is installed along the ridge line of a sloped roof.
The point where two sides of the roof meet forms the apex of the roof, and is known as the ridge or ridge line. A ridge cap fits over the joint between these two edges.
Gables: Toggle to add ridge caps to the gable side of the roof.
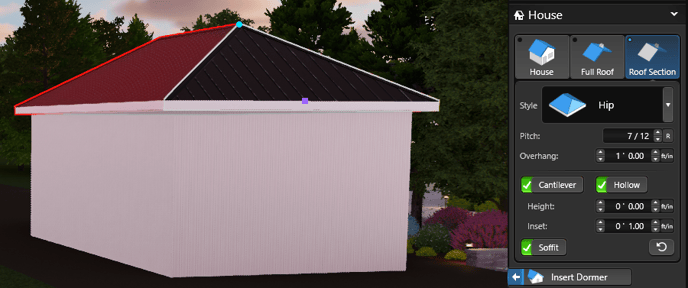
Roof Section:
Roof sections can be adjusted individually. Modifications made under Roof Section will only affect the selected roof section.
Click a section to select it. When a roof section is selected, it will highlight in white and the Panel automatically displays the Roof Section options.
Here you can choose the roof style for your selected roof from the drop-down menu.
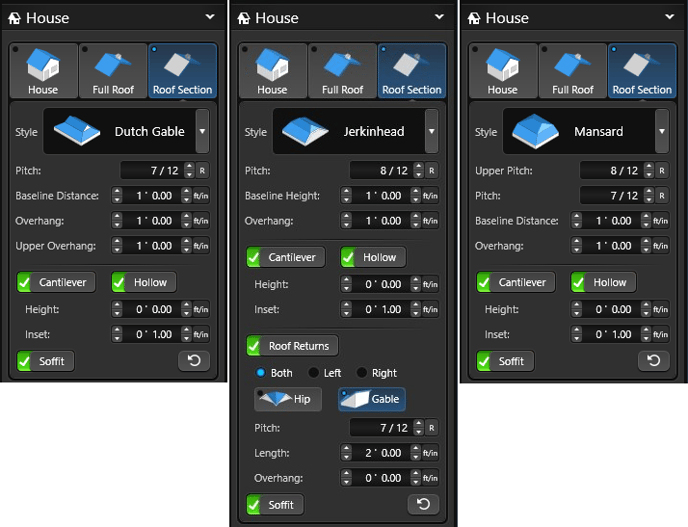
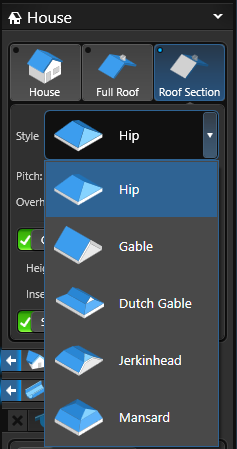 Style: A preview of each roof style is to the left of the name. Choose between Hip, Gable, Dutch Gable, Jerkinhead and Mansard
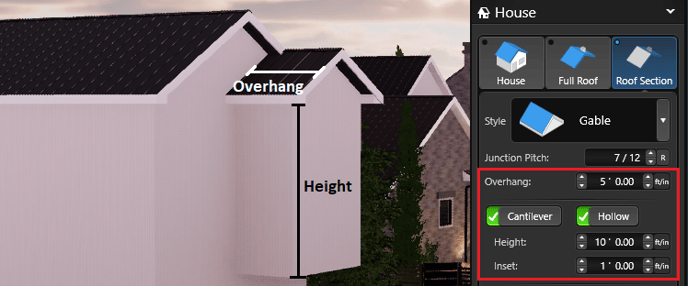
Pitch: Adjust the angle of the selected roof section.
Overhang: Adjust the overhang distance for the selected roof section.
Cantilever: Toggle to add a wall under the overhang section of the roof.
Hollow: Toggle to remove the wall between the house and cantilever.
Height of Cantilever: How far down the cantilever extends below the roofline.
Inset of Cantilever: How far inset the cantilever is from the edge of the roof. Note: Minimum inset value is the width of the Fascia.
Soffit: Toggle to add soffit on the selected roof section.
Roof Styles
As you change the roof style between Hip, Gable, Dutch Gable, Jerkinhead and Mansard, additional controls appear for your selection.
🏡Download example .sav file: 20 Basic Roof Styles
Corner Junctions
When neighboring roof sections of the the house are set to Gable, the Corner Junction controls are visible.
To create a single-pitched roof surface, set the corner junctions to Gable.
To create a multi-pitched roof surface, set the corner junctions to Hip.
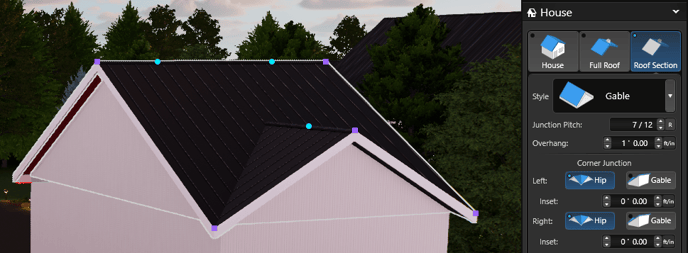
When 1 or 3 Roof Sections are Selected: Default Corner Junction is Gable
When 2 or 4+ Roof Sections are Selected: Default Corner Junction is Hip
You can change the corner junction at any time in the Panel.
Baseline
Baseline Distance (Dutch Gable and Mansard): How far from the roofline it switches to the upper gable or hip plane.
Baseline Height (Jerkinhead): How high above the wall height before the upper hip plane starts.
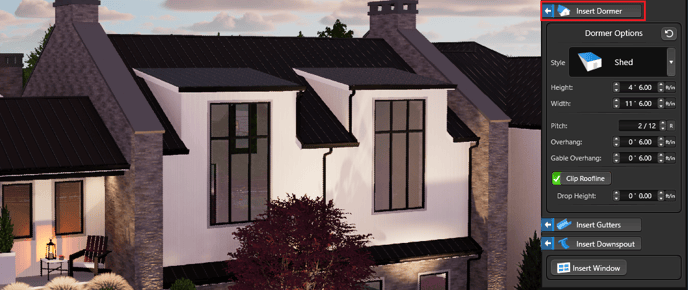
Insert Dormer
Add Roof Returns
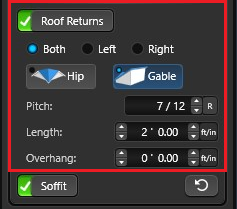
Location: Choose between Both, Left or Right.
Style: Choose between Hip and Gable.
Pitch: Adjust the angle of the roof return.
Length: Adjust the length to create the style you need.
Overhang: Adjust the overhang distance for the selected roof section.
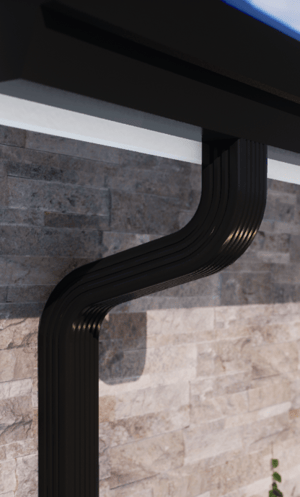
Insert Gutters and Downspouts
Gutters and Downspouts can be added automatically to give your design a finished look. In the Library, you'll find 12 Gutter Profiles and 3 Downspout Profiles.
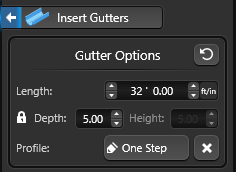
Note: When the Lock is ON, Height updates proportionately with Depth.
When you press the Lock Icon next to Depth it will "unlock" the Height field and allow you to type in a value.

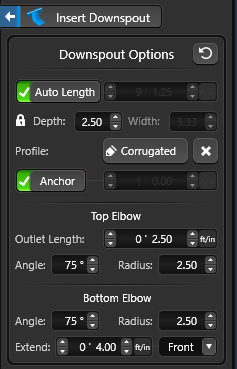
Note: When the Lock is ON, Width updates proportionately with Depth.
When you press the Lock Icon next to Depth it will "unlock" the Width field and allow you to type in a value.
 Anchor: Toggle to automatically anchor the downspout to the house wall. When off, set a custom distance.
House Decor Library
Once you have designed the basic outline of your house shape and added your custom windows, you can add doors and other items from the House Décor tab in the Library. To add these items, open the Library to House Décor.
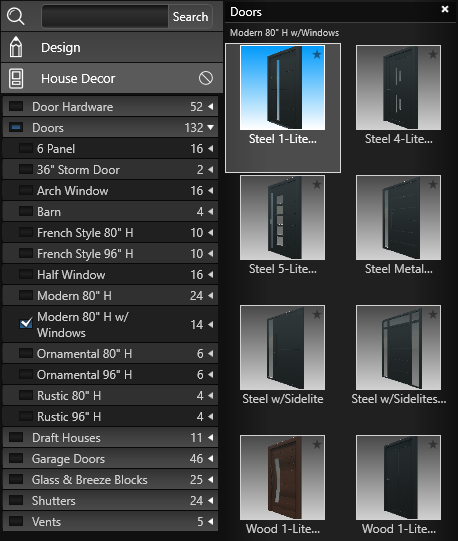
Select the item you wish to insert and either click the Insert One button or double-left-click on the image of the item.
When you move your cursor to the viewport, the item will follow until you left-click to place it.
If you move the mouse close to a house shape with a House Decor item selected, the object will snap into the proper position.
Ready to add custom windows? See our Windows Knowledge Base Article
Elevation
The elevation of shapes drawn in the House Stage can be set in the Panel under the Object Tab. You can control both shapes you have drawn as well as items inserted from the Library.
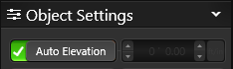 Auto Elevation: With this box checked, shapes drawn in the House Stage will automatically snap to the elevation of the terrain. Items from the Library will attempt to snap to the dimensions of existing shapes in the design.
 Elevation Box: You can manually enter an elevation value for the shape or library item. Whenever you move an item in the 3D view, this option is automatically selected. With this control, which is available in both 2D and 3D, you can create floating open space elements.
Moving House Pieces in 3D
Objects drawn in the House Stage may be moved in 3D with the 3D gizmo. Double left click on the object to bring up the 3D gizmo. The blue arrow will move objects up and down, the red arrow will move objects left to right, and the green arrow will move objects backwards and forward.
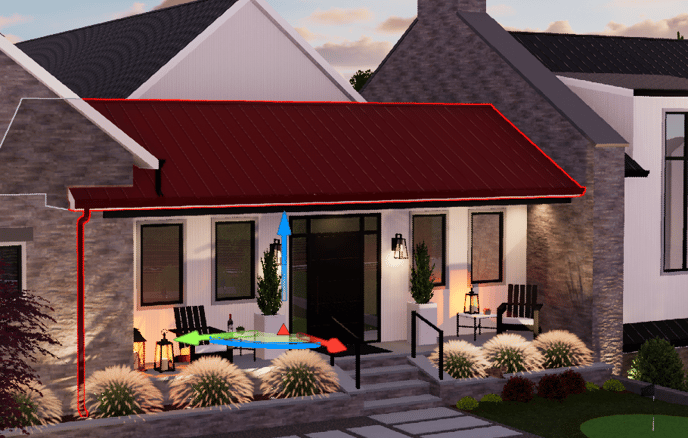
Elevated House Pieces: Elevated house pieces are used to create patio covers, custom roofs, and suspended objects with empty space underneath. House pieces can be elevated either with the 3D gizmo or by setting an elevation under the Object Tab.
Elevation: The elevation controls under the Object Tab can be used to edit house pieces in 3D. As you change the settings, the selected pieces will change in 3D.