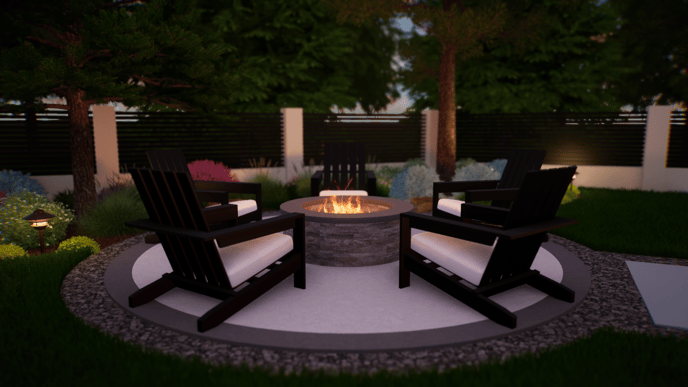
A fire pit is a focal point where everyone wants to gather.
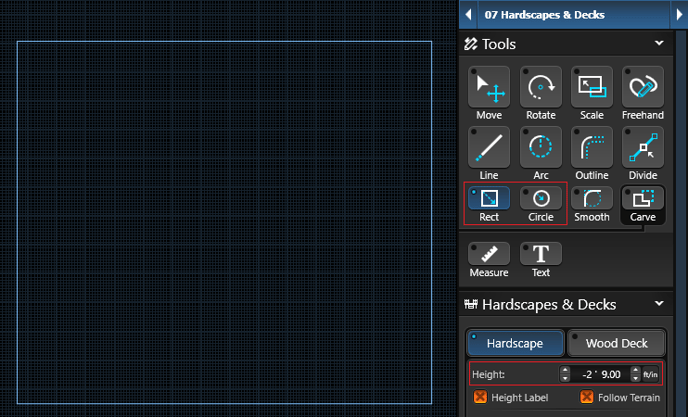
Step 1: Draw the Fire Pit
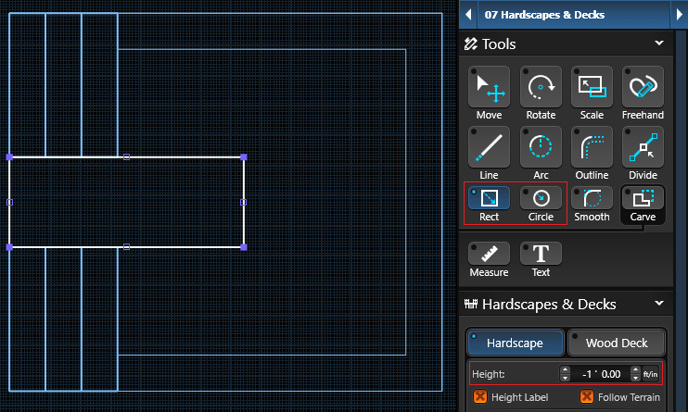
Head to the Hardscapes & Decks Stage to draw the outside dimensions with the Rectangle or Circle Tool.
These measurements include the thickness of the walls, so the total width of the fire pit is not the same as the width of the burning area.
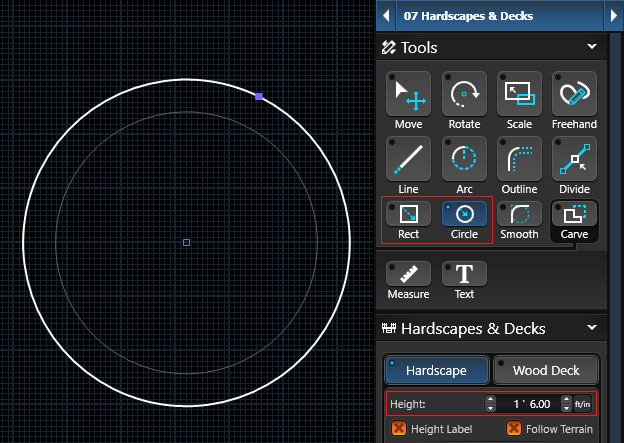
A good rule of thumb is to make an above-ground fire pit 12" to 20" tall.
12" to 14" will keep the fire pit a few inches shorter than most outdoor furniture seating.
If you want to sit on the edge of the fire pit, 18" to 20" inches will be comfortable.
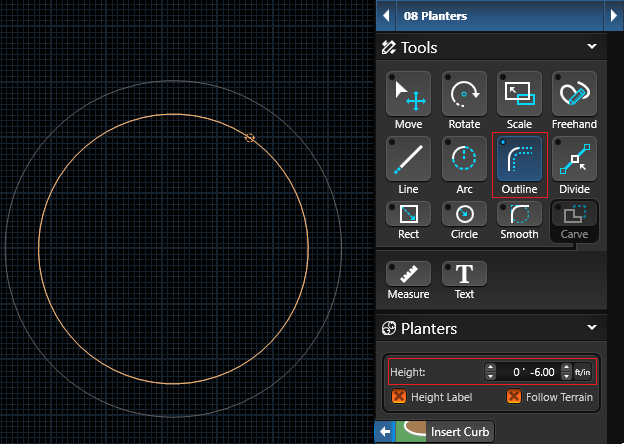
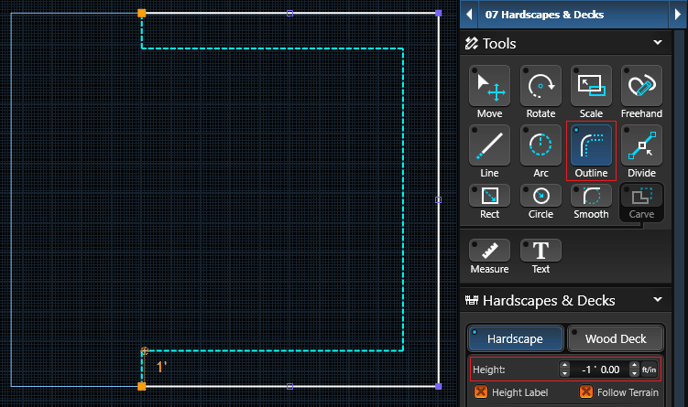
Step 2: Draw the Burning Area
Use the Outline Tool in the Planters Stage to create the depth of the fire pit.
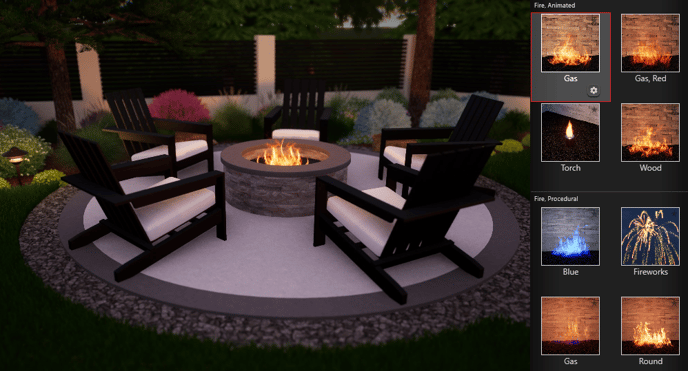
Step 3: Add Fire and Seating
Head to Plants & Items to add the a Fire Element to the center of the fire pit.
Customize the fire in the Panel under Fire Options.
Next plan for seating that will allow for both group settings or one-on-one time.
Step 4: Customize the Appearance
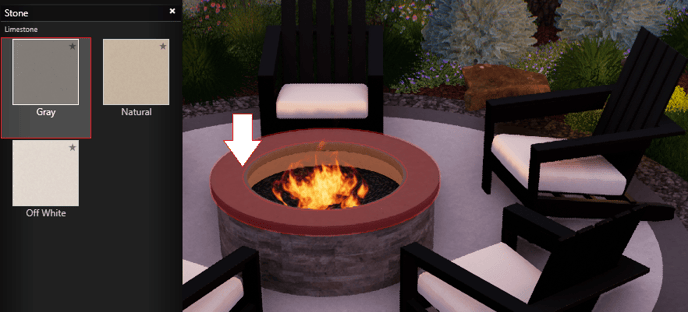
Head to the Materials Stage to apply a unique material to each element.
The outside of the fire pit can then be finished with stucco, stone or brick veneer, or decorative concrete.
To change the material on the fire pit cap, select it by double left clicking directly on it. The selected surface will highlight in red.
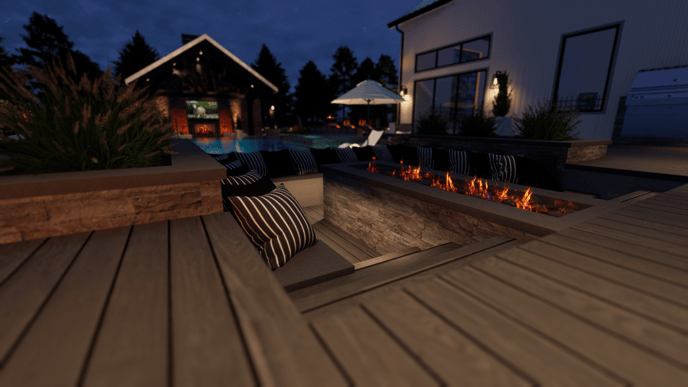
Create an Inviting Sunken Area
A sunken area is another way to create a comfortable space that helps you enjoy the fire pit.
Step 1: Draw the Floor
Step 2: Draw the Bench
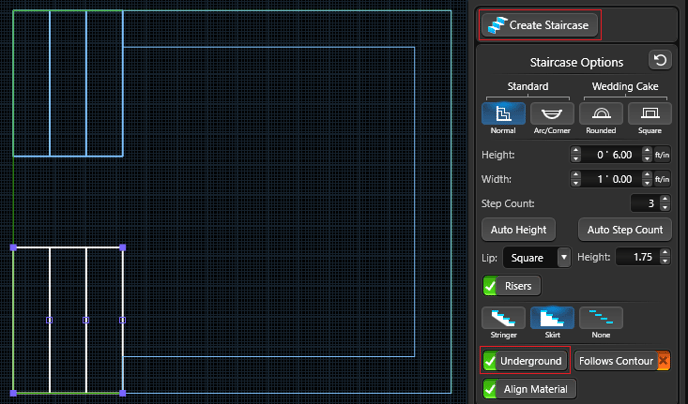
Step 3: Add the Stairs
Use the Staircase Tool to add stairs down to the area.
Step 4: Draw the Fire Pit
Use the Rectangle or Circle Tool to add the Fire Pit.
Use the Outline Tool in the Planter Stage to create the depth of the fire pit.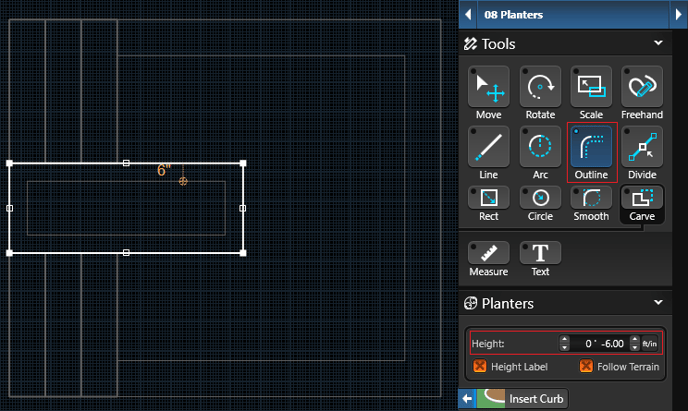
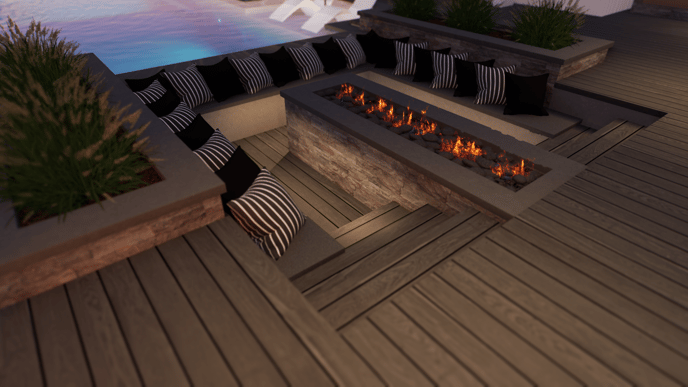
Step 5: Customize the Appearance
Once the structure is in place, add fire, step lights, cushions and pillows from the Library.
The fire pit and walls can then be finished with stucco, stone or brick veneer, decorative concrete, or tile in the Materials Stage.
Use these techniques to create any shape or size outdoor seating area you need.