In this stage, we have three ways to present the project to our clients: we can take Photos in Photo Mode, create Videos in Video Mode, or give a real-time tour in Presentation Mode.
Stage Options
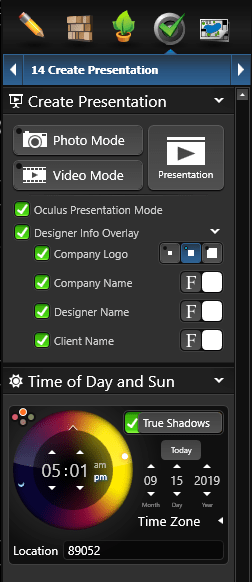 Photo Mode: Photo mode allows you to take pictures/screenshots at high resolution and save camera locations for the project. For more information, see Photo Mode.
Video Mode: Video mode allows you to capture professional, smooth, and captivating videos. For more information, see Video Mode.
Presentation: Once you have entered the information and chosen your presentation settings, click on the Presentation button. You will view your project in the full screen.
Oculus Presentation Mode (Vip3D Only): With the Oculus hardware, view the Presentation Mode in virtual reality. With box checked, clicking Presentation or F5 will display Presentation Mode in Oculus headset. Remove the checkmark to view the standard Presentation Mode without Oculus.
Designer Info Overlay: The Designer Info Overlay control allows you to display your company logo, company name, designer name, and client name when you are in Presentation Mode, Photo Mode, and Video Mode.
- Display Company Logo: Check this box for your Company Logo to appear in the lower left corner of the screen. Select between three size options.
- Display Company Name: Check this box for your Company Name to appear next to your Designer Name.
- Display Designer Name: Check this box for your Designer Name to appear in the lower right corner of the screen.
- Display Client Name: Check this box for your Client’s Name to appear below your Designer Name.
TIP: Change the text font and color by clicking the Font button or Color Square.
True Shadows (Vip3D Exclusive)
Check this box for the sun to rise and set at real-world times and locations based on your client’s address.
Add the client’s address when you create the file or click on Location to open the project information screen to add the address to existing files.
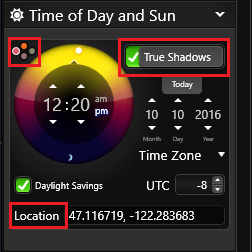
Date: Set a time and date to show your client the view of their project on a specific date.
Location: This field will display the zip code or latitude/longitude of the location entered in Project Information.
Sunset Colors: You may select any of the sky colors by left clicking on the color dot. The Sunset control allows you to adjust the appearance of the sky in your photos, video and presentation. Each option will adjust the overall color of the sky during dusk.
Shadow Slider: The shadow slider will lighten or darken the shadows.NOTE: With True Shadows On, you cannot rotate the sun as it’s using the real-world location.
Time of Day and Sun
Sun Controls: CTRL plus the left and right arrow keys will rotate the sun around the horizon.
CTRL plus the up and down arrow keys will change the time of day.
Sunset Colors: You may select any of the sky colors by left clicking on the color dot. The Sunset control allows you to adjust the appearance of the sky in your photos, video and presentation. Each option will adjust the overall color of the sky during dusk.
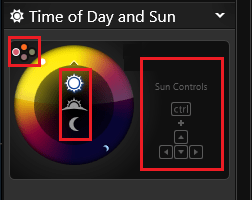
Time of Day Icons: You may select Day, Dusk or Night as the time of day for your photos, video and presentation.
You may change the time of day by pressing the letter N on your keyboard or using the Time of Day icons in the middle of the ring. This setting will also affect the time of day in the 3D view.
Time of Day Ring: The outer Time of Day Ring allows you to change the sun position. Left click directly on a color in the ring.
Image Adjustments
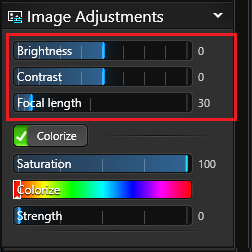 Brightness: This slider allows you to adjust the image brightness. Values range from -100 to 100; the default is 0. Negative values decrease brightness of image, making whole image darker. A value of -100 produces a black image. Positive values make images brighter, with 100 producing a white image.
Contrast: This slider allows you to adjust the image contrast. Values range from -10 to 100; the default is 0. Negative values decrease color and value contrast, making colors more similar. A value of -100 produces a gray image. Positive values increase color saturation and contrast, creating intense bright and dark areas, highly saturated colors, and a smaller range of vivid colors.
Focal Length (Vip3D Exclusive)
With this slider, you can adjust the angle of view (how much of the scene will be captured) and the magnification (how large individual elements will be). The longer the focal length, the narrower the angle of view and the higher the magnification. The shorter the focal length, the wider the angle of view and the lower the magnification.
Reset Image Adjustments: The button above Image Adjustments resets all image adjustments back to the default settings.
Colorize
The Colorize checkbox enables three additional color editing parameters:
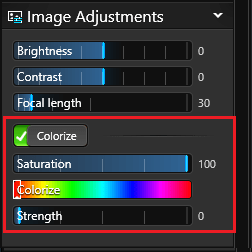
Saturation: This slider allows you to adjust the color saturation. Values range from 0 to 100; the default is 100. Decreasing the value will shift colors towards grayscale/black and white.
Colorize: This slider allows you to adjust the image hue. Choose a hue to cast over the image. Strength of colorization is determined by the strength slider.
Strength: This slider allows you to adjust the strength of the colorize hue. Values range from 0 to 100; the default is 0.
A value of zero produces no image colorization, and 100 produces a complete colorization where all colors are shades of the selected Colorize hue.
Image Effects (Vip3D Exclusive)
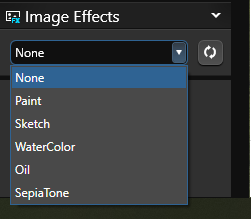
None (Realistic): This effect is the default 3D look.
Paint: This effect creates a soft painted look with subtle small strokes.
Sketch: This effect creates a hand-sketched pencil look, in color or black and white.
WaterColor: This effect creates a watercolor paint look.
Oil: This effect creates an oil-painted look with thick brush strokes.
SepiaTone: This effect will alter the colors to sepia.
Reset: This button resets all image adjustments back to the default settings of the selected image effect. This will not change the effect you selected; it will only reset the changes made with the image adjustment sliders.
Paint
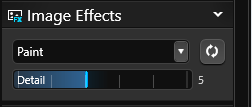 Detail: This slider adjusts the size of the simulated brush strokes. Values range from 1 to 11, with 1 being small strokes (very subtle effect) and 11 being large strokes (obvious effect, with greater loss of detail).
Sketch
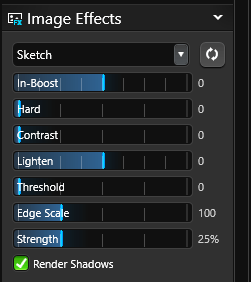 In-Boost: This slider allows you to increase (or decrease) the contrast of the edge detection. This is essentially a contrast filter, but it happens before the edges are detected on the image. Values range from -100 to 100. The default is 0, or no change. A value of -100 would cause no edges to be detected, while 100 would cause an extreme edge detection.
Hard: This slider adjusts the hardness/softness of the lines created by edge detection. Values range from 0 to 4. The default value of 0 gives hard, crisp lines. A value of 4 gives soft, blurred lines.
Contrast: This slider adjusts the contrast of the lines created by edge detection. Values range from 0 to 100. The default of 0 will allow the full range of lines created by edge detection. A value of 100 will fade out thin/faint lines and create harder, thicker lines.
Lighten: This slider adjusts brightness for edge detection. Values range from -100 to 100. The default is 0, while -100 will darken edge detection to a completely black image. Values lower than 0 will darken edge detection. When combined with contrast, lower values can be used to bring back some of the lighter lines. High values will decrease the lines across the image.
Threshold: This slider determines the color difference threshold required for edge detection to create a line. Values range from 0 to 100, where 0 is the default. Higher values will make edge detection more discriminating, requiring larger color difference in pixels before an edge is created.
Edge Scale: This slider adjusts the thickness/darkness of the edges drawn. Values range from 0 to 400; the default is 100. Similarly to contrast, this will darken or lighten lines. The difference is that this edge scale does not discriminate between dark and light lines; instead, it darkens/lightens all lines equally.
Strength: This slider adjusts the strength of the white in the edge-detected line drawing. Values range from 0% to 100%, where the default is 25%. A value of 0% will show no white/paper color, or edges on the original image colors, while100% will show a pure black and white line drawing.
Render Shadows: This checkbox will disable the rendering of shadows. This is useful for effects like coloring book or when you do not want edges drawn around cast shadows.
Water Color
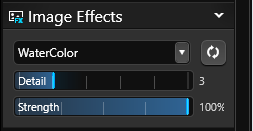 Detail: This slider adjusts blur/bleed of water color simulation. Values range from 1 to 11, with 1 being very little blur/bleed and 11 being a large amount of blur/bleed.
Strength: This slider blends the blur/bleed effect into the regular image. Values range from 0% to 100%, where 0% will show the regular image with no watercolor bleed and 100% will show the full effect of the watercolor bleed.
Oil
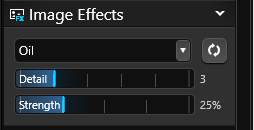 Detail: This slider adjusts the size of the simulated brush strokes. Values range from 1 to 11, with 1 being small strokes (very subtle effect) and 11 being large strokes (obvious effect, with greater loss of detail).
Strength: This slider adjusts the strength of the white in the edge detected paint, much like the strength of the sketch effect. Values range from 0% to 100%; the default is 25%. A value of 0% will show no white/paper color, or edges on the original image colors, while 100% will show a pure black and white line painting.
Sepia Tone
This effect has no parameters
Texture and Border
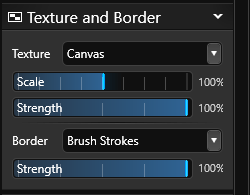 Texture: This dropdown enables you to select a texture to overlay on the image. Some textures also effect the image adjustments, such as brush strokes and watercolor.
Scale: This slider adjusts the scale of the overlay texture. Values range from 5% to 200%.
Strength: This slider adjusts the strength of the overlay texture. Values range from 0% to 100%, with 0% being no overlay texture.
Border: This dropdown enables you to select the border texture used to surround the image.
Strength: This slider adjusts the strength/opacity of the border. Values range from 0% to 100%; the default is 100%.
Stylized Image Effects in Presentation Library
In the Create Presentation stage, you can quickly apply pre-set image effects from the library to your design. The Library Tab is located on the left side of the Viewport. Single-click the left mouse button to expand the library.
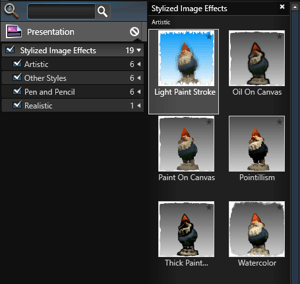 Left click the Stylized Image Effects category to expand or collapse it. Left click the box next to the name to add a check mark. A preview of each image effect will appear to the right of the list.
To apply the currently selected effect to the design, left click the Insert One button or double left click on the image effect name or preview picture.
Saving Custom Effects to the Library: You can also save your custom image effects to the Presentation library for future use.
The buttons located at the bottom of the Library allow you to save, edit and delete your custom effects.
Save: The Save button will allow you to save custom image effects to the Presentation Library.
Edit: The Edit button is used to edit custom image effects you have saved to the Presentation Library.
Delete: The Delete button will permanently delete a custom image effect from the Presentation Library.
Adjusting Movement
In the Configuration Menu (Press F7) the 3D Settings Tab allows you to control the movement in Presentation Mode.
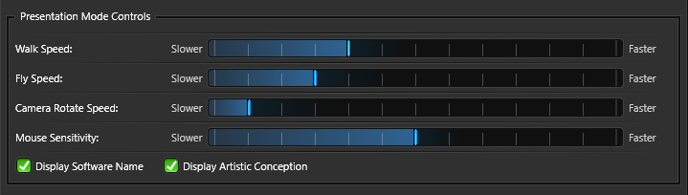
Walk Speed: Use this slider to adjust the speed at which you move while in walk mode.
Fly Speed: Use this slider to adjust the speed at which you move while in fly mode.
Camera Rotate Speed: Use this slider to adjust the speed at which the automated tour rotates.
Mouse Sensitivity: Use this slider to adjust how sensitive the mouse is to your movements.
Display Software Name: Check this box for the Software Name to appear in the top right corner on the Presentation Mode and Photo Mode screens.
Display Artistic Conception: Check this box for Artistic Conception to appear in the top left corner on the Presentation Mode and Photo Mode screens.