When choosing between drawing a 3D object and inserting a 3D object into a project, there are two important differences to note: how objects move and scale and whether object materials can be changed.
Drawn Objects: Rotate and Elevation
Drawn Objects provide the most flexibility:
- Can be moved,scaled or rotated in 2D
- Can be moved and scaled in 3D (all drawn objects that are touching will move together)
- Can change materials
Inserted 3D Objects offer quick options to explore:
- Cannot be moved,scaled or rotated in 2D
- Can be moved and scaled in 3D individually
- Cannot change materials
Interacting with Drawn Shapes in 2D
Moving, scaling and rotating drawn shapes in 2D is easy!
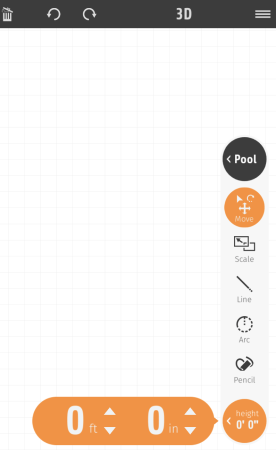
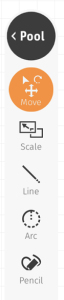 Move in 2D: Tap the Move tool on the tool panel to the right. Just tap on a drawn shape in 2D (zoom in to select the shape you need, if the wrong shape selects) and then slide your finger to move the shape.
Scale in 2D: Tap the Scale tool on the right tool panel. Tap on a drawn shape in 2D and pinch your fingers in or out to scale a shape up or down.
Rotate in 2D : Use 2 fingers on the screen to rotate a drawn shape.
The height of a drawn shape is also easy to edit with the Move tool.
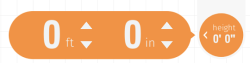 Height: Tap the Move tool, select the desired shape, then tap height to set the new desired height.
Interacting with Drawn Shapes and Objects in 3D
 Tap this icon on the bottom left, to make the green ball and tool panel visible.
TIP: Before the presentation with your client, tap again to close the panel.

Delete: With the green ball over the 3D object, press the Trash Can to delete the object.
Move in 3D: With the green ball over the 3D object, hold the Move button and move the iPad left, right, up, or down.
NOTE: The shape and all 3D shapes touching it will Move together, (Inserted objects will move individually.)
Rotate in 3D: With the green ball over the 3D object, hold the Rotate button and move the iPad left, right, up, or down.
Scale in 3D: With the green ball over the 3D object, hold the Scale button and move the iPad up or down.
NOTE: The shape — as well as all other 3D shapes touching the selected shape — will scale automatically. (Inserted objects will scale individually.)
Height: With the green ball over the 3D object, hold the Height button and move the iPad up or down.
Marker: Tap the Marker button on the tool panel on the left. A marker is inserted in 3D that can be referenced in 2D.
 To take a picture in 3D, tap the Camera icon on the bottom right.
You will see a pop up that says: YARD would like to access the Camera for AR. Click OK
Pictures are saved on your iPad in Photos
NOTE: You need to Allow YARD to access your Photos and Camera on your iPad.
Change Materials
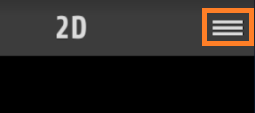 While in 3D, tap on the 3 lines in the upper right corner.
 Tap on the Materials Tab
Select a Category
With the green ball over a drawn shapes surface, tap the material of your choice.
Download Additional Materials
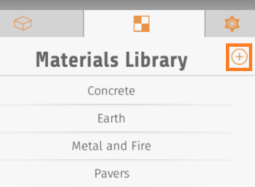
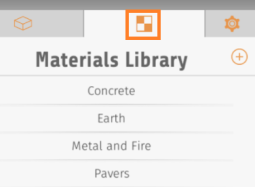
Need more materials?
Download additional materials by tapping the “+” icon on the Materials Library.
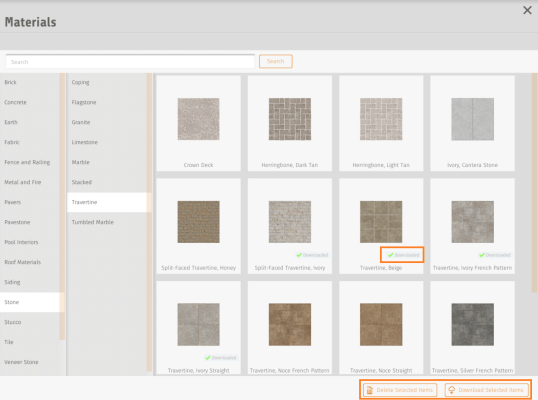
In the Materials Manager page, choose a category, and then a subcategory of the desired materials.
Next, tap on each desired material. A green checkmark will appear on each material selected.
To download the selected materials to your iPad, tap Download Selected Items at the bottom right.
If you need to remove a material, select the material and tap Delete Selected Items.
Download Additional 3D Objects
 Adding more 3D objects to use in a design is easy: simply tap on the Objects tab in your Library and then tap the “+” on the object library.
In the object manager, tap on the objects that you’d like to download to your iPad and tap Download Selected Items at the bottom right.
If you need to remove an object, select the object and tap Delete Selected Items.
 To see the newly downloaded objects in your library, tap the Refresh Exported Items button.
Moving Shapes on a Hill or Slope
All shapes drawn or inserted in YARD exist on a flat plane. That is why it is important to aim the camera towards your feet during the initial tracking process: it helps the iPad determine the elevation of the plane.
In order to design around a hill, it is best to choose at the start whether you would rather design from the bottom of the hill and look up, or design from the top of the hill and look down.
If you walk up or down a hill after establishing the tracking, the illusion of AR will be lost.
If a hill confuses the tracking in YARD, just tap on the configuration tab, and choose Reset Tracking while standing at the top or the bottom of the hill.