Features of Plants and Trees
All plants and trees are fully rendered in 3D to create a visually stunning presentation of your landscaping design.
The software uses a unique landscaping system to ensure every plant and tree looks natural and realistic. Each plant and tree in the library has multiple variations. Every plant and tree you insert will be a different variation. You can change the variation of an inserted plant or tree by using the New Variation button located under the Object Tab.

Animations: Nearly all the plants and trees in the library are animated. In the 3D view and in Presentation mode, plants and trees will sway in the wind.
Custom Landscaping Symbols: You may assign custom symbols to all the plants and trees. Choose from the over 1,000 industry standard symbols included with the program or create your own. You may assign symbols to Plants and Trees in the library by using the Edit button.
Botanical and Common Names: You can display plants and trees in the library under Botanical or Common names. You select which type of names you want to use in the Library Tab of the Configuration Menu.
Plants and Trees in the Library
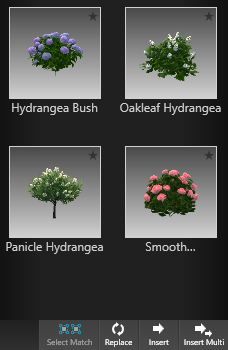
All plants and trees in the library are located under the Landscaping Tab.
 List View: The List View is sorted under Category bars that can be collapsed and expanded as necessary. The number displayed to the right represents the number of options available in that Category.
Left clicking on a Category name will expand or collapse that Category and display the Types available. Left clicking on the box next to the Category name will add a check mark and a preview image of each plant/tree in that category will appear to the right of the list in the Thumbnails Panel.
To clear a selected plant/tree, left click on the check mark next to the Category or Type name to remove the check mark. To deselect all plants/trees you have selected, left click the Deselect Button. This will remove the check marks from anything you have selected.
Plants and Trees may be inserted by double left clicking on the name or preview picture or using the Insert One or Insert buttons at the bottom of the Thumbnails Panel.
Thumbnails Panel: In the Thumbnails Panel you will see a preview of plants and trees that have a check mark next to their name in the List View. The plants and trees are sorted by Categories. Types are listed below the Category.
You have the ability to resize the width of the Thumbnails Panel by hovering you cursor on the edge of the panel until the cursor becomes a double arrow, hold down the left mouse button to resize the panel. You also have the ability to scale the size of the thumbnails by using the Thumbnail Slider at the bottom of the Thumbnails Panel.
 Replace Button: This button replaces the landscaping you currently have selected with the plant or tree selected in the library. This command works well when combined with Select Matching found under the Object Tab in the Panel. Combining both commands allows you to quickly exchange all the maple trees in your design for cedar trees.
Insert Button: This button will insert the currently selected plant or tree into the project one time.
Insert Multi Button: This button allows you to insert as many copies of the item as you wish. Each time you left click, the currently selected item will be inserted. To stop inserting copies of the item, right click or switch to the Move tool to reset your cursor. Insert Multi is perfect for adding multiple plants and trees to the design.
Object Settings
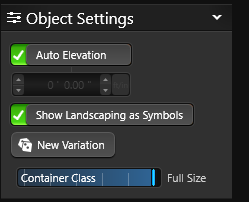 Auto Elevation: With this box checked, a selected plant or tree will automatically snap to the surface underneath it. This means that plants and trees will be set to the elevation of the ground or if placed on a surface like a raised planter, the height of the planter. The plant or tree will even snap to a surface that has a negative height such as a sunken deck.
Elevation Box: You can manually enter an elevation for a selected plant or tree here. Moving a plant or tree in 3D with the 3D gizmo will also set a manual elevation.
Show Landscaping as Symbols: This toggle allows you to show a selected plant or tree as a 2D symbol instead of as a 3D marker. This also allows you to change how a plant or tree you have already placed into your design appears. Uncheck the box to show the selected landscaping as a 3D marker again.
New Variation: This button will change the variation of a selected plant or tree. This also allows you to change the variation of a plant or tree you have already placed in your design.
Play/Pause: This button allows you to turn Wind on and off for a selected plant or tree. Pressing Play will turn on Wind for a selected plant or tree while pressing Pause will stop animations. With Wind on, the plant or tree will sway in a gentle breeze.
Container Class: This slider allows you to change the container class of a selected plant. You can also change the container class of plants you have already placed in your design. The symbol for each container class can be set by using the Gear button on the plant thumbnail.
Object Modification
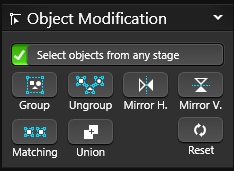
Select Objects From Any Stage: Checking this box will allow you to select an object regardless of which stage it was created in. Unchecking the box will limit you to selecting only objects created on the current stage.
Matching: This button will automatically select every item in the design matching the currently selected item. For example, this allows you to select every pine tree inserted in the design
Reset Object: This button allows you to reset a selected plant or tree that has been rotated or scaled. The plant or tree will reset to its default from the library.
Additional Options
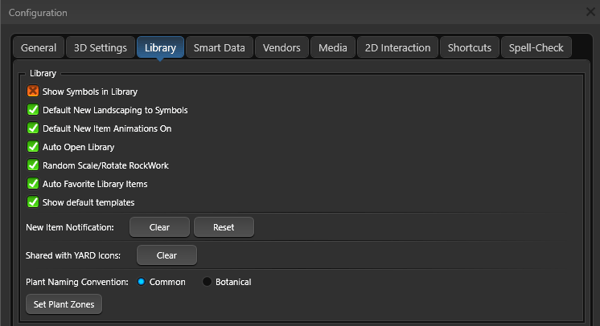
Show Symbols in Library: Check this box to set all plants and trees in the library to display as symbols. With this option turned on, the symbol preview in the library will change as you select different container classes. This makes it easy to place the proper container class symbol for the landscaping.
Default New Landscaping to Symbols: Plants and trees may be shown in the 2D viewport either as 2D symbols or as 3D markers. Check this box to have new plants and trees insert as 2D symbols or uncheck the box to have new plants and trees insert as 3D markers.
NOTE: Plants and trees that have already been inserted can be changed under the Object Tab in the Panel.
Default New Item Animations On: Check this box to default animations on for items inserted from the library. This controls the animations for items located under the Items Tab in the library. If you do not wish items to animate, uncheck this box to default animations to off.
Animations for items you have already inserted may be turned on/off by using the Play/Pause button located under the Object Tab in the Panel.
Auto Open Library: Check this box to cause the library to automatically expand when going to a stage that requires the library. This would include stages like Plants and Trees, Materials, and Yard Accessories
Random Scale/Rotate Rockwork: Check this box to automatically randomize the rotation and scale of the rockwork that you insert. Thus, each time you insert rockwork, it will have a different rotation and appearance than the previously inserted rockwork.
Auto Favorite Library Items: Check this box to automatically add the items you use the most to your Favorites tab of the Library. Once an item is inserted 25 times, a blue star will appear in the item preview thumbnail. Uncheck the blue star to remove the item from your auto favorites.
Show Default Templates: Check this box to automatically show the default templates included with the software in the Library.
New Item Notifications: Press the Clear button to remove the New Item exclamation points in the Library. Press the Reset button to restore the New Item list from the most recent update.
Naming and Zones
Plant Naming Convention: This control allows you to change how plants and trees are listed in the library. Landscaping may be listed by either common or botanical names. This control will affect all landscaping in the library.
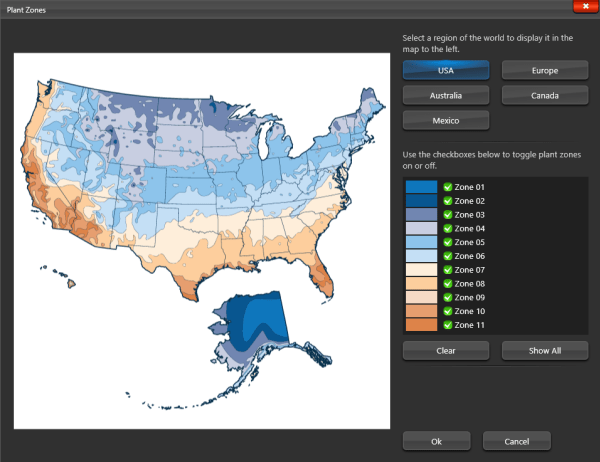
Set Plant Zones: This control allows you to select which plant zones you want to appear in the library. Left click the Set Plant Zones button to bring up the Plant Zone Map. First select a region of the world to display on the map. Next use the checkboxes to select which plant zones appear in the library.
Searching for Plants and Trees in the Library
To search for a plant or tree, simply type the name of the plant or tree into the Search bar and press the magnifying glass. The results of the search will appear below.
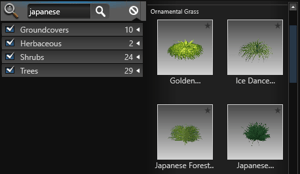 Single words or groups of words may be entered into the Search bar. You may type in a specific plant name such as Apple Serviceberry or type in a category name such as Groundcovers.
You may search the botanical or common name of the plant or tree regardless of what the library is currently set to display. The search feature will search plant names and categories.
Show in Library: To find a plant or tree already inserted in the design go to Object Info and press the Show In Library button.

Moving Plants and Trees in 3D
Moving in 3D: Plants and trees can be moved in 3D by using the 3D gizmo. The blue arrow will elevate the plant or tree up and down while the red green arrows will move it left to right and back and forth. You may move a single plant or trees, multiple landscaping, or groups of landscaping.
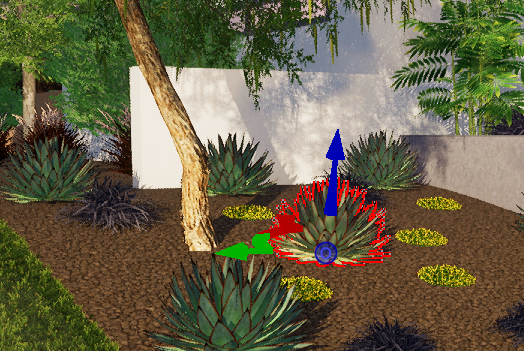
Rotating in 3D: Plants and trees can be rotated in 3D by using the 3D gizmo. This allows you to not only rotate the landscaping but also tilt the plant or tree at an angle. You can tilt landscaping to properly place it on elevated terrain such as hills and tree mounds.
The blue rotate arrow will rotate the plant or tree while the red and green arrows will tilt it. Landscaping will rotate according to the Snaps you have set.
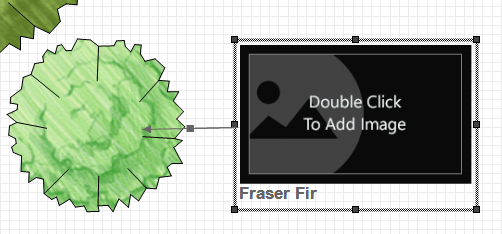
Assigning Image Callout Label
With the Callout Tool, you can also add photos to plants and site objects. This is a great way to share your plant palette and project details with your clients.
Add the Callout:

1. Select the Plant, Tree or Library object, then Callout under Guides.
2. Check the box for Image.
3. Double click on the image to access the menu, or click Edit in the Library.
Assign the Image:
You can select images saved on your PC, click Online Search to look for new images, or drag and drop images from your browser.
- Browse PC: Clicking on Browse PC will bring up a file selection box. Graphic files in the .BMP, .PNG, .JPG, or .TGA formats may be used.
- Online Search: Clicking on Online Search will open your default browser, and search for the Botanical name or Template Name of the object. The image can be saved to the PC, or dragged into the “Drag image here” area in the object menu.
NOTE: You may need to view the original image before dragging. Click to view the larger preview of the image in your browser, then View Image. Some images cannot be dragged or saved, depending on the website’s security settings.
Assigning Custom Symbols and Fills
You can assign any of the over 1,000 landscaping symbols in the program or create custom landscaping symbols to plants and trees. Select the plant or tree in the library and press the Edit button.
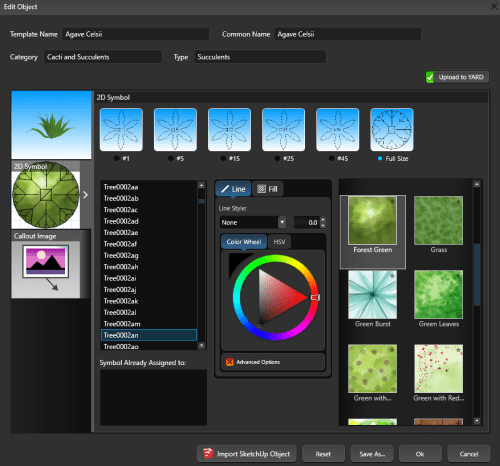
Preview: An image of the 3D model and 2D symbol of the plant will appear on the left.
Container: Click the radio button to select the Container Class you would like to set. You can set an unique symbol, fill and/or line style for each Container Class.
2D Symbol List: A list of available symbols will appear below the six container classes. Left click on the symbol name to select it.
Symbol Already Assigned: This list will tell you what other plants currently use the symbol.
Fill Style: Assign a basic or artistic fill to the symbol. You can also customize the line style and color.
Reset: Press the Reset button to reset the plant to the Vip3D defaults.
Ok: Press Ok to save your selections and update the symbol.
Creating Your Own Symbols: You can create your own symbols in the Construction Markup Stage. In Markup, draw the symbol using the line and arc tools. Save the symbol to the Construction Library by clicking the Plant Symbol radio button at the top of the Create New Template box. Your custom symbol will now appear in the list in the Edit Object box. Please Note: You must save your symbol as a Plant Symbol for it to appear in the list under Edit Object.
Resetting Symbols: You may set the symbol for any item back to the Vip3D default by pressing the Reset button in Edit Object. This will set all symbols and container class symbols for the item back to the program defaults.
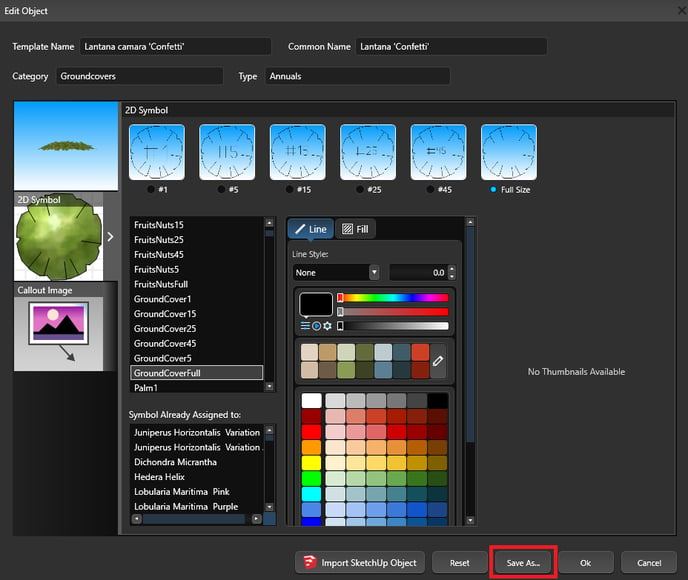
Creating New Plants/Trees with Save As
To create a new plant we use the Save As feature.
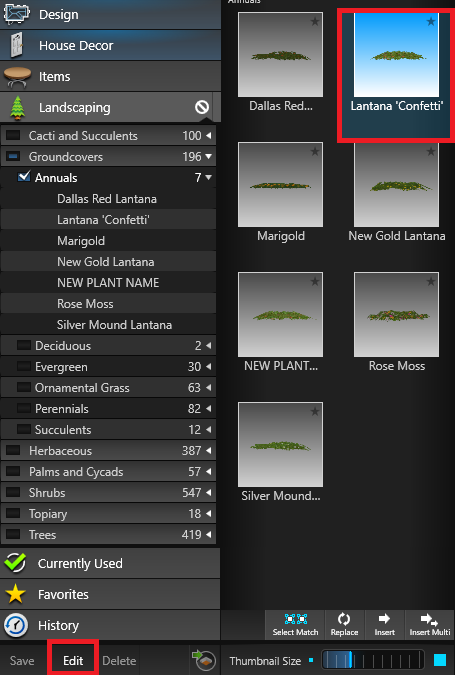
Select the plant or tree in the library and press the Edit button.
When you press the Edit Button, the Edit Object box will come up.
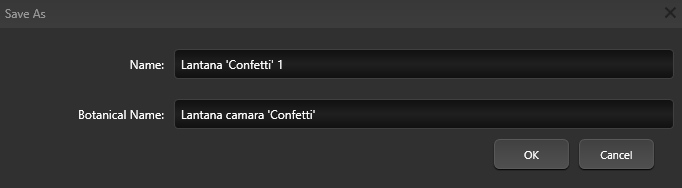
Next type in a Common and Botanical Name for the New Plant and Press Ok:
After pressing Ok - the New Plant will appear in your Library:
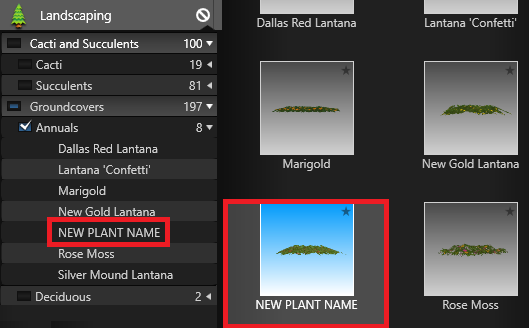
Select this New Plant and press the Edit Button to bring up the Plant Editor to assign a symbol, line and fill pattern to your new plant.
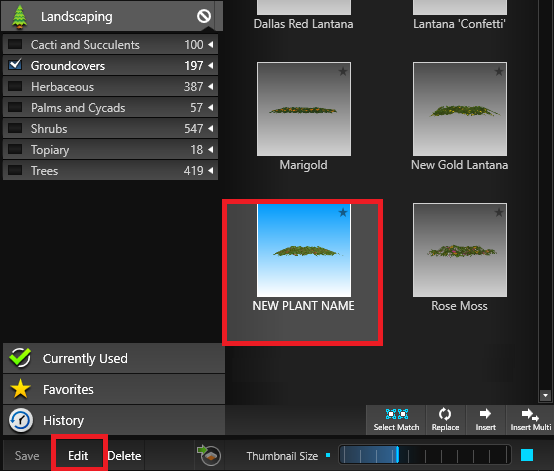
In the Library, you’ll see both the original and the copy, which means you can edit both individually. The plants/trees that are visually identical in 3D, but have a unique entry in the Library, a custom symbol, and appear as a unique entry in Legends.
For example, a palm in the library may look just like one you install, but you call it a different name. You can make a copy of the original plant, and save it with a unique name and symbol.