
As you create and make changes to your project, Smart Data works right alongside you, giving you the detailed data that you need.
Warning: Calculations will only be as accurate as the drawing itself. If shapes overlap, values will not be accurate. Draw clean lines to get the most accurate data. Smart Data cannot account for variations in the real world such as dirt quality or uneven excavation.
Selected Objects
Selected Data will show details and calculations for selected objects in the project.
In 2D or 3D click on the object or objects(s) you’d like to see calculated.
As you click on objects, they’ll appear automatically in your Selected Data, showing you all the calculations the software does for you.
Click the Smart Data tab to open the Smart Data panel.
With an object selected, as we mouse over the data in our Smart Data list, your selection will be highlighted in green, making it easy to see which areas of your selected object are included in the displayed calculation.
To calculate data of several objects, draw a box around the objects with the Move tool, or press and hold CTRL and click each object.
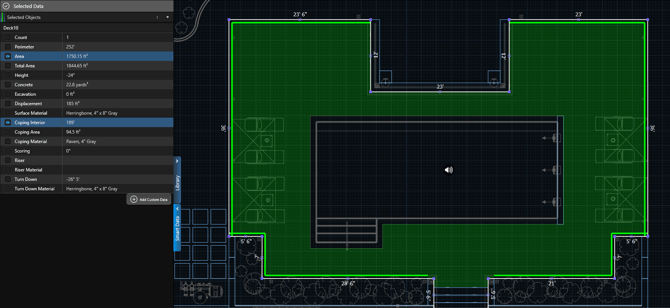
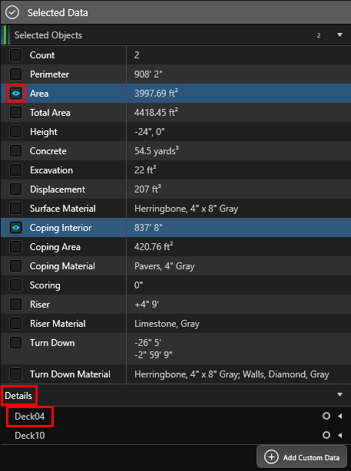
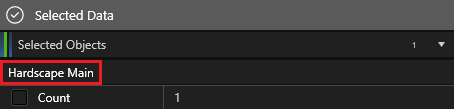
Count: Shows the total number of objects that are currently selected.
Data: Located beneath the Count field, this section lists the combined values for all selected shapes.
Blue Eye: Left-click the eye icon to the left of a data line to keep that highlight active on the drawing.
Details: Left-click Details to expand or collapse the list of selected objects. In the expanded view, you can see the full calculations for each object individually.
Name: Left-click an object name to display its detailed data. To rename an object, double-click its name under Details and enter a new value. The new name is applied in both Smart Data and Object Properties.
O Selection Circle: Click the circle to make that object the only selected object and clear all other selections.
White Arrow: Click the white arrow to display the detailed data for that specific object. If all of the information cannot fit on a single line, an additional white arrow appears on the right side of the data row to indicate that more details are available.
Calculator: Whenever you make changes to the project, click the calculator button to recalculate and refresh the data.
If a change is made—such as moving a shape or adjusting its height—the affected values turn red, indicating that the data is out of date and must be recalculated.
After recalculation, all values appear in white, confirming that the data is current.
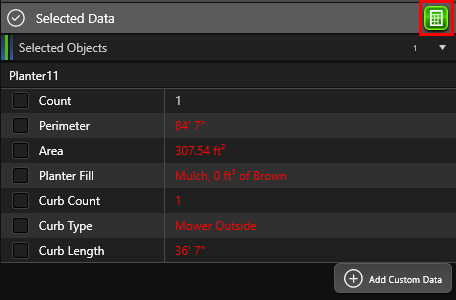
When a single object is selected a name bar appears above Count. Double click the name bar to edit the name.
For more information on each calculation, refer to the article Smart Data - Calculation Details for detailed explanations.
Configuration Menu
Use the Configuration Menu to control how Smart Data is calculated and displayed.
On the Smart Data tab in the Configuration Menu, you can adjust concrete thickness, rebar settings, and measurement display options.
Open the Configuration Menu: Open the menu from the Application Button by choosing Configuration, or press F7 on your keyboard.
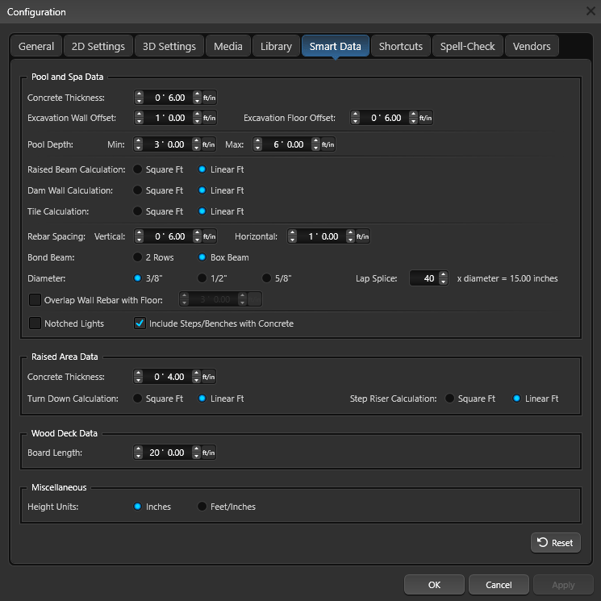
Pool and Spa Data
Concrete Thickness: This control will allow you to select a concrete thickness for your Pool and Spa shapes.
Excavation Wall Offset: This control will allow you to set a wall offset for your Pool and Spa shapes. Note: This value increases the size of the hole that is used for pool and spa excavation calculations.
Excavation Floor Offset: This control will allow you to set a floor offset for your Pool and Spa shapes. Note: This value increases the size of the hole that is used for pool and spa excavation calculations.
Pool Depth: This control will allow you to set your default minimum and maximum depth for each new pool shape.
Raised Beam Calculation: Raised Beam may be listed by either square ft. of material or linear ft. of the face.
Dam Wall Calculation: Dam Wall may be listed by either square ft. of material or linear ft. of the face.
Tile Calculation: Tile may be listed by either square ft. of material or linear ft. of the face.
Rebar Spacing: This control will allow you to set your vertical and horizontal rebar spacing.
Bond Beam: Bond Beam may be 2 rows or box beam (4 rows) of rebar around the Bond Beam of the Pool or Spa.
Diameter: Rebar diameter may be listed as 3/8″ 1/2″ or 5/8″
Lap Splice: This control will allow you to set your lap splice. Default is a Lap Splice of 40x the diameter of the rebar (40 x 3/8″)
Overlap wall Rebar with Floor: With this box checked, the wall rebar with overlap with the floor rebar. Default is an overlap of 3 feet. Use this control to set the amount of overlap.
Notched Lights: With this box checked, the lights will be notched, adding 1 yard of concrete and 20′ of rebar for each pool or spa light.
Include Steps/Benches with Concrete: With this box checked, the concrete calculation with include Steps and Benches, using the concrete thickness uniformly for all shapes. When unchecked, Steps and Benches will not be included in the Concrete calculation.
Raised Area Data
Concrete Thickness: This control will allow you to select a concrete thickness and will directly affect your deck/hardscape concrete yardage calculation.
Turn Down Calculation: Turn down may be listed by either square ft. of material or linear ft. of the face.
Step Riser Calculation: Step risers may be listed by either square ft. of material or linear ft. of the face.
Wood Deck Data
Board Length: This control will allow you to set your board length for wooden decks.
Miscellaneous
Height Units: Height values may be listed by either inches or feet and inches.
Reset: Press Reset to revert to the default settings.