
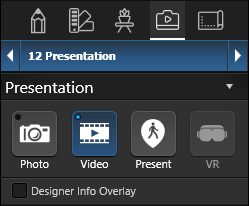
 Getting to Video Mode: In order to take videos of your project in Video mode, go to the Finalize Phase.
Single left-click the Video button to load a 3D View with black border.
To move around in 3D, use the standard mouse controls to rotate and pan and Walk (CTRL + W) and Fly (CTRL + F).
Camera Locations
Save camera locations and then string them together with transitions to create professional videos.
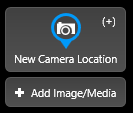 New Camera Location: Press this button to add your current 3D view as a new camera location to the storyboard. You can also press (+) on your keyboard. To change the order, select the new location and hold down the left mouse button to drag it to the correct position.
Add Image/Media: Press this button to insert an image into your storyboard. The image may be in the .bmp, .jpg or.png file formats.
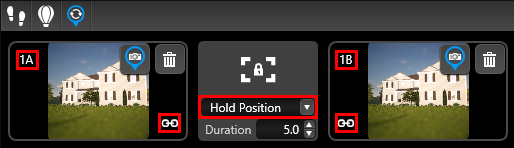
By default the image will appear in your storyboard twice as Location Slot A and B separated by a Hold Position. If you select a different transition, the image will appear once.
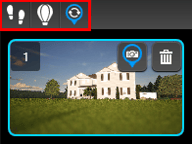 Footprints: Press this button to enter Walk mode. Walk mode plants your feet firmly back on the ground so you can walk around. Press Esc to exit Walk mode and return to the Storyboard.
Balloon: Press this button to enter Fly mode. Fly mode allows you to “fly” anywhere in the 3D view. Press Esc to exit Fly mode and return to the Storyboard.
Thumbnail Refresh: After saving a video mode location, the preview image will only update when there are significant changes to the design or when you reopen the saved file.
To update the preview image at any time, simply click on the Thumbnail Refresh Button.
For example, if you save the thumbnail location with specific materials applied and later make changes to those materials, the thumbnail preview will display the original materials until you press the Thumbnail Refresh button.
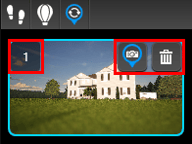
Location Slot Number: Left-click on the preview image to move to that saved location. To change the Location order, select the location and hold down the left mouse button to drag the saved location to the correct position.
Camera Pin: Press this button to update/change the Location Slot to the current view or different time of day.
Trash: Press this button to Delete the saved camera location. All locations after the deleted slot will move forward one place.
TIP: Copy and Paste locations between Photo Mode and Video Mode. Select the Location, press CTRL+C then CTRL+V to add the copy of the location.
Video Transitions
Transitions control how your video plays from one video clip or picture to the next. You can add a transition between two pictures, video clips, or titles in any combination on the storyboard.
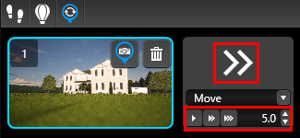
Move: This video transition will move the camera smoothly from one location to another.
Move speed: The move speed is based on seconds. Select one of the three arrow buttons for slow, average and fast speeds. Or you can enter a second value manually.
Hold Position: This video transition will keep the camera location steady for the amount of time set in the Duration window.
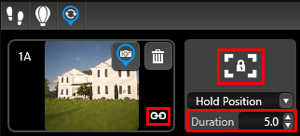
Once Hold Position is selected, a 2nd Location Slot “B” of the same 3D View will appear.
Chains: This icon shows the two locations (A & B) are linked.
Feature the sun setting in your video in a few quick steps:
- Add your desired 3D View as a new Camera Location
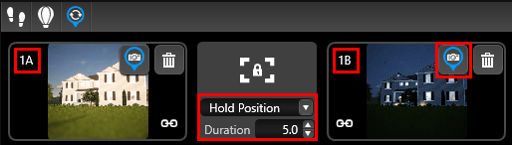
- Select “Hold Position” transition and set the Duration to 10.0 (Once Hold Position is selected, a second Location Slot “B” of the same 3D View will appear.)
- Select the new Location Slot “B”, set the Time of Day to Night and press the Camera Pin to save the new view.
- Done! Press the Preview Video button to watch the sun set.
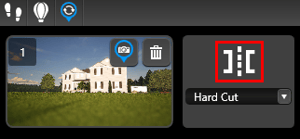
Hard Cut: This video transition will switch between two camera locations and instantly go to the next. If added at the end of the video, it will instantly end the clip.
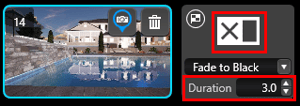 Fade to Black: This video transition will fade to black at the end of the video, based on the amount of time set in the Duration window. This transition is only available on your last location slot.
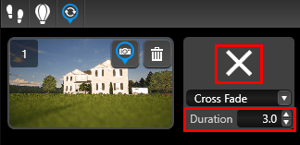 Cross Fade:This video transition blends two camera locations together to create a smooth transition. The time set in the Duration window determines how quickly the two clips merge.
Cross Fade is exclusive to Vip3D and appears only in rendered videos. It does not appear in the preview.
Stage Options

Storyboard Length: This box shows how long the rendered video clip will be.
Video Resolution: Choose your video resolution from the drop down list.
Preview Video: Press this button to see a preview of the Storyboard. The Preview will start at the currently selected Location. Not all transitions, such Fade to Black or Cross Fade will be visible in the preview.
Render Video: Press this button to render the storyboard into a MP4 video file. The file will be saved in your Project > Videos folder.
Videos are generally too large to email directly. To share a video, first upload it to YouTube. For instructions, see Exporting and Importing. Once the video is uploaded, email or text the YouTube link.
Path Tracing
Path tracing uses realistic light bouncing to produce photorealistic results, but it can make the scene look slightly different and often a bit darker.
Click the Gear icon next to the Path Tracing toggle to view the available options.
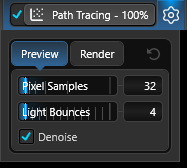
Preview controls what you see while you work, while Render controls the final quality when you click Take Photo.
Because path tracing is computationally intensive, you can use a low sample count in Preview to get a general sense of the lighting.
Pixel Samples: This determines how many times path tracing evaluates each pixel in the scene. Higher sample counts reduce noise—the small speckles visible in the image—but also increase render time.
Light Bounces: This controls how many times light can bounce through water or reflective materials. Scenes with multiple reflective surfaces—such as a waterfall in front of glass—may require more light bounces for accurate results. For most scenes, however, a lower setting is sufficient and can significantly improve render speed.
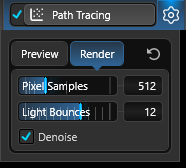 Render for typical shots, 512 samples is quite good. For our marketing shots and videos, we use 1024 samples.
Remember the higher the sample count the longer the rendering time.
Denoise: This control reduces noise to create a smoother, more cohesive final image. If you turn Denoise off, the image will appear much noisier, with small speckles throughout.
Copy Location Settings
To copy and paste locations and settings, you have a couple of options.
First, you can select the location, press CTRL+C to copy, and then use CTRL+V to paste the location within the same save file, or even to the photo mode location or a new save file. This makes it easy to transfer and duplicate your locations across different modes and projects.
Alternatively, you can right-click on the location and choose "Copy Settings". This will copy all the settings of that specific location. Then, right-click on another location and choose the settings you want to copy to the new location. Finally, click "Paste Settings" and only those selected changes will be applied.
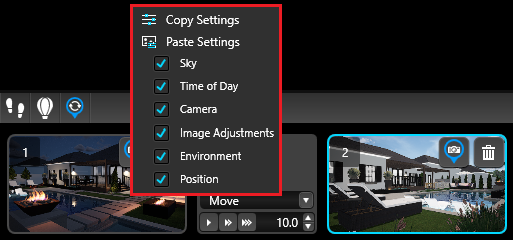
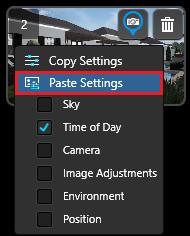
If you want to keep two different locations the same, except for the time of day, follow these steps:
-
Right-click on the first location and choose Copy Settings.
-
Next, right-click on the second location and deselect all settings except for Time of Day.
-
Click on Paste Settings.
By following these steps, you'll notice that the second location remains the same, except for the updated time of day.
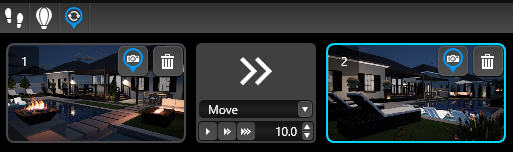
Storyboard Settings (Vip3D Exclusive)
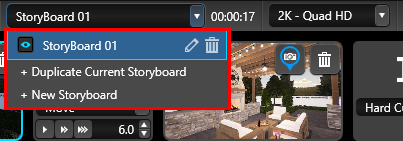
Create multiple storyboards for each projects to highlight different features of your project.
Pencil: Give your Storyboard a name.
Delete: This button will delete the current Storyboard.
360° Videos
360° Videos allow you to share with your clients the easiest, most engaging way to explore every detail of their future outdoor living space. Use the mouse on your PC or the screen on your tablet or smartphone, to let your clients explore your design in any direction.
Select 360° Video from the drop down list:
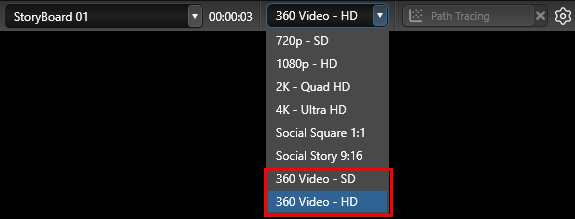
Creating 360° Videos will take significantly longer to render than standard videos. This is because the video is being recorded in all directions, instead of just one.
Once the 360° video is recorded, upload to Facebook to interact with the video. Left click and drag the image using a PC mouse, or use a mobile device such as smart phone to move the view with your device.
Standard image viewing software will not display the video as a 360° or interactive video, but will upload correctly to Facebook.