Opening the Configuration Menu: You can access the configuration menu by going to the Application Button menu and selecting Configuration or by pressing F7 on your keyboard.
The different controls and settings are divided into 9 Tabs.
Some options will only take effect after you restart of the software.
General Tab
The General Tab allows you to control how library items appear, your color theme, and general settings.
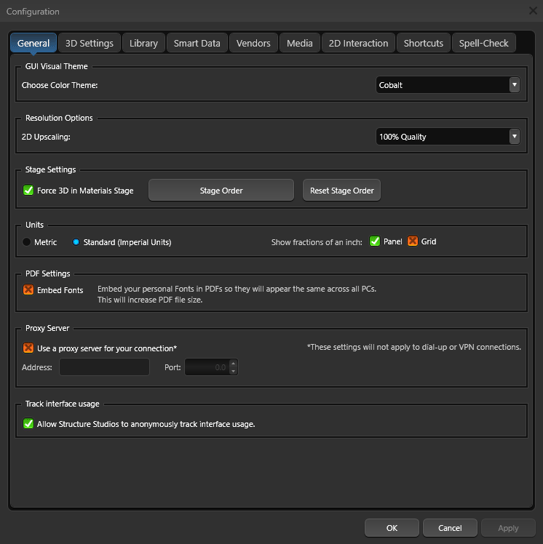
GUI Visual Theme: This control allows you to change the overall color theme of the software.
Resolution Options: This dropdown will allow you to adjust the resolution of the Viewport Scale. Set this resolution the same as your monitor’s resolution.
Stage Settings: This control allows you to change the order in which the stages appear.
Press Reset Stage Order to revert to the default stage order.
Units: This control will allow you to set the measurements Vip3D will display while you design.
You may choose from Standard/Imperial English units or Metric units. All measurements in the program will instantly change, including shapes you have already drawn.
Show Fractions of an Inch: This control will add 2 decimal places to all height boxes in the Panel or on the Grid.
PDF Settings: This control allows you to embed your personal fonts into the PDF. Check this box to embed the font and have your PDF appears the same across all devices. When this box is unchecked, a red F icon will appear next to fonts that will not export.
Proxy Server: This control allows you to connect to the internet through a proxy server.
Track Interface Usage: Help us improve the software with anonymous interface usage.
3D Settings Tab
The 3D Settings Tab allows you to control the appearance and quality of the Presentation Mode.
NOTE: These features are completely dependent on your computer’s hardware.
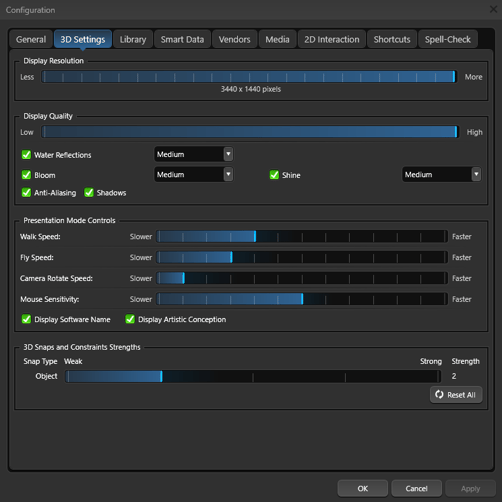
Display Quality: This slider allows you to set the display quality for the presentation mode. The higher the quality, the greater detail your presentation will show. The lower the quality the faster your computer will run.
Water Reflections: This feature controls how reflective bodies of water are in your design. You may set the strength or turn it off completely.
Bloom: This feature controls how much light blooms from surfaces such as water and metal. You may set the strength or turn it off completely.
Shine: This feature controls how much light shines off of surfaces such as water and metal. You may set the strength or turn it off completely.
Anti-Aliasing: This feature smooths out the edges of shapes to create a softer and clearer picture in 3D. Choose between None, Temporal or DLSS (RTX cards only)
Shadows: This features allows you to turn shadows on or off.
Presentation Mode Controls:
Walk Speed: This slider allows you to adjust the speed at which you move while in walk mode.
Fly Speed: This slider allows you to adjust the speed at which you move while in fly mode.
Camera Rotate Speed: This slider allows you to adjust the speed at which the automated tour rotates.
Mouse Sensitivity: This slider allows you to adjust how sensitive the mouse is to your movements.
Display Software Name: Check this box for the Software Name to appear in the top right corner of Presentation Mode, Video Mode and Photo Mode.
Display Artistic Conception: Check this box for Artistic Conception to appear in the top left corner of Presentation Mode, Video Mode and Photo Mode.
3D Snaps and Constraints Strengths: This slider allows you to adjust the strength of the snap when placing objects that snap in 3D, such as windows, doors and pool lights. The higher the strength, the greater distance away an object will snap to the design shape.
Library Tab
The Library Tab allows you to control how library items appear, new item notifications, and plant naming.

Show Symbols in Library: Check this box to set all items in the library to display as symbols.
Default New Landscaping to Symbols: Check this box to have new plants and trees insert as 2D symbols. Uncheck the box to have new plants and trees insert as 3D markers.
Plants and trees that have already been inserted can be changed by selecting them and using the Show Landscaping as Symbols button located in the Panel.
Default New Item Animations On: Check this box to default animations on for animated items inserted from the library such as animals and ceiling fans. Uncheck this box to default animations off.
Animations for items you have already inserted may be turned on/off by using the Play/Pause button located in the Panel.
Auto Open Library: Check this box to cause the library to automatically expand when going to a stage that requires the library. This would include Plants and Trees, Materials, and Yard Accessories
Random Scale/Rotate Rockwork: Check this box to automatically randomize the rotation and scale of the rockwork that you insert. Each time you insert a rock, it will have a different rotation and appearance than the previously inserted rock.
Auto Favorite Library Items: Check this box to automatically add the items you use the most to your Favorites tab of the Library. Once an item is inserted 25 times, a blue star will appear in the item preview thumbnail. Uncheck the blue star to remove the item from your auto favorites.
Show Default Templates: Check this box to include the default templates included in the software in your Design Library.
New Item Notifications: Press the Clear button to remove the New Item exclamation points in the Library. Press the Reset button to restore the New Item list from the most recent update.
Plant Naming Convention: Landscaping may be listed by either common or botanical names.
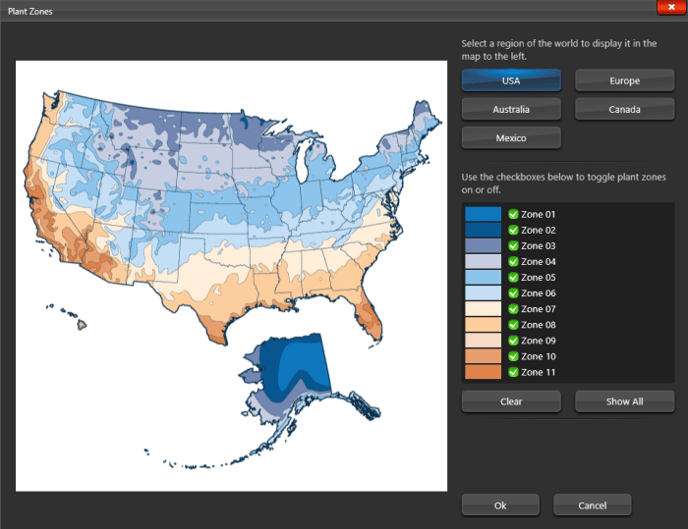
Set Plant Zones: This button allows you to select which plant zones appear in the library. Press the button to open the Plant Zones Map.
First select a region of the world to display on the map. Next use the checkboxes to select which plant zones appear in the library.
Smart Data Tab
The Smart Data Tab allows you to customize how data is calculated and appears in Smart Data. Adjust concrete thickness, rebar settings and how measurements are displayed. For more information, see Smart Data.
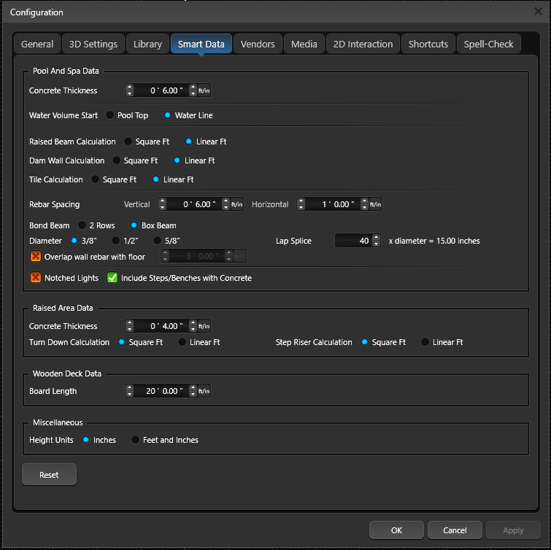
Pool and Spa Data:
Concrete Thickness: This control will allow you to select a concrete thickness for your Pool and Spa shapes.
Water Volume Start: This control will allow you to set your water to calculate from the pool top or water line.
Raised Beam Calculation: Raised Beam may be listed by either square ft. of material or linear ft. of the face.
Dam Wall Calculation: Dam Wall may be listed by either square ft. of material or linear ft. of the face.
Tile Calculation: Tile may be listed by either square ft. of material or linear ft.
Rebar Spacing: This control will allow you to set your vertical and horizontal rebar spacing.
Bond Beam: Bond Beam may be 2 rows or box beam (4 rows) of rebar around the Bond Beam of the Pool or Spa.
Diameter: Rebar diameter may be listed as 3/8″ 1/2″ or 5/8″
Lap Splice: This control will allow you to set your lap splice. Default is a Lap Splice of 40x the diameter of the rebar (40 x 3/8″)
Overlap wall Rebar with Floor: With this box checked, the wall rebar with overlap with the floor rebar. Default is an overlap of 3 feet. Use this control to set the amount of overlap.
Notched Lights: With this box checked, the lights will be notched, adding 1 yard of concrete and 20′ of rebar for each pool or spa light.
Include Steps/Benches with Concrete: With this box checked, the concrete calculation with include Steps and Benches, using the concrete thickness uniformly for all shapes. When unchecked, Steps and Benches will not be included in the Concrete calculation.
Raised Area Data:
Concrete Thickness: This control will allow you to select a concrete thickness and will directly affect your deck/hardscape concrete yardage calculation.
Turn Down Calculation: Turn down may be listed by either square ft. of material or linear ft. of the face.
Step Riser Calculation: Step risers may be listed by either square ft. of material or linear ft. of the face.
Wooden Deck Data
Board Length: This control will allow you to set your board length for wooden decks.
Miscellaneous
Height Units: Height values may be listed by either inches or feet and inches.
Reset: Press Reset to revert to the default settings.
Vendors Tab
The Vendors Tab allows you to control which vendor packages appear in your library. You can turn off vendors you don’t use to clear the items out of the library.
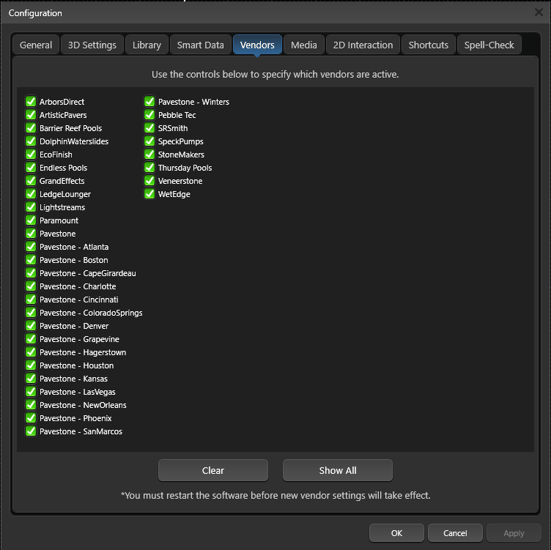
Vendors: All vendor packages currently available will appear in this list. To turn ON a vendor package simply place a green checkmark next to the vendor.
To turn OFF a vendor package simply place a red x next to the vendor.
NOTE: You must restart the software for these changes to take effect.
Media Tab
The Media Tab allows you to set preferences for screenshots and video recording. For more information, see Photo Mode and Video Mode.
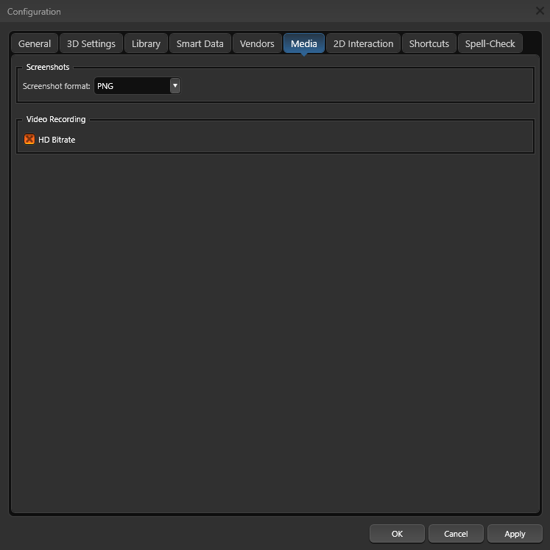
Photos
Screenshot Format: This control allows you to set the format of your screenshots. You may select JPEG or PNG from the drop-down list. PNG will enhance the colors and lighting in your image but PNG files tend to be larger than a JPEG, because they contain more information.
Video Recording
HD Bitrate: With this box checked, create better quality, clearer videos. The video file size will be significantly larger.
2D Interaction Tab
The 2D Interaction Tab allows you to set the font measurement size, snaps and constraints strength and change the scale of the labels in the program.
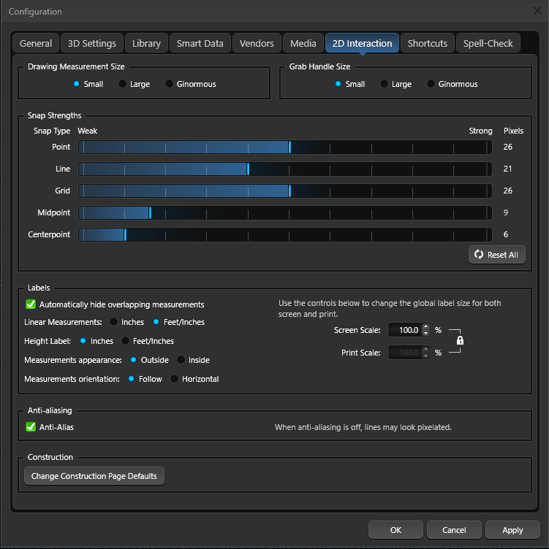
Drawing Measurement Size: This control allows you to select the font size of your drawing measurements. You may select Small, Large or Ginormous.
NOTE: To change the font size of a completed shape, select the shape and go to the Object Tab in the Panel
Snaps Strengths: These sliders allow you to adjust the strength of your snaps. The higher the pixel number, the stronger the snap will be. The pixel number represents the number of pixels away your cursor needs to be in order for the snap to take effect.
Press the Reset All button to restore the default strengths.
Labels: These controls allow you to adjust the scale at which labels in the program will appear on the screen and print out.
Automatically Hide Overlapping Measurements: With this box checked, any shape measurements that overlap will be automatically hidden. This creates a cleaner design. Uncheck this box, to show all measurements.
Linear Measurement: This control allows you to display linear measurements in 2D as either inches only, or feet and inches.
Height Label: This control allows you to display height label measurements in 2D as either inches only, or feet and inches.
Measurements Appearance: This control allows you to display your measurements on the outside or inside of the line.
Measurements Orientation: This control allows the measurement orientation to display following the line or horizontally.
Lock Print to Screen: This lock icon will lock the print scale to the screen scale. Uncheck it to set a different print scale.
NOTE: We do not recommend changing these settings from 100%.
Anti-Aliasing: With this box checked, lines in the software will look clean and smooth. With the box unchecked, lines in the software will look jagged and pixelated if not at perfect 0, 90, or 180 degree angles.
Change Construction Page Defaults: This control will open your default page settings when you enter Construction Page Layout.
Shortcuts Tab
The Shortcuts Tab allows you to reassign keyboard commands.

Context Menu: The context menu can be linked to your right mouse button or middle mouse button.
Assign Shortcuts: To change the shortcut command, click on the currently assigned command.
Three question marks will appear, asking what new keyboard command to use. You can use a single button, such as a letter or number, or combination of CTRL, SHIFT and a letter/number.
If the new value is already being used by another command, the software will alert you that the two commands will be swapped.
Spell-Check Tab
As you type, the software will alert you to any potential typos and spelling errors. Simply right click on the word to see recommended replacements, choose to ignore the word, or add it to your dictionary.
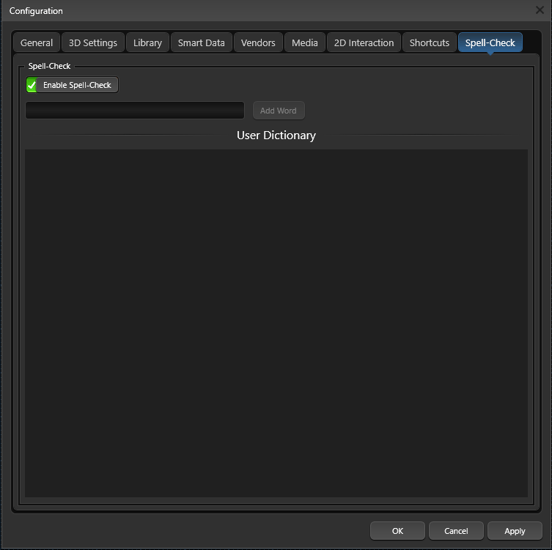
Enable Spell-Check: With this box checked, the software will alert you to any potential spelling errors.
Add Word: It’s easy to add any industry-or company-specific terms to build your own custom dictionary.