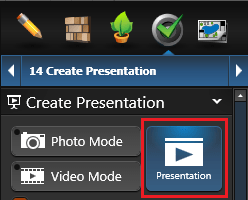
 Getting to Presentation Mode: In order to explore your project in Presentation mode, go to the Create Presentation Stage. Click the “Presentation” button in the panel.
You can also enter the Presentation Mode by selecting View Presentation Mode from the Application Menu or pressing F5.
Presentation Control System
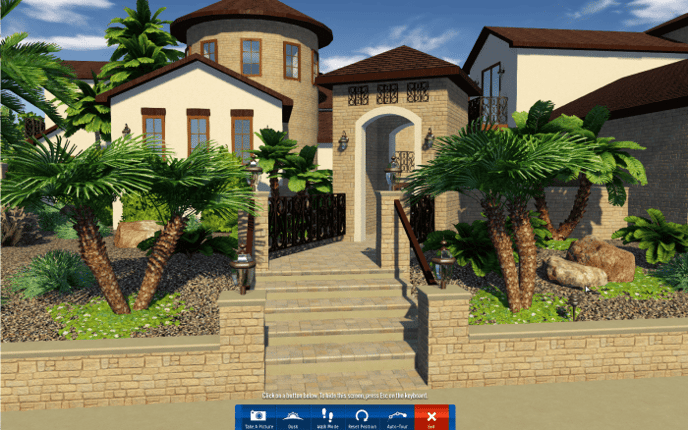
Navigation in the Presentation Mode is simple. Moving the mouse around will change the direction you are looking.
Move Forward: Press and hold the left mouse button to move forward in the direction you are looking.
Move Backwards: Press and hold the right mouse button to move backwards from the direction you are looking.
Saved Location: To move to a specific location saved in Photo Mode, Press the location number. For example: To move to Location 02, Press 2.
Keyboard Shortcuts:
ESC: This will bring up the menu where all of these commands can be found.
P: Take a picture/screenshot of your presentation. This command will take a picture of your current view in the presentation mode. The screenshot will be saved in the screenshots folder.
A: Automated tour. The view will automatically rotate around your current location in the project.
Space Bar: Same as A, starts the Automated Tour.
R: Reset the view to where the Presentation mode began.
F: While in Walk mode, enter Fly mode. Fly mode allows you to “fly” anywhere in the 3D view.
W: While in Fly mode, enter Walk mode. Walk mode plants your feet firmly back on the ground so you can walk around.
N: Go from day to dusk to night.
X: Exit Presentation Mode and return to the program.
Enter: Play/Pause item and landscaping animations. This command will turn item animations on and off while in Presentation Mode.