Stage Options
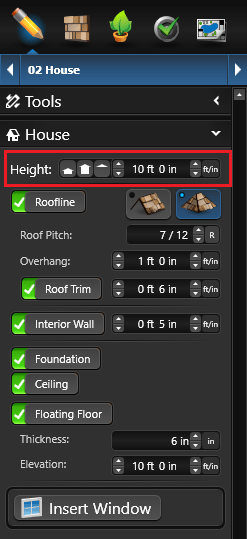
House Height:
One Story: Select this option to set the height of the selected house piece to a single-story house at 10 ft.
Two Story: Select this option to set the height of the selected house piece to a two-story house at 20 ft.
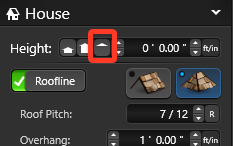
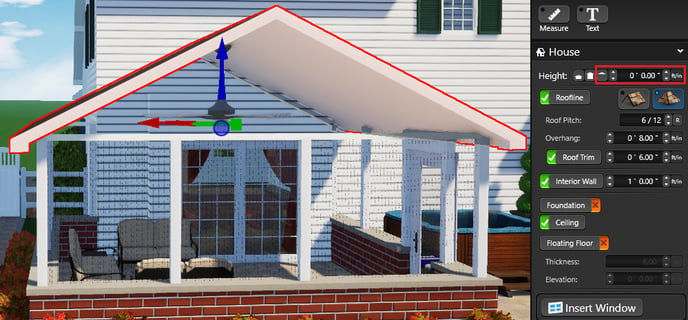
Roof Only: Select this option to set the height of the selected house piece to 0″ and create a vaulted ceiling, perfect for creating patio covers.
Height: Set the height of the selected house piece. Because a custom height can be set for each house piece, this is an easy way to set the thickness of patio covers and house decks. (This control is available in both 2D and 3D.)
Roof and Interior Wall:
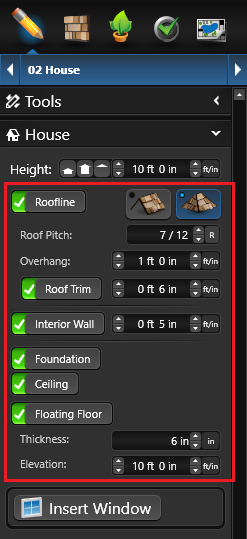
Roofline: Toggle to add roof line to the selected House object.
Gabled Edge: Change the selected roof edge or roof to a Gabled edge.
Angled Edge: Change the selected roof edge or roof to an Angled edge.
Pitch Angle: Adjust the angle of the roof line. Click R to adjust the angle by degrees instead of slope.
Overhang: Adjust the amount of overhang for the roof line.
Roof Trim: Toggle to add roof trim on the selected House object.
Interior Wall: Toggle to add interior wall and set the wall width of the selected House object.
Note: If Interior Wall is set to off, Window Covering will automatically be added to inserted windows.
Foundation: Toggle to add a foundation to the selected House object. This option will automatically cut away and flatten the Terrain inside of the house.
Ceiling: Toggle to add a ceiling to the selected House object. If Ceiling is set to off, a vaulted ceiling is visible.
Floating Floor: Toggle to add a floating floor to the selected House object. Adjust the thickness and elevation to place the floor where you need.
Note: Roof lines only appear in 2D while in the House stage.
Roof Only:
Create a roof shape without a house with the "Roof Only" button. This is important for creating a covered walkway between two house shapes.
Use "Roof Only" to create:
Covered PatioLanai
Porch
Roof overhang
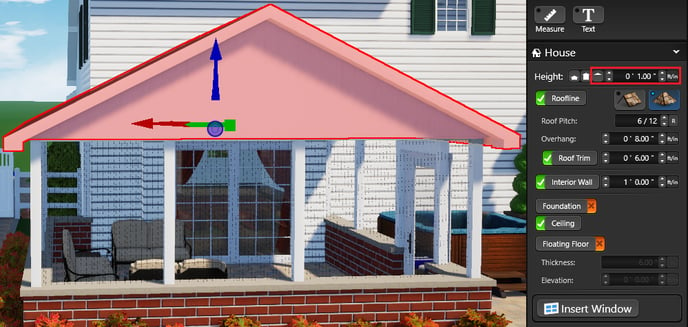
Tip: Set the "house" height to 1" to create a gable. A house height of 0" will create a vaulted ceiling (see video below).
Roof Only set to a height of 1" will add the Gable
Roof Only set to a height of 0" will create an open vaulted ceiling
Creating complex Roof shapes? See our Multiple Roof Elevation Knowledge Base Article
Insert Window:
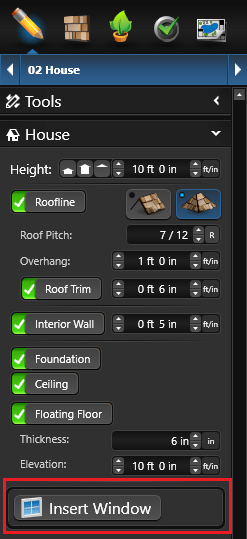
Insert Window: Once you have designed the basic outline of your house shape, you can add custom windows with the Insert Window Button. When you move your cursor to the viewport in 2D and 3D, the window will follow until you left-click to place it.
If you move the mouse close to an existing house shape while the window is selected, the window will snap into the proper position. Once placed, you can customize the details of the window, including the type of window, size, and rotation. (See window options below.)
To adjust windows, double-click on each section of the selected window. As you double click on each section, the panel menu will update to show you the options available. You can also click directly on the window image in the panel menu to adjust each setting.
Window Type and Size:
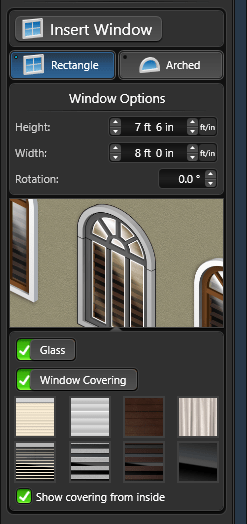
Window Type: Select Rectangle or Arched
Height: Set the height of the selected window.
Width: Set the width of the selected window.
Rotation: Set the rotation of the selected window.
Glass: Toggle to add or remove glass from the selected window.
Window Covering: Toggle to add or remove a window covering to selected window. Options are Curtains, Blinds, Shutters, and Tinted Glass.
Show Covering from Inside: Toggle to add or remove window covering from inside the house.
Window Panes and Frame:
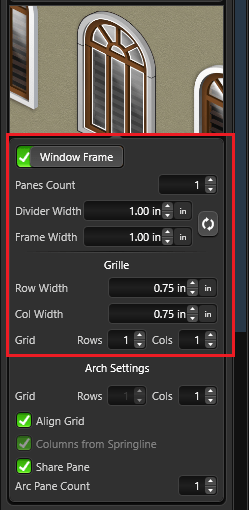
Window Frame: Toggle to add or remove the frame from selected window.
Panes Count: Adjust the number of panes for the selected window.
Divider Width: Set the width of the divider between panes.
Frame Width: Set the width of the window frame.
Reset: Restore default Divider and Frame width to the selected window.
Row Width: Set the row width of the grille row for the selected window.
Col Width: Set the column width of the grille row for the selected window.
Grid: Adjust the number of rows and columns of the grille for the selected window.
Window Casing:
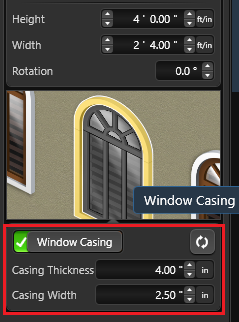
Window Casing: Toggle to add or remove casing from selected window.
Casing Thickness: Set the thickness of the window casing.
Casing Width: Set the width of the window casing.
Reset: Restore default thickness and width to the selected window.
Add Arch to Top of Rectangle Window:
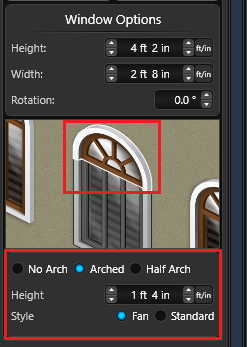
Arched: Select this option to add an arch to the top of the Rectangle window
Half Arched: Select this option to add a half arc to the top of the Rectangle window
Height: Adjust the height and position of the arch.
Style: Choose between fan and standard style for framing settings (See Arch Window Section below).
Flip Half Arch: Select this option to change the direction of the arch.
Rectangle with Arch Top Settings:
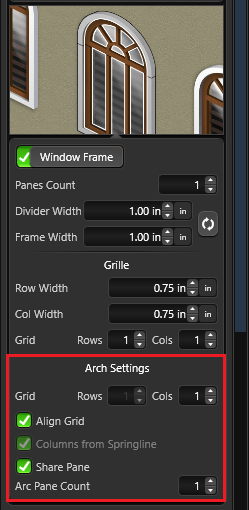
Arch Settings Grid: Adjust the number of rows and columns of the grille for the arch section of the selected window
Align Grid: Toggle to align the arch grille with the rectangle grille. Note: When active, you cannot adjust Arch rows separately.
Column from Springline: Toggle to connect arch columns to bottom of pane. When off, columns start from first row of grille.
Share Pane: Toggle to have the arch and rectangle share a single pane with no divider.
Arc Pane Count: Adjust the number of panes in the arch for the selected window.
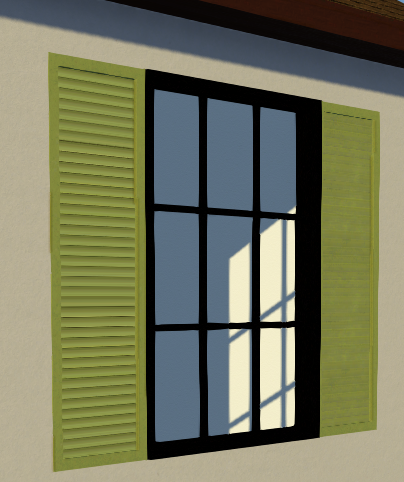
Add Shutters to Your Windows
Vaulted Ceiling
Create an open air roof using the Roof Only feature, and add support beams and rafters with Custom Shapes. This technique can also be used for a porch or "all-season room."
Library
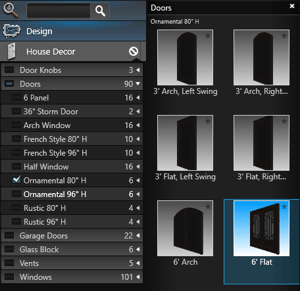 Once you have designed the basic outline of your house shape and added your custom windows, you can add doors and other items from the House Décor tab in the Library. To add these items, open the Library to House Décor.
Select the item you wish to insert and either click the Insert One button or double-left-click on the image of the item. When you move your cursor to the viewport, the item will follow until you left-click to place it. If you move the mouse close to a house shape with a house decor item selected, the object will snap into the proper position.
Elevation
The elevation of shapes drawn in the House Stage can be set in the Panel under the Object Tab. You can control both shapes you have drawn as well as items inserted from the Library.
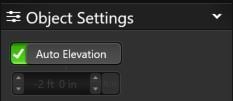 Auto Elevation: With this box checked, shapes drawn in the House Stage will automatically snap to the elevation of the terrain. Items from the Library will attempt to snap to the dimensions of existing shapes in the design.
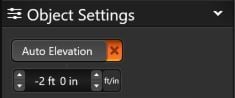 Elevation Box: You can manually enter an elevation value for the shape or library item. Whenever you move an item in the 3D view, this option is automatically selected. With this control, which is available in both 2D and 3D, you can create floating open space elements.
Moving House Pieces in 3D
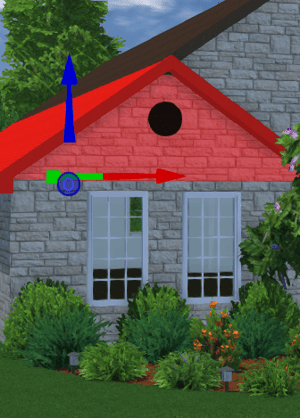 Objects drawn in the House Stage may be moved in 3D with the 3D gizmo. Double left click on the object to bring up the 3D gizmo. The blue arrow will move objects up and down, the red arrow will move objects left to right, and the green arrow will move objects backwards and forward.
Elevated House Pieces: Elevated house pieces are used to create patio covers, house decks, custom roofs, and suspended objects with empty space underneath. House pieces can be elevated either with the 3D gizmo or by setting an elevation under the Object Tab.
Elevation: The elevation controls under the Object Tab can be used to edit house pieces in 3D. As you change the settings, the selected pieces will change in 3D.