Discover new ways to shape your design. The presentation enhancements in Vip3D Version 3 offer you a wide variety of exclusive options.
RAY TRACING
Ray tracing enhances the realism of the environment and adds an incredible level of detail to your designs. By taking the best advantage of the full power of your Nvidia RTX video card, ray tracing makes your designs even more breathtakingly immersive, enhancing your rendering quality in three areas: reflections, refractions, and shadows.
DYNAMIC WATER
Watch the water move in the pool and spa from spillovers and water features! Even control the intensity of the water surface to enhance the water ripples.
3D GRASS
Ground your viewer to the reality of your design with 3D grass, which makes expansive lawns, gardens, and parks look even more impressive.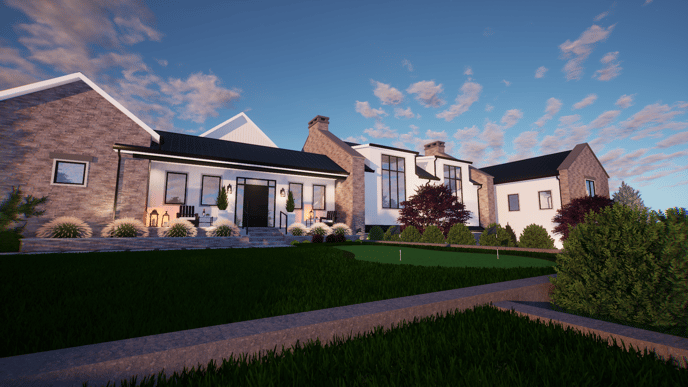
In Stage 11: Materials, double-click the Grass to select it. With the Grass selected, Turn On 3D Grass in the Panel under Object Settings.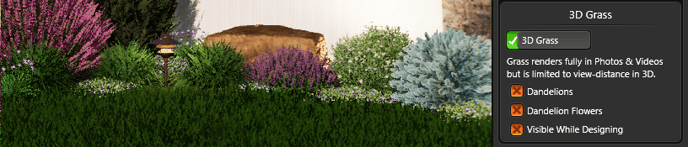
To see 3D Grass in Design Stages, add a checkmark next to: Visible While Designing.
In Design Stages, 3D Grass is only a preview with a limited view distance.
3D Grass will fully render in Photos and Videos.
LIGHTING CONTROLS
Lighting Controls offer you limitless opportunities to create the perfect light settings for your client’s design. With the freedom to light each project exactly as you envision it, you can easily customize each light by adjusting the Attenuation, Light Angle, Intensity, Temperature, and Color.
The Point and Spot staging lights even include physically accurate falloff, making your lighting extraordinarily, beautifully realistic.

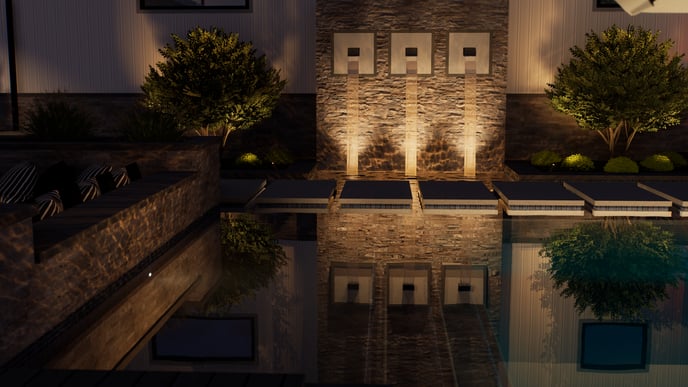
STRIP LIGHTS
Strategically place strip lights to add ambiance and depth to your design. They're the perfect way to highlight the pool, outdoor kitchen, and bar areas.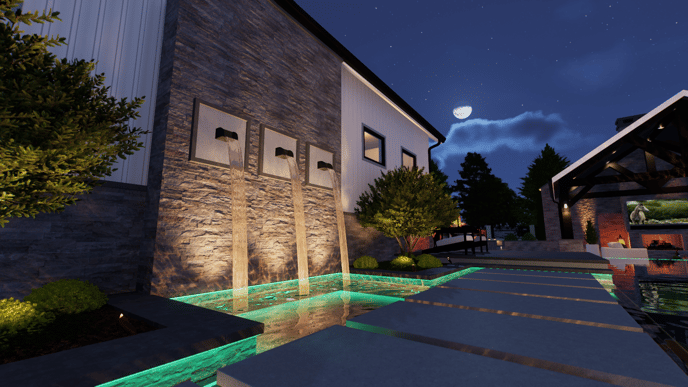
Found in the Library in the Lights Category, Strip Lights snap to the edge of the pools, spas, outdoor kitchens and retaining walls.
Double-click the preview thumbnail or left-click the Insert button. When you move your cursor to the viewport, the strip light will follow until you left-click to place it.
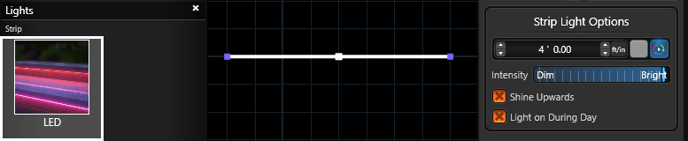 Once the strip light is placed, you can customize the strip light by using Strip Light Options under Object Settings in the Panel.
The strip light will also conform to the shape, bending around corners and curving around arcs.
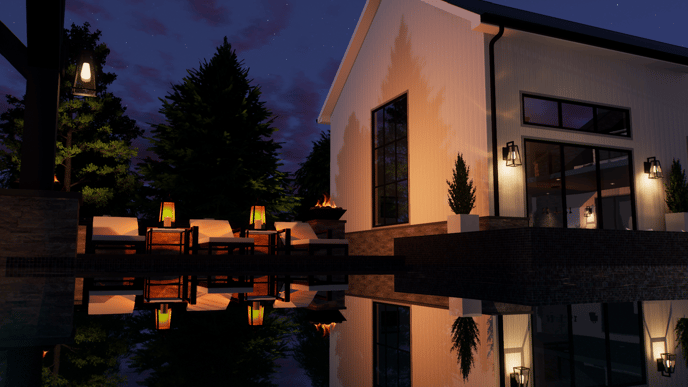
WINDOW LIGHTS
Give your client’s house an upgrade in Version 3 by turning on the automatic window lights. 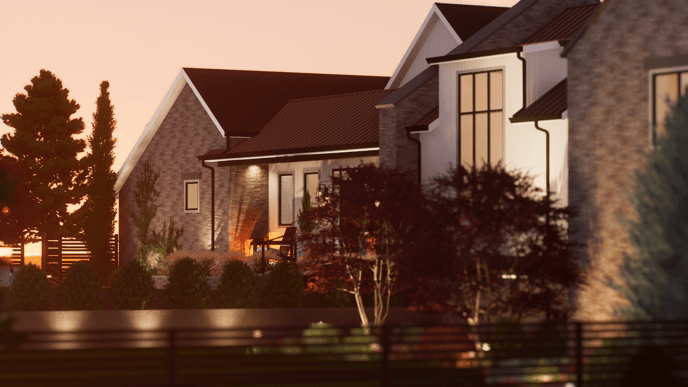
In Stage 11: Materials, apply a Window Glass to the window. As soon as you enter Dusk or Night, the house becomes an inviting centerpiece as the light glows through the windows.
CUSTOM MEDIA
Screens offer yet another avenue to surprise and delight your clients. You can add your (or their!) videos and still images to TVs and projectors.
PROFESSIONAL CAMERA CONTROLS
In Stage 14: Create Presentation, add another level of professionalism to your photos and videos with exclusive camera controls.
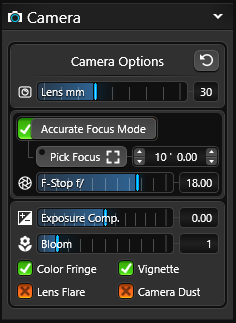
Camera Lens mm: This slider allows you to choose between a focal lens of 15mm and 150mm. Fine tune in your desired lens by typing in your own value between 15 and 150.
Accurate Focus Mode: To achieve precise focus, enable the accurate focus mode and choose the specific area you want to focus on. Adjusting the F-stop will control the amount of blur in the areas that are not selected.
Add Bloom, Lens Flare, Camera Dust, Color Fringe, or a Vignette to your image.
See 🎥 Create Presentation for more details on camera and filter controls.
When you enable Accurate Focus Mode, you can adjust the focal distance and F-Stop of your camera, ensuring pixel-perfect focus as you capture images or videos.
With this mode turned on, you can preview exactly how your photos and videos will appear. Even if you turn off Accurate Focus Mode, the settings will remain in effect for your location.
(Note: Keeping Accurate Focus Mode enabled will decrease performance.)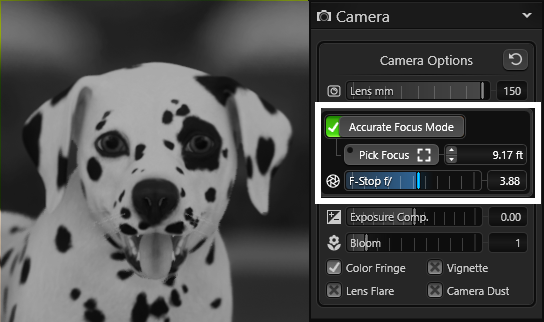
FAST MODE 
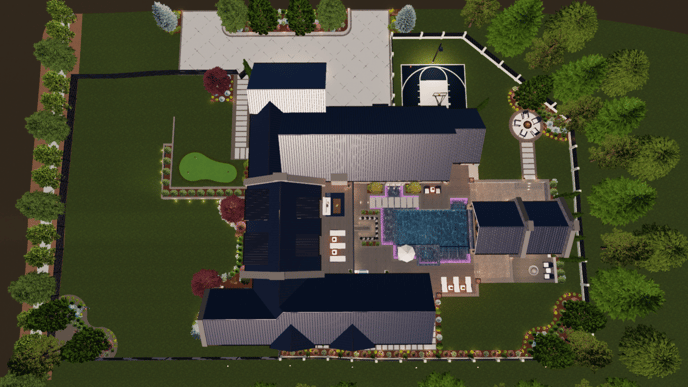
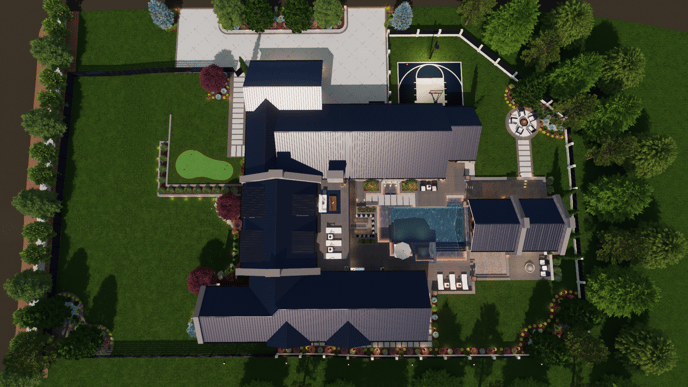
Turn on Fast Mode to design complex projects faster by disabling rendering effects and shadows in Design Stages.
FAST MODE ON:
FAST MODE OFF:
SKY & WATER CONTROLS
Capture the mood of your design by adjusting the cloud cover, selecting the perfect phase of the moon to dial in the romance and set your water surface to be turbulent or as smooth as glass.
In Stage 14: Create Presentation, use the Environment Setting Controls:
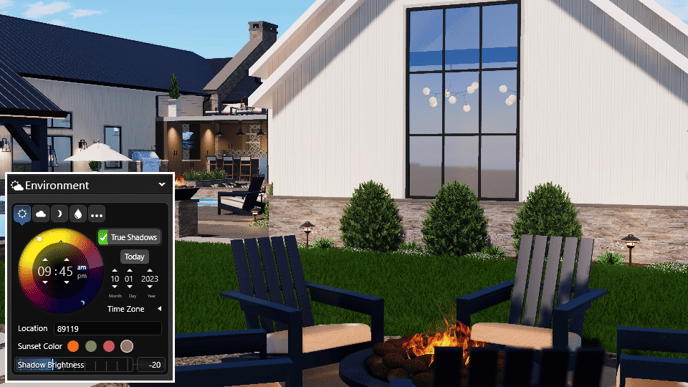
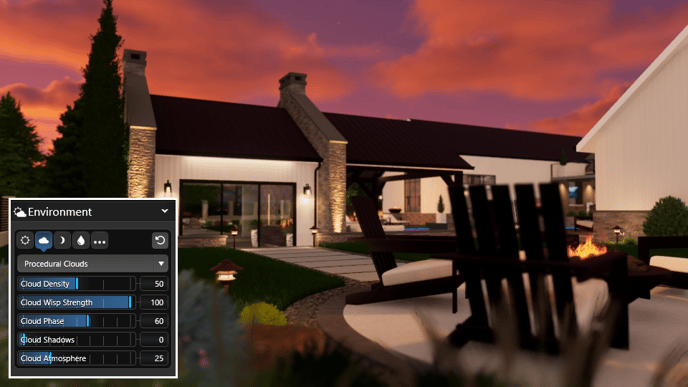
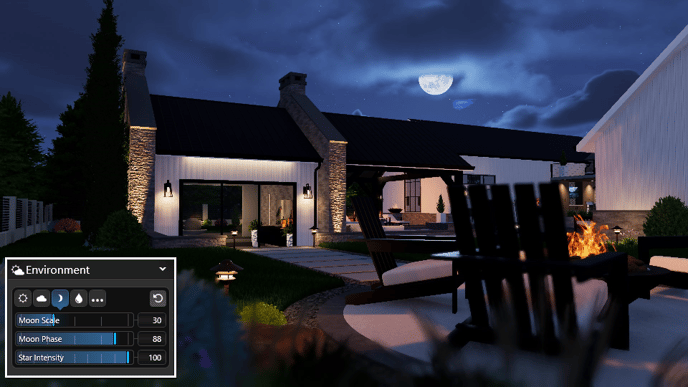
IMAGE FILTERS
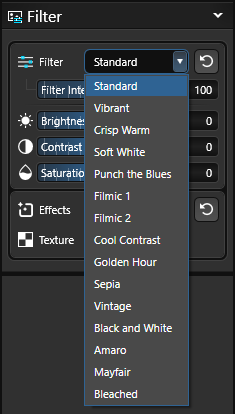 In Photo and Video Mode, apply image filters to enhance the visual elements and the overall aesthetic of your photos and videos.
You can achieve vibrant colors, subtle shadows, and enhanced details with image filters.
Find your style and adjust the strength with the Filter Intensity Slider.
Customize each filter with the brightness, contrast, and saturation sliders.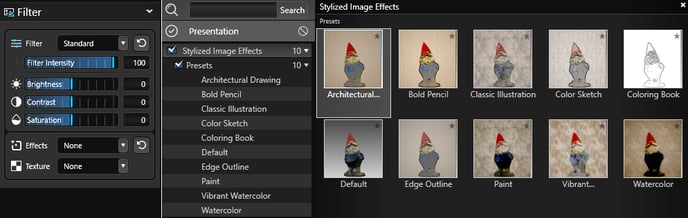
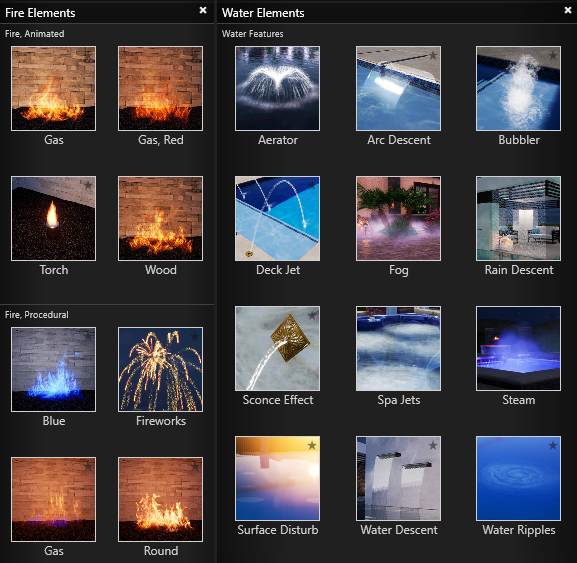
EFFECTS
Add fog, steam, and even fireworks to add ambiance to your project and set the ideal mood.
Found in the Library under Fire Elements and Water Elements..
Double-click the preview thumbnail or left-click the Insert button. When you move your cursor to the viewport, the effect will follow until you left-click to place it.