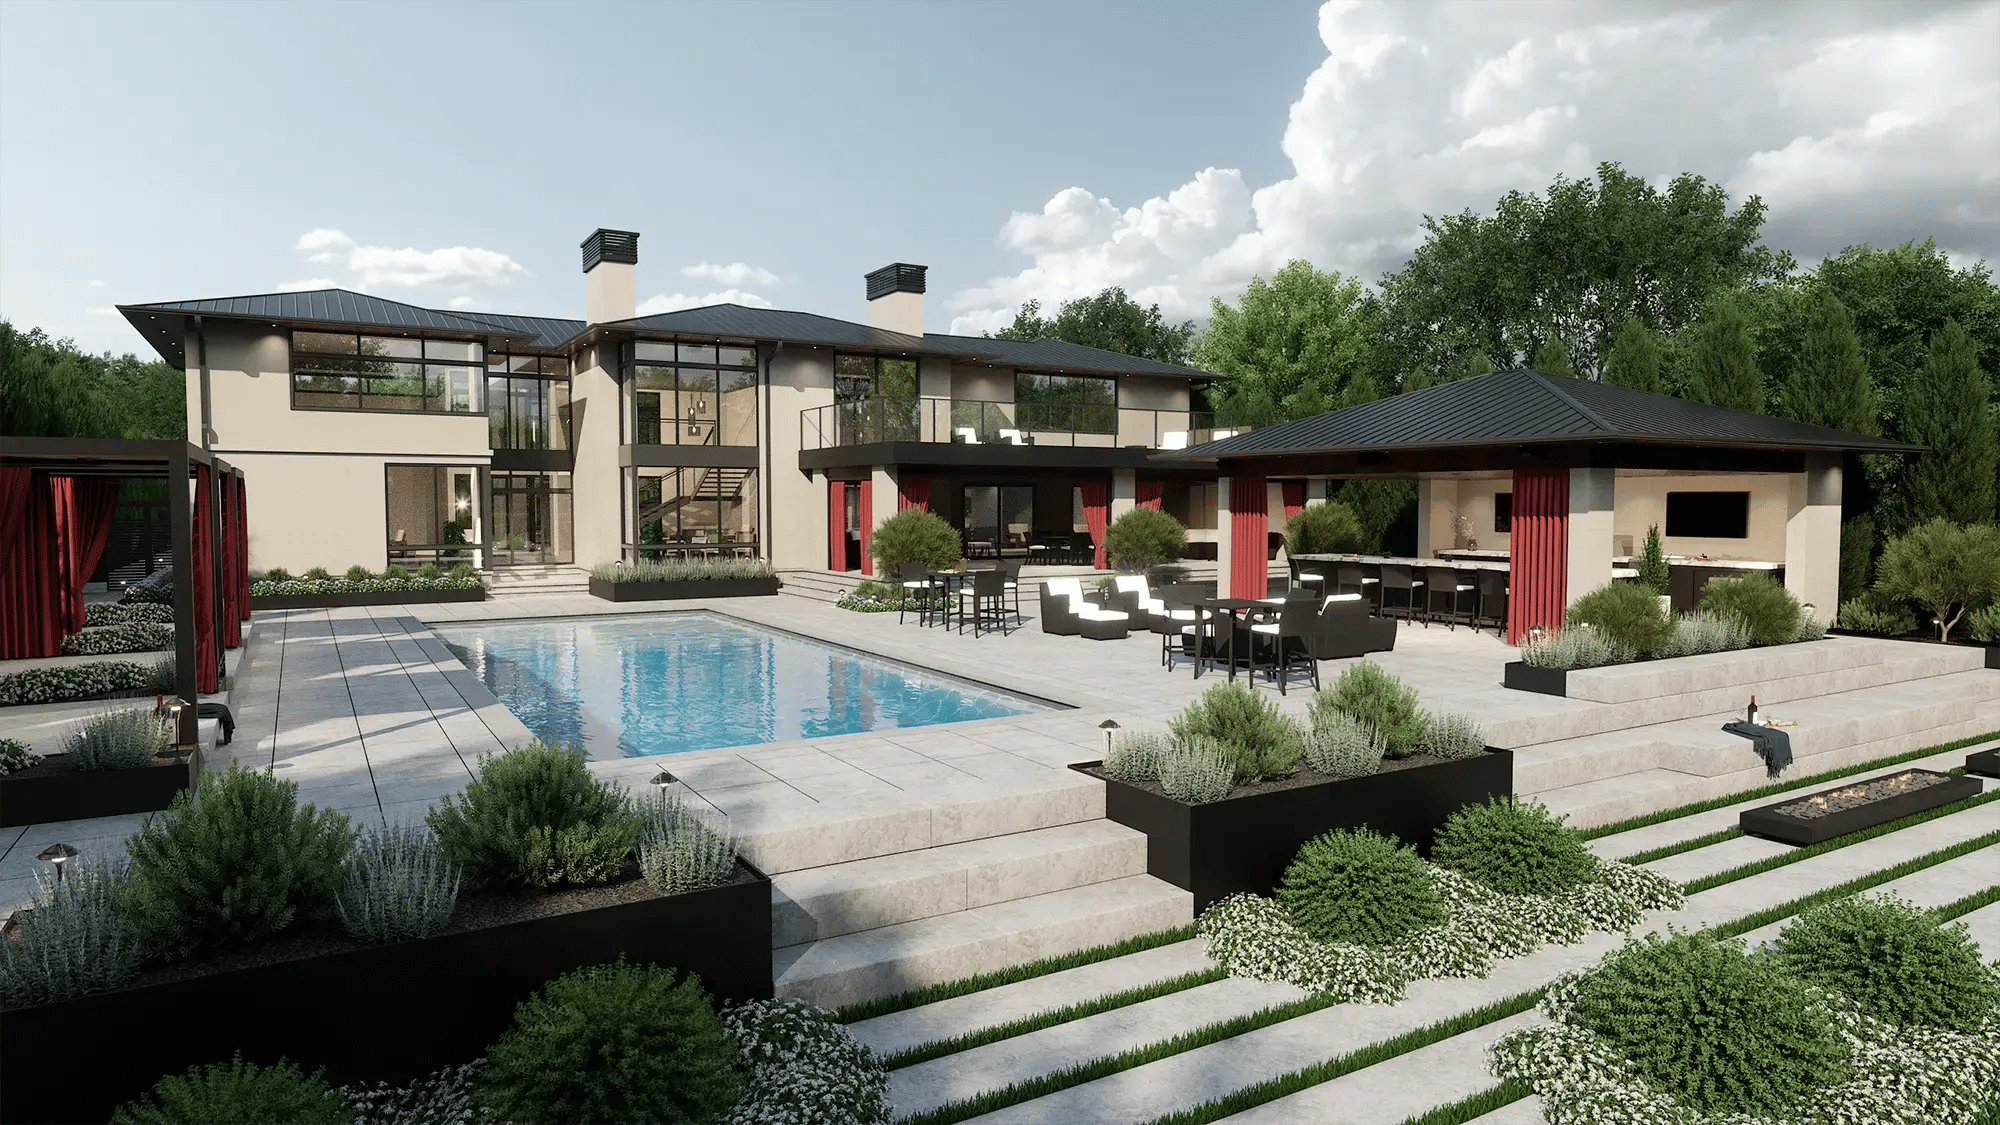




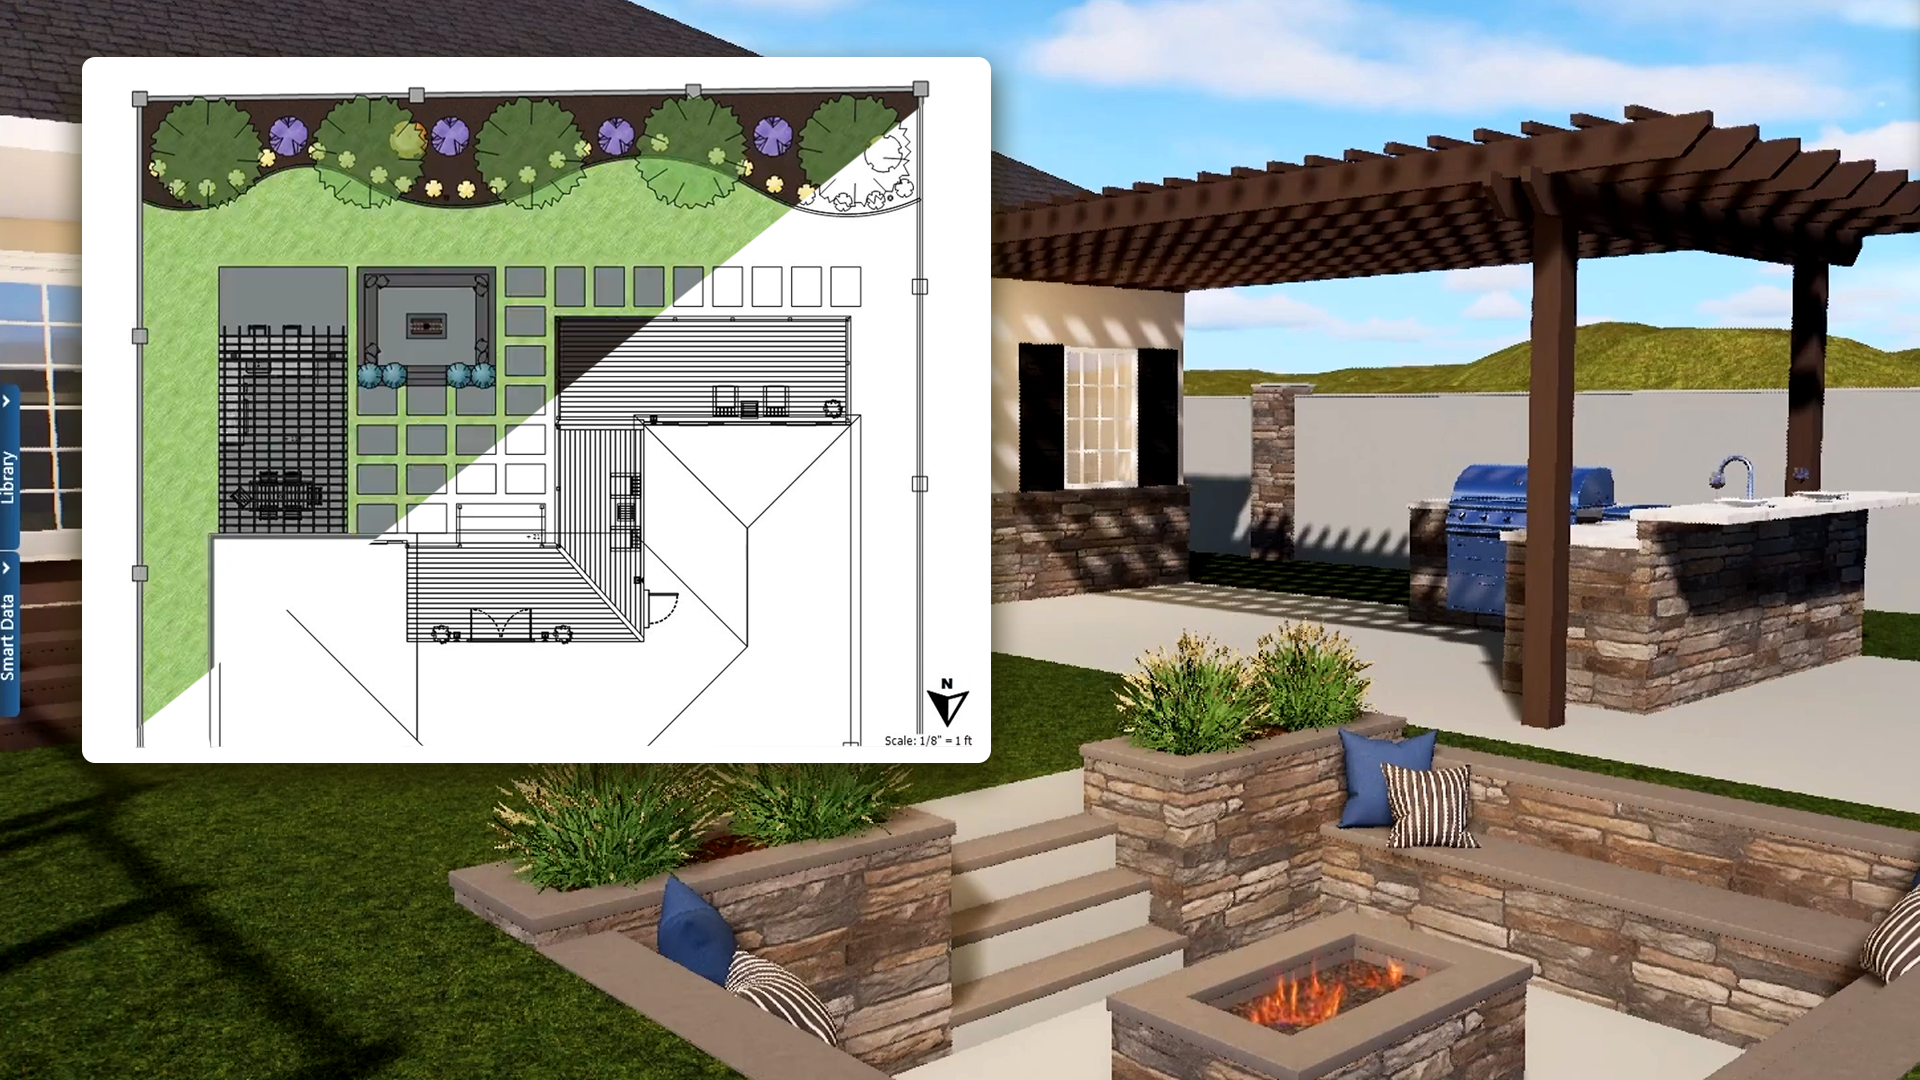
Quick Answer: To visualize an outdoor design in 3D, capture accurate site measurements, draw the layout in 2D, then convert it into an interactive, true-to-scale 3D model with purpose-built design software. From there, add terrain, materials, and lighting, present the design live, and generate construction plans from the same file.
You can picture the finished space. Your client may not be able to — at least not from a flat plan alone.
They may understand where the pool, patio, pergola, or planting areas will go. But they're reading a flat plan, trying to see stone, water, and evening light in a set of lines and labels. A client who can't picture the result hesitates. They scale the project back, keep shopping around, or request changes once the concrete has already been poured.
A 3D design closes that gap.
Instead of asking a client to interpret a sketch or a marked-up site plan, you show them a true-to-scale version of the project from any angle, at any time of day. You take them through the design, clarifying the layout and comparing materials, so they make decisions with confidence.
Here’s how outdoor living professionals can move from a 2D plan to a fully interactive 3D design — and use the same project file for the presentation, revisions, and construction plans.
3D Visualization at a Glance
-
Start with accurate site information, including measurements, boundaries, grade changes, and existing conditions.
-
Draw the layout in 2D, including all of the key elements of your design.
-
Switch from the 2D plan to a fully interactive 3D design — without rebuilding the project.
-
Add terrain, plants, hardscapes, pools, structures, materials, lighting, and other project details.
-
Present the design live, make changes in real time, and create construction plans.
What It Means to Visualize an Outdoor Design in 3D
Visualizing an outdoor design in 3D means building a true-to-scale, photorealistic model of a project so the client can see exactly what it will look like before anyone breaks ground. You already know what the finished space should be — 3D design software lets your client see the patio, the pergola, and the pool the same way you do.
With 3D design software, the same project file carries your 2D drawing, measurements, settings, presentation, and plans — so you spend less time redrawing and more time designing. Move between a 2D plan and a full 3D design with one click. Set materials and finishes. Add lights and furniture. Shift the scene from day to dusk to night.
That's the difference between a flat plan and a 3D design. A flat plan asks the client to imagine the result. A 3D design shows it to them. Designers use it to close more deals, sell more on every project, and reduce change orders, because the client approves what they can already see.
Three Ways to Create a 3D Outdoor Design
There's more than one way to create a 3D view of an outdoor space. The right option depends on how you work, how often you need to produce these views, and what you need the 3D design to accomplish.
|
Method |
Best for |
Main limitations |
|---|---|---|
|
Free or DIY planners |
Homeowners, quick experiments, early idea exploration |
Limited accuracy; minimal presentation or documentation tools |
|
3D visualization services |
One-time polished visuals when revisions aren’t expected |
Revision time; less control during client meetings |
|
Professional design software |
Designing, presenting, and documenting projects |
Learning curve; finding the right hardware |
Free or DIY 3D Planners
Free browser-based or phone-based design tools can be useful for homeowners experimenting with early ideas. They are usually quick to pick up and can be helpful for exploring a rough layout.
For professional work, however, they tend to run out of road fast. Many are limited to top-down layouts, simple 3D previews, or photo-overlay views. They may not support accurate grading, detailed outdoor living elements, true-to-scale project measurements, construction plans, or real-time client revisions.
While tools like these can work for DIYers or homeowners exploring a concept, they typically aren’t built to carry a professional project from the initial pitch to the construction handoff.
3D Visualization Services
A 3D visualization service can turn your 2D plan into a polished, high-end image or a walkthrough animation. This can be a solid option when you need a one-time presentation and don’t anticipate needing to revise or alter the design.
While the rendering quality can be excellent, the trade-off is speed and flexibility. Even relatively minor changes will require another round of back-and-forth communication, another waiting period, and often another fee. If the client wants to see a different material, move a feature, adjust the layout, or compare options during the meeting, you may not be able to pivot in the moment.
Visualization services can produce strong images, but they often turn every simple client request into a waiting game.
Professional Outdoor Living Design Software
Built for industry professionals, 3D outdoor living software makes it easy to design, present, revise, sell, and document client projects. That connected workflow is where Structure Studios software stands apart.
With purpose-built software, you begin the project in 2D, switch to fully interactive 3D, continue refining the design, and create immersive presentations as well as build-ready construction plans.
When the presentation, layout, measurements, material quantities, and construction documentation are all connected, the design stays consistent from concept to build.
The right professional design software for you and your business depends on the type of work you do most often and the level of design control, presentation quality, and construction documentation your projects require. Each Structure Studios product helps you create detailed 2D plans, immersive 3D presentations, and build-ready construction documents — all from one design.
- VizTerra is fast, intuitive landscape and outdoor living design software. It’s built to help designers quickly create and present decks, patios, planting plans, hardscapes, outdoor kitchens, fire features, pergolas, and complete backyard designs.
- Pool Studio is the definitive professional pool design software built specifically for high-impact sales presentations. It includes VizTerra’s full suite of outdoor living tools, plus dedicated features for crafting custom pools, spas, water features, coping, and tile with complete precision.
- Vip3D is advanced outdoor living design software that combines complete landscape, pool, and hardscape design with professional drafting and high-end visualization tools. It includes Smart Data tools that update automatically as you design, giving you accurate project data for estimates, permit applications, and client change requests.
How to Visualize an Outdoor Design in 3D: A Step-by-Step Guide
A strong 3D presentation starts before you ever switch to 3D. With Structure, the process is straightforward. Here’s how to take a project from concept to reality with a 3D design that closes the deal.
Step 1: Measure and Capture the Site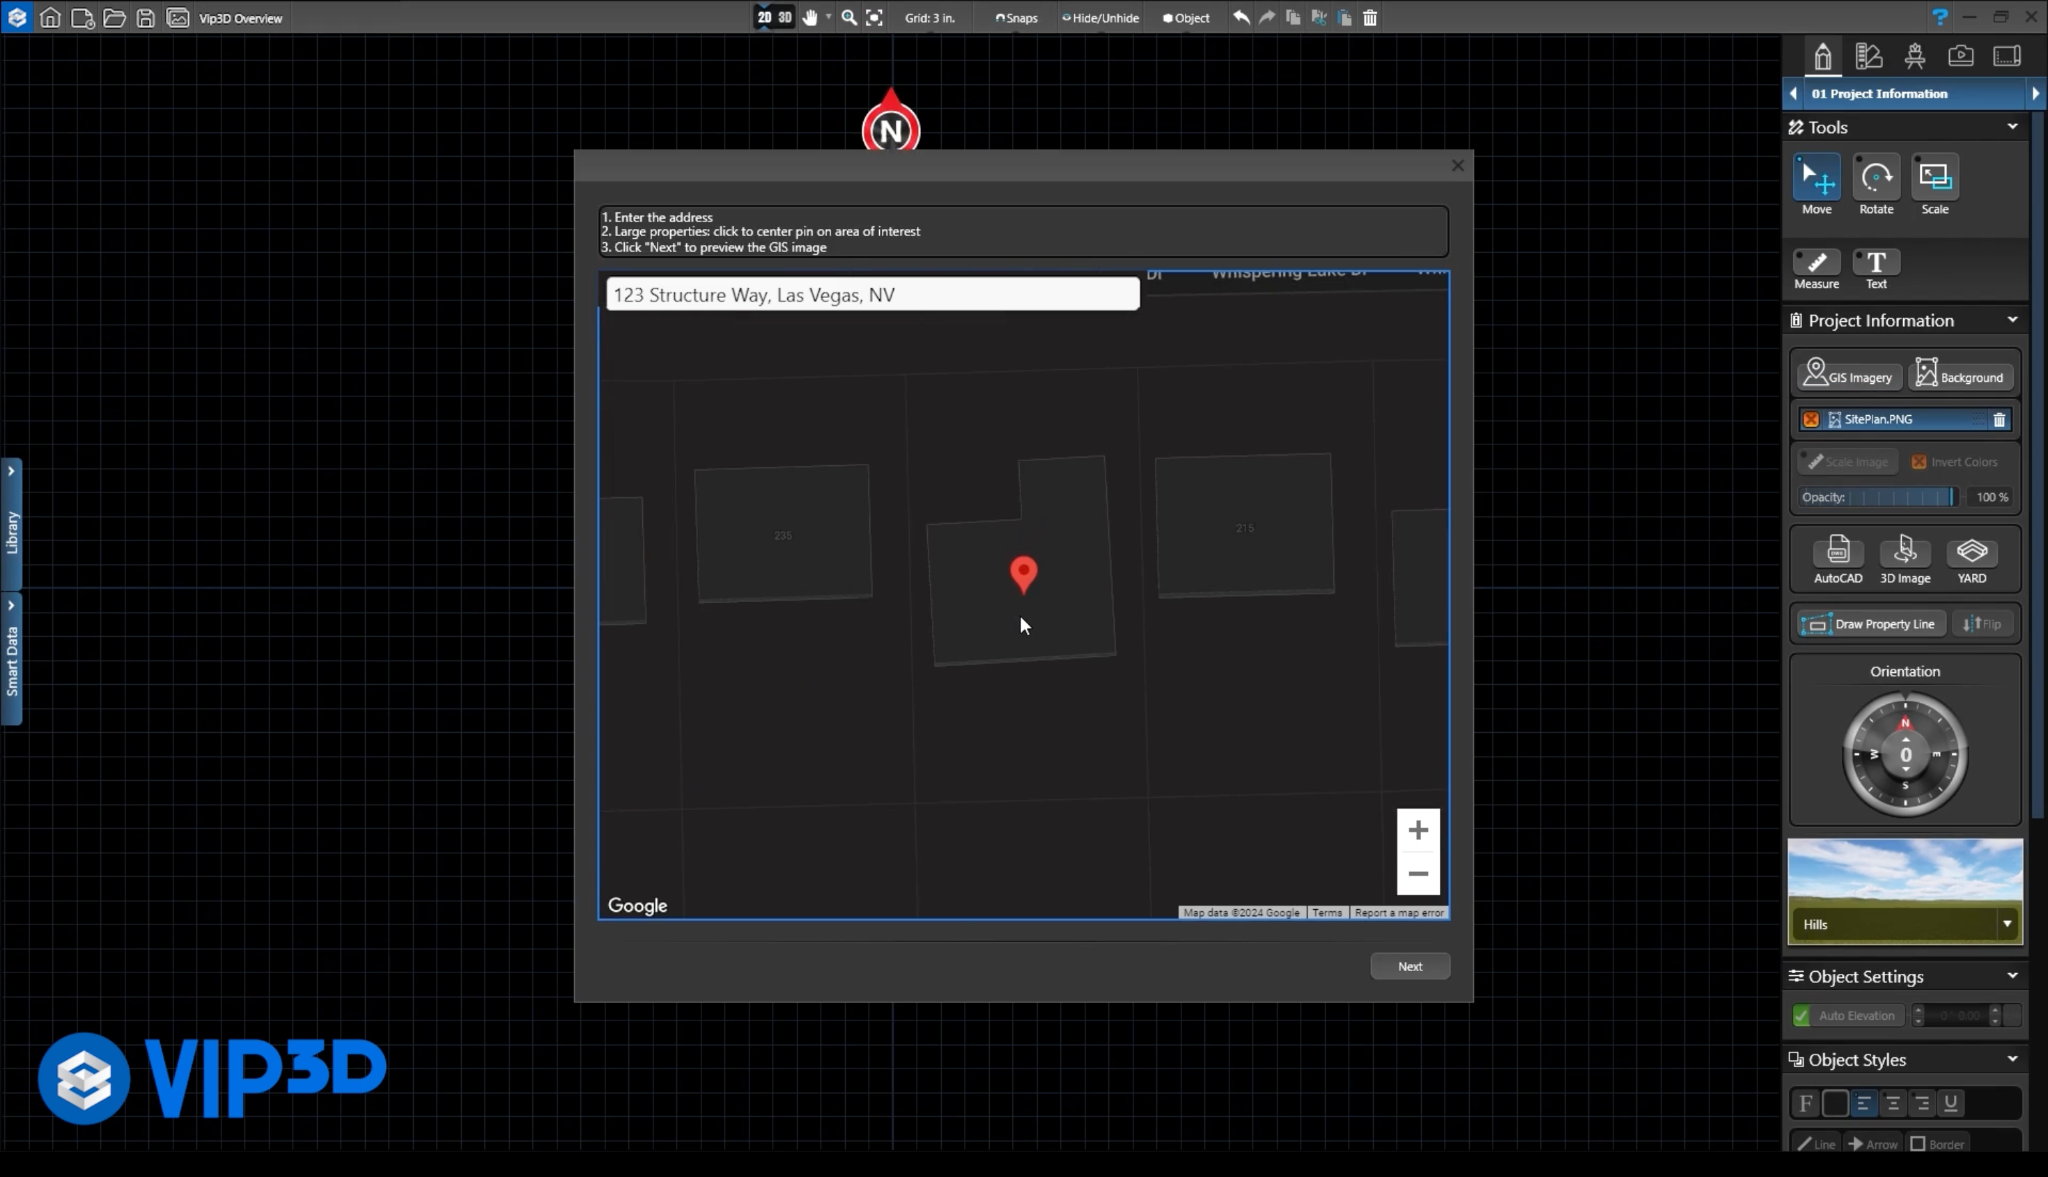
Start with the foundation of your project. Get the property's dimensions, mark the boundaries, note the changes in grade, and flag what's staying and what's going — such as any existing trees, structures, or utility lines that will shape what you can build. The whole design rests on this data, so the care you put in here will show up at every stage.
Structure makes it easy for you to get your project underway quickly, whether you enter field measurements, import a plot plan, or use the optional GIS service to pull in high-resolution aerial imagery and surveyed terrain data. The GIS option can include aerial imagery, surveyed terrain data, parcel lines, setbacks, 3D structures, and property details — streamlining your design process before you've drawn your first line.
Once the site is captured, you're ready to lay out the design.
Step 2: Draw the Layout in 2D
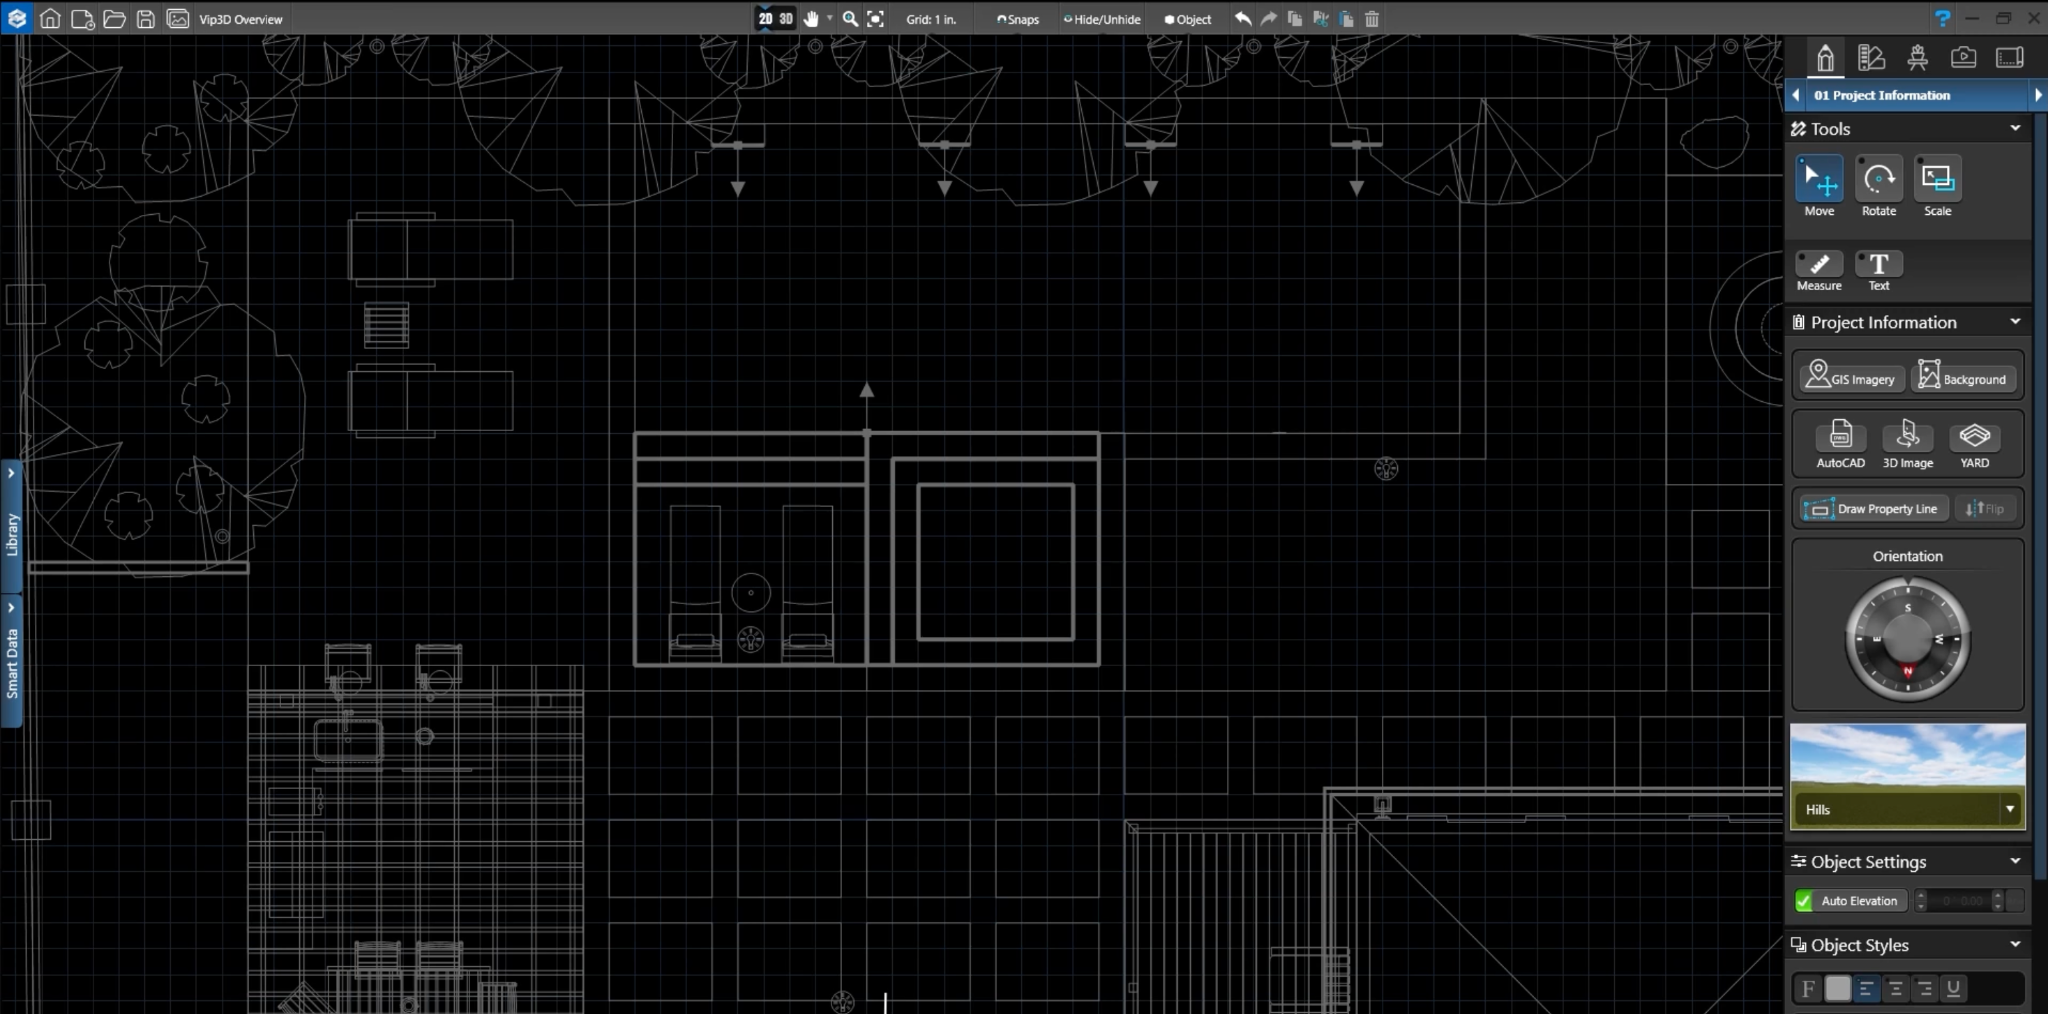
Every 3D design starts with a clear layout. For most outdoor living professionals, that means beginning in a familiar place: a top-down 2D plan.
Draw the client's home on the 2D grid, then lay out your design. Depending on the project, this may include the pool, spa, patio, deck, fence, planter walls, steps, outdoor kitchen, pergola, fire feature, or planting areas.
Because every element remains editable, refining the layout is just as easy as creating it. Replace automatically generated pool steps with a tanning ledge, reshape planting areas, or adjust hardscape elements — without starting over.
Once the key elements of the layout are in place, switch to fully interactive 3D to continue refining the design.
Step 3: Continue Designing in 3D
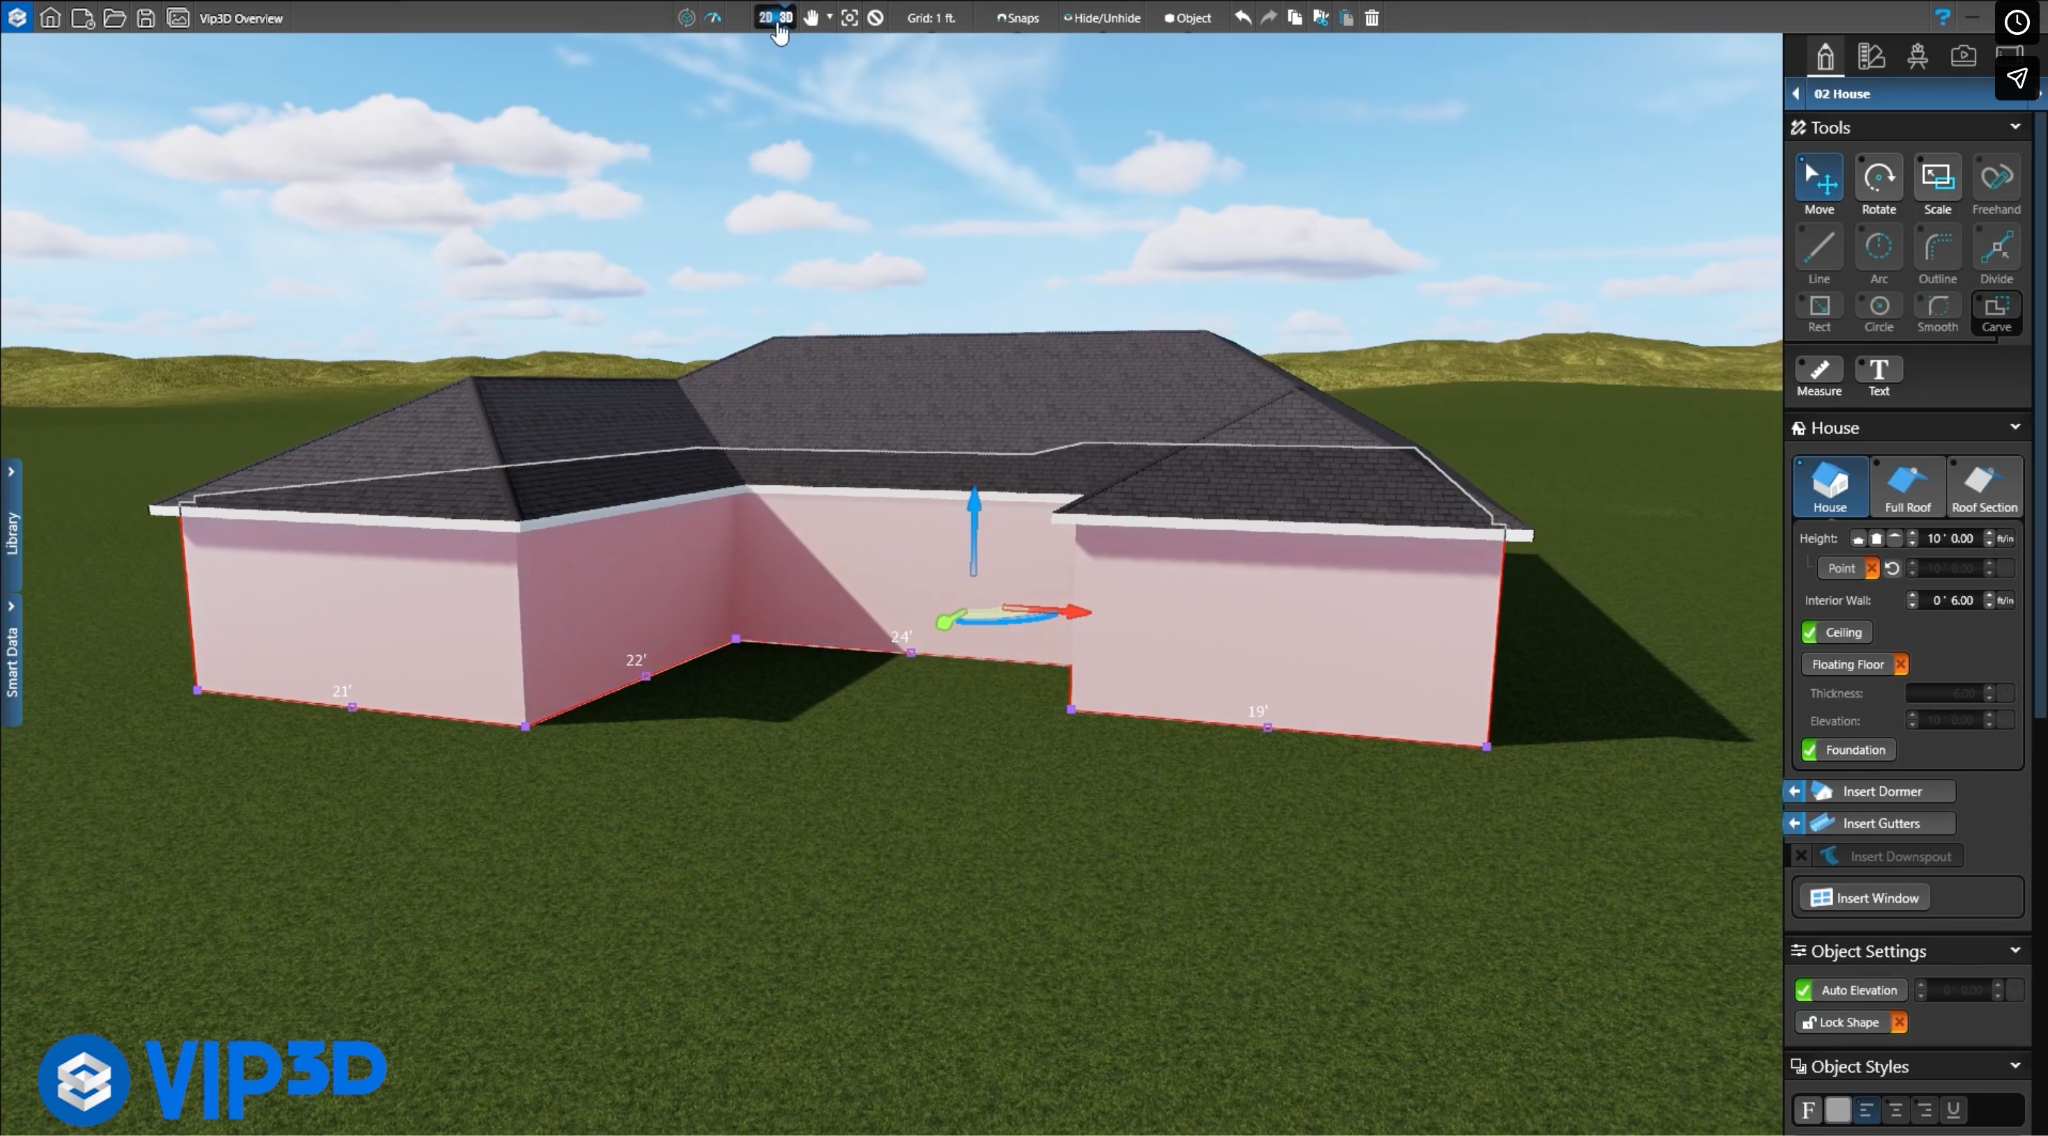
With the 2D layout in place, click the 3D button to see your flat plan become a three-dimensional design. The lines of the 2D grid give way to a workspace that you can move through to customize and refine your design.
This is where purpose-built outdoor living software really shows its value. General 3D modeling software often requires you to build the model manually. Structure Studios software is built specifically for pools, landscapes, and hardscapes, so the elements you draw in 2D carry into 3D automatically — without requiring you to model the details again.
Step 4: Build Out the Outdoor Living Space
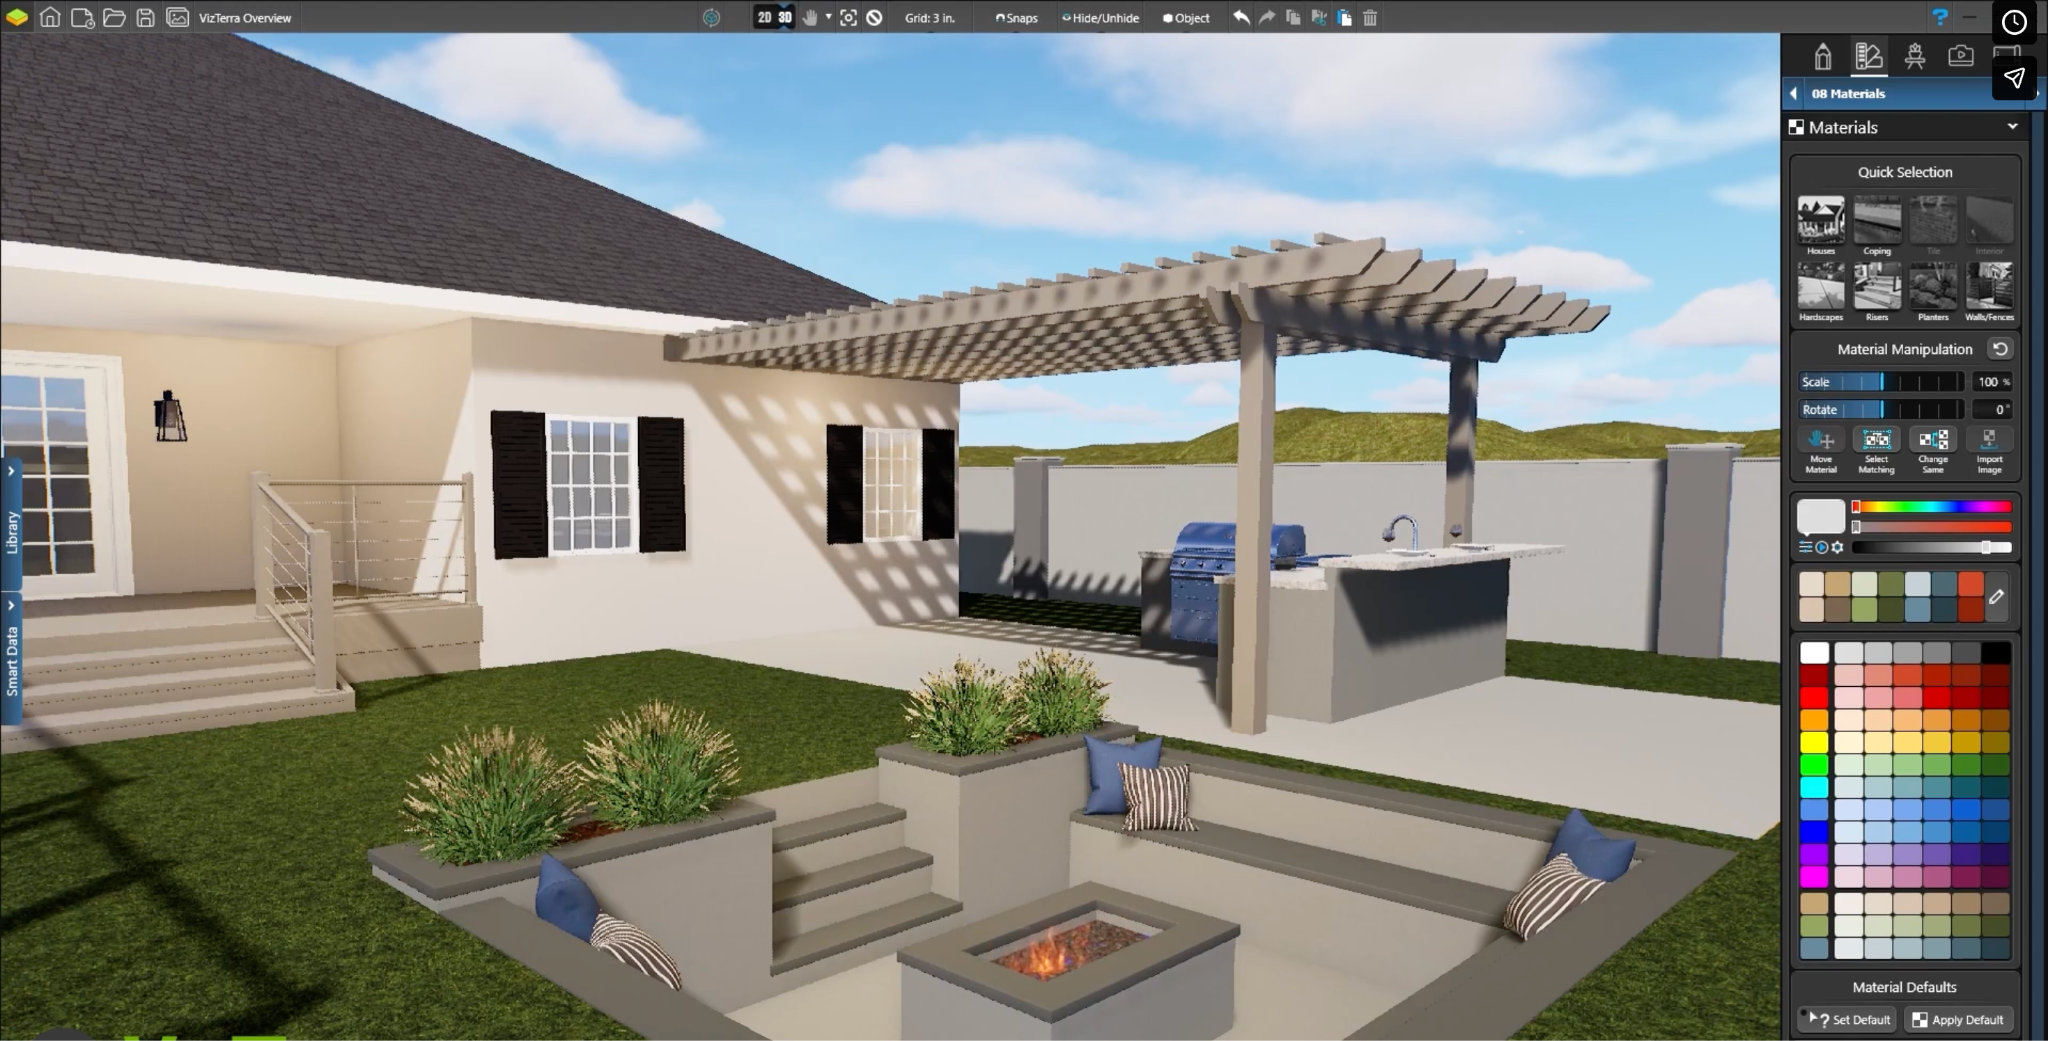
With the design in 3D, you can fill the space in the way a real build goes up — from the ground up.
Start with terrain and grading so the design sits correctly on the property and the slopes and levels are right. Then continue to build out the structural elements, adding and adjusting until the details of the pool, hardscape, decking, steps, retaining walls, and planting areas are exactly right.
From there, layer in the details. Add the outdoor kitchen, fire feature, pergola, shade structures, furniture, lighting, planting, and surrounding context.
This is another way purpose-built tools save you real time. Instead of drawing every rafter in a pergola by hand, you set the dimensions and the whole structure is built for you. Instead of calculating every stair or measuring every board, you pull project data generated from the design itself.
By the time you've worked through the space, you’ll have a complete, accurate outdoor living design, and you'll be ready to add the finishing touches.
Step 5: Apply Materials and Finishes
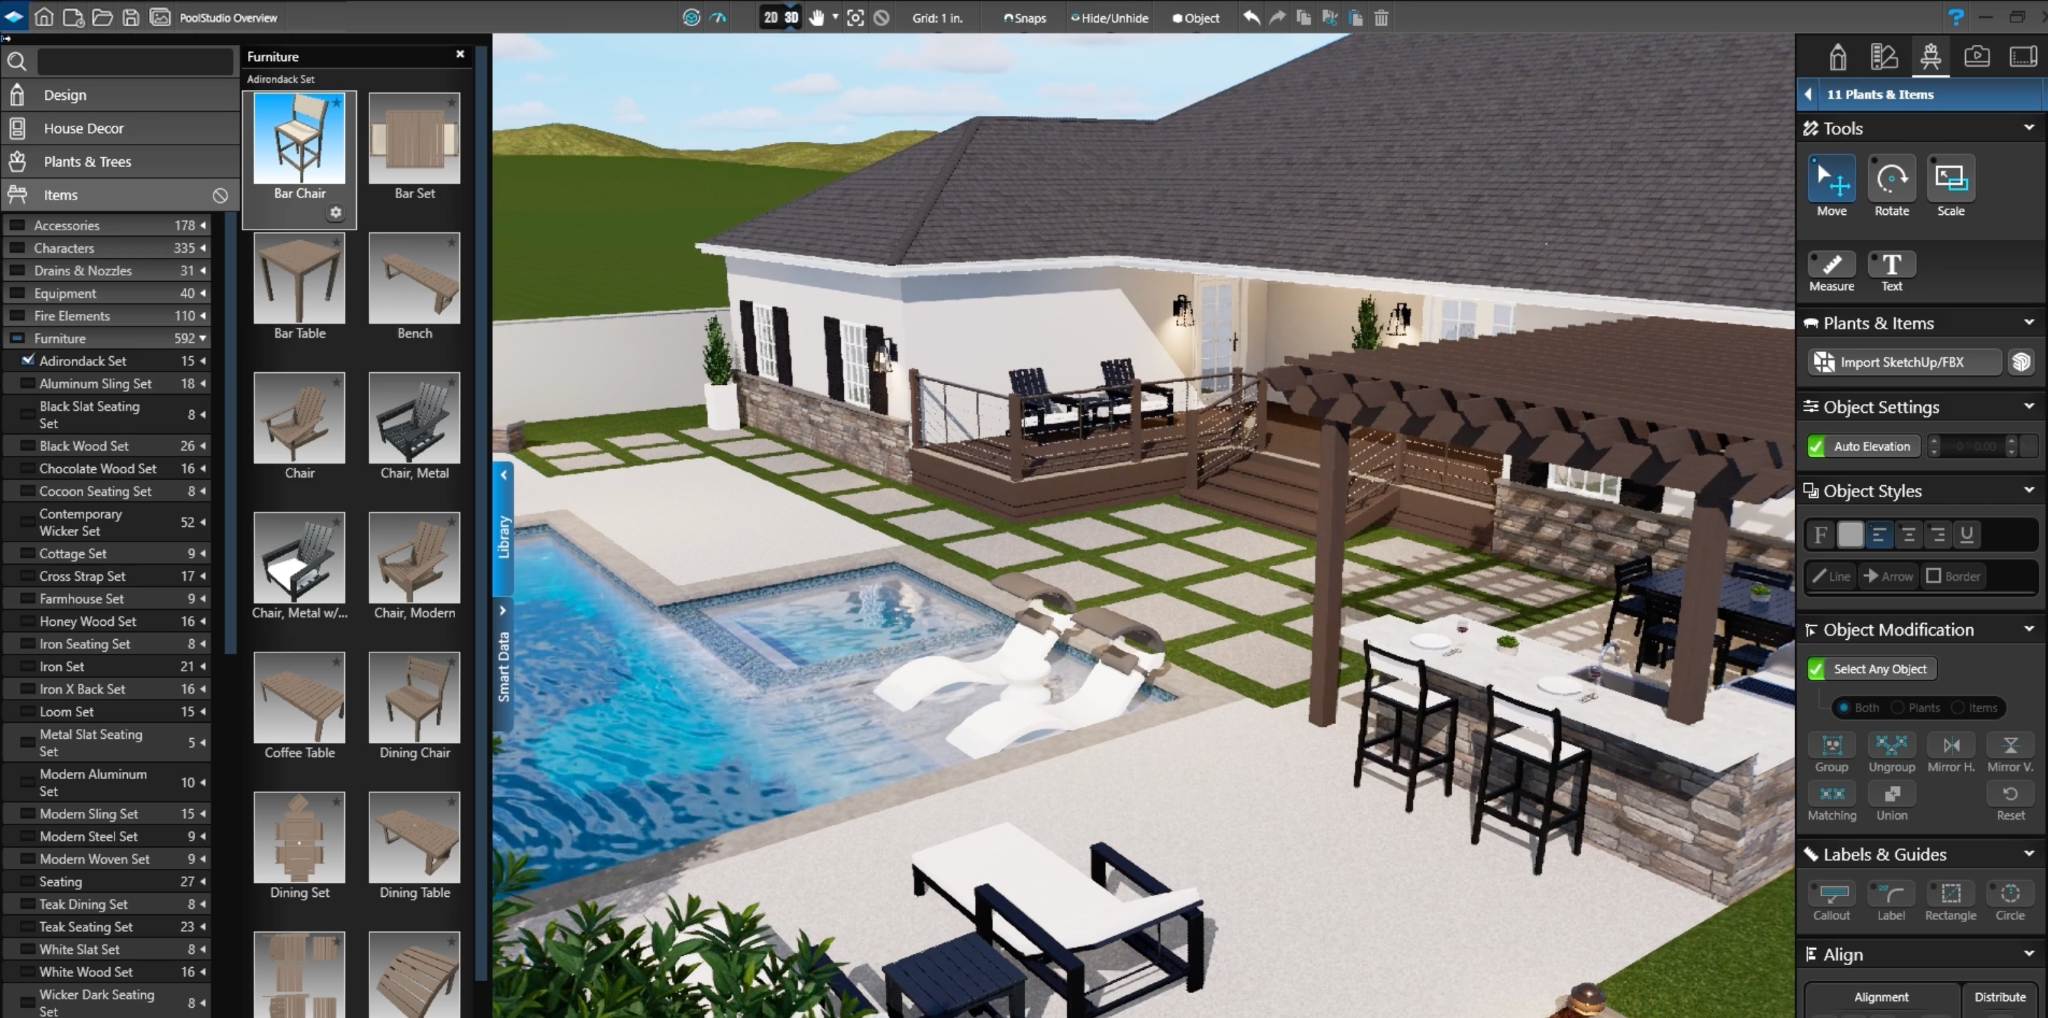
This is where the design stops being a model and starts looking like the finished project.
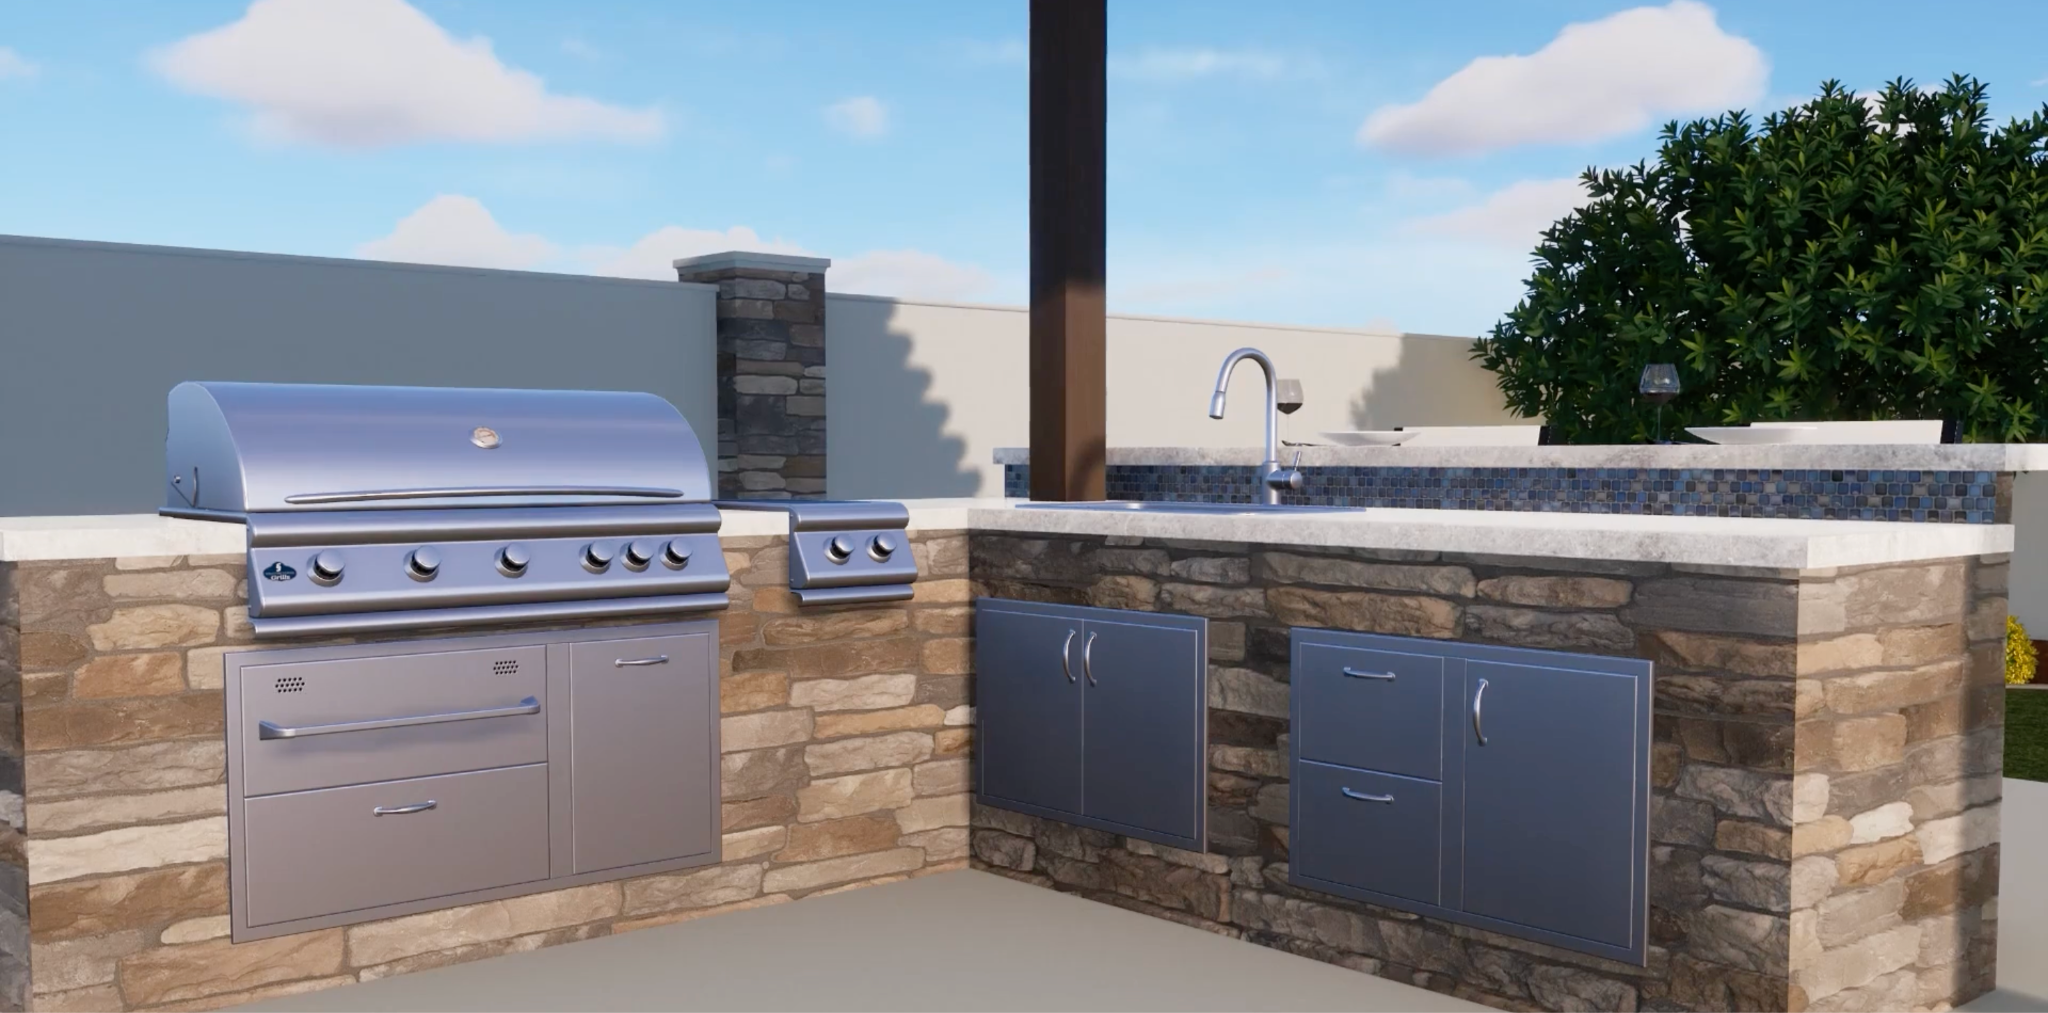
VizTerra, Pool Studio, and Vip3D include thousands of plants, trees, outdoor living elements, detailed 3D objects, and HD materials at up to 4K resolution, so you can create complete, polished outdoor spaces without building every detail — and reveal to your client exactly what you’re offering them.
Apply real finishes to your design: pavers, coping, stone, turf. When you are suggesting upgraded materials — like travertine, flagstone, glass tile, or premium wood tones — these are far easier for the client to evaluate in the actual design than on a sample board. Instead of asking the client to imagine whether an upgrade is worth it, you show them.
Step 6: Set the Lighting and Time of Day
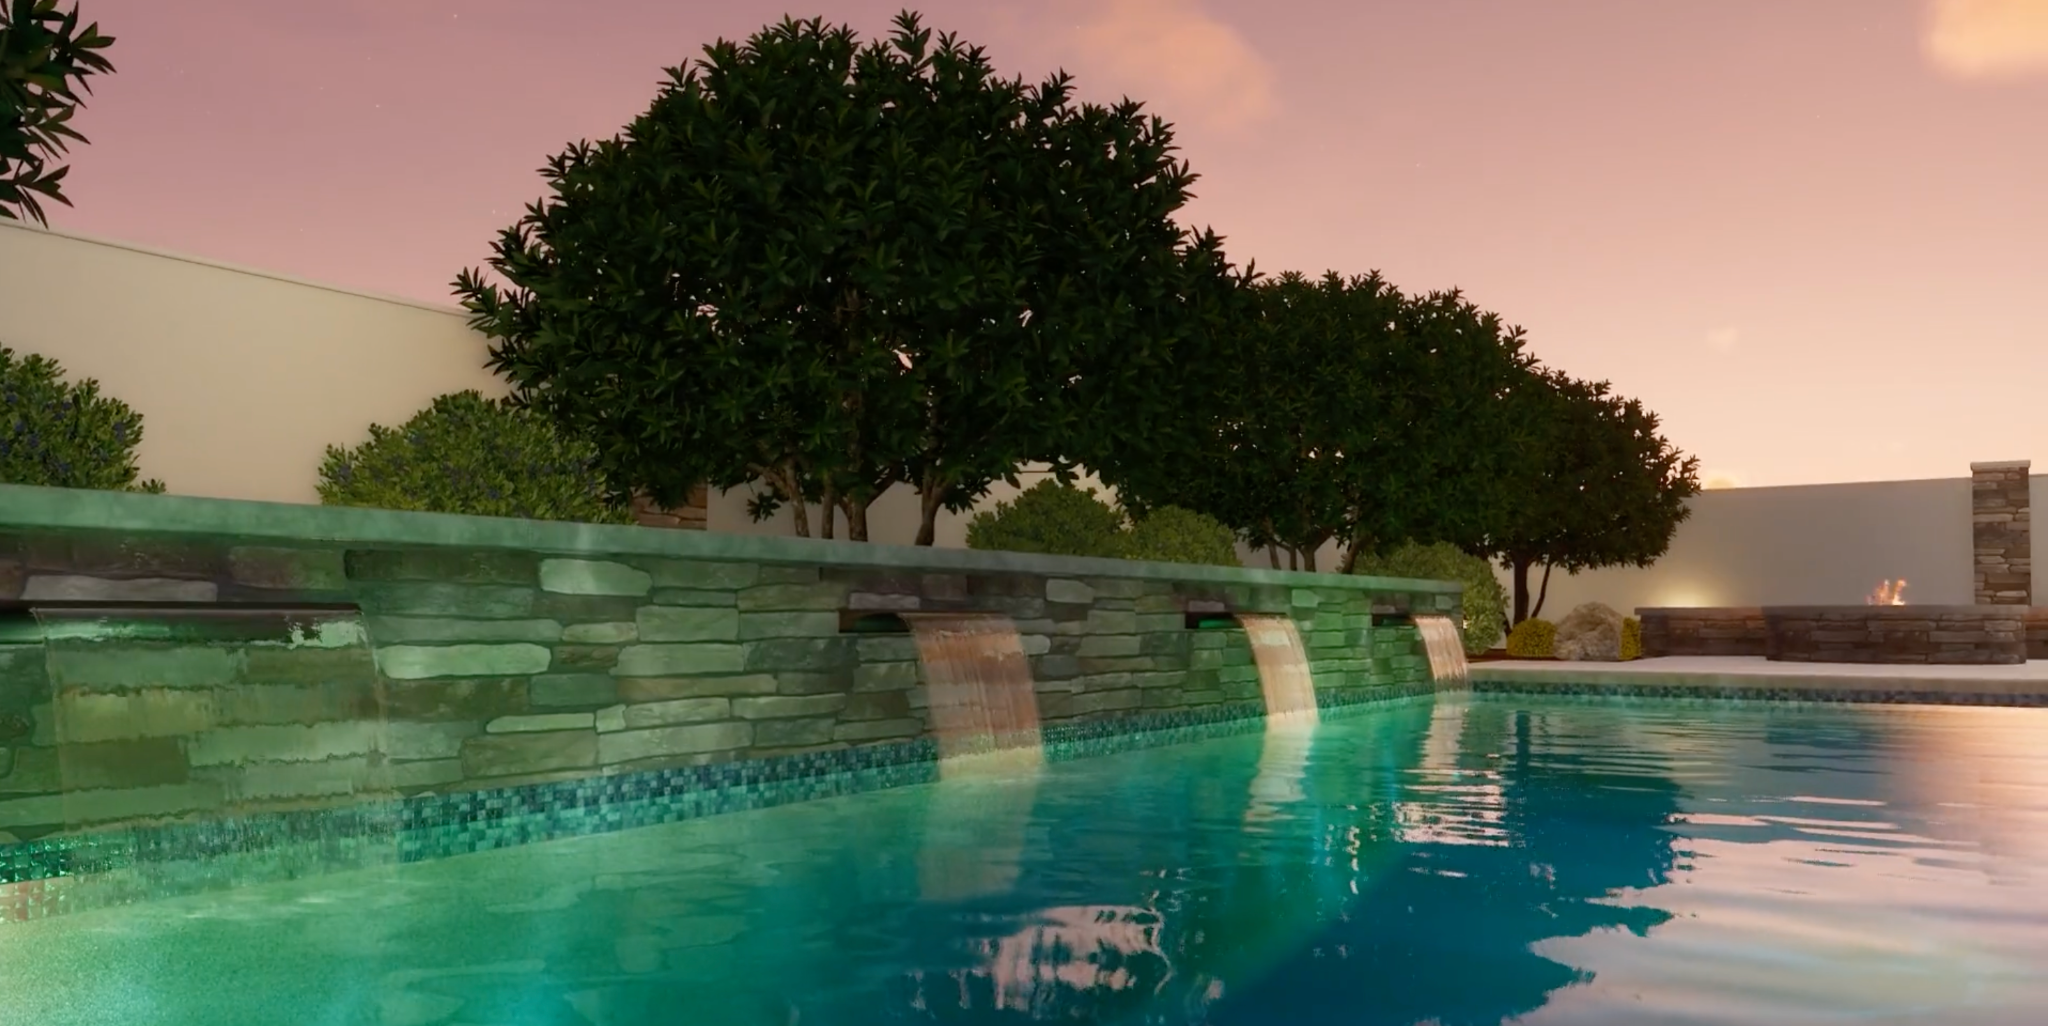
Getting the light right is often what makes a design finally click for the client, because lighting changes how everything in the design feels. A project that looks one way at noon can feel completely different in the evening.
Start by positioning the sun and selecting the option that suits your needs: Optimal, Day, Dusk, or Night. With Vip3D, you can automatically position the sun to rise and set at real-world times and angles, based on your client’s address.
But the sun and moon are only the beginning. This is where you add the lighting that actually defines an outdoor space after dark: landscape lighting, path and step lighting, pool and water-feature lighting, fire features, and the warm glow of an outdoor kitchen or pergola in the evening. Vip3D offers you even more options, including HDRI skies and advanced lighting controls that let you dial in the exact mood and quality of light, from a bright midday sky to a deep, atmospheric dusk.
When the lighting is accurate and inviting, the whole design becomes easier to trust — and easier to say yes to.
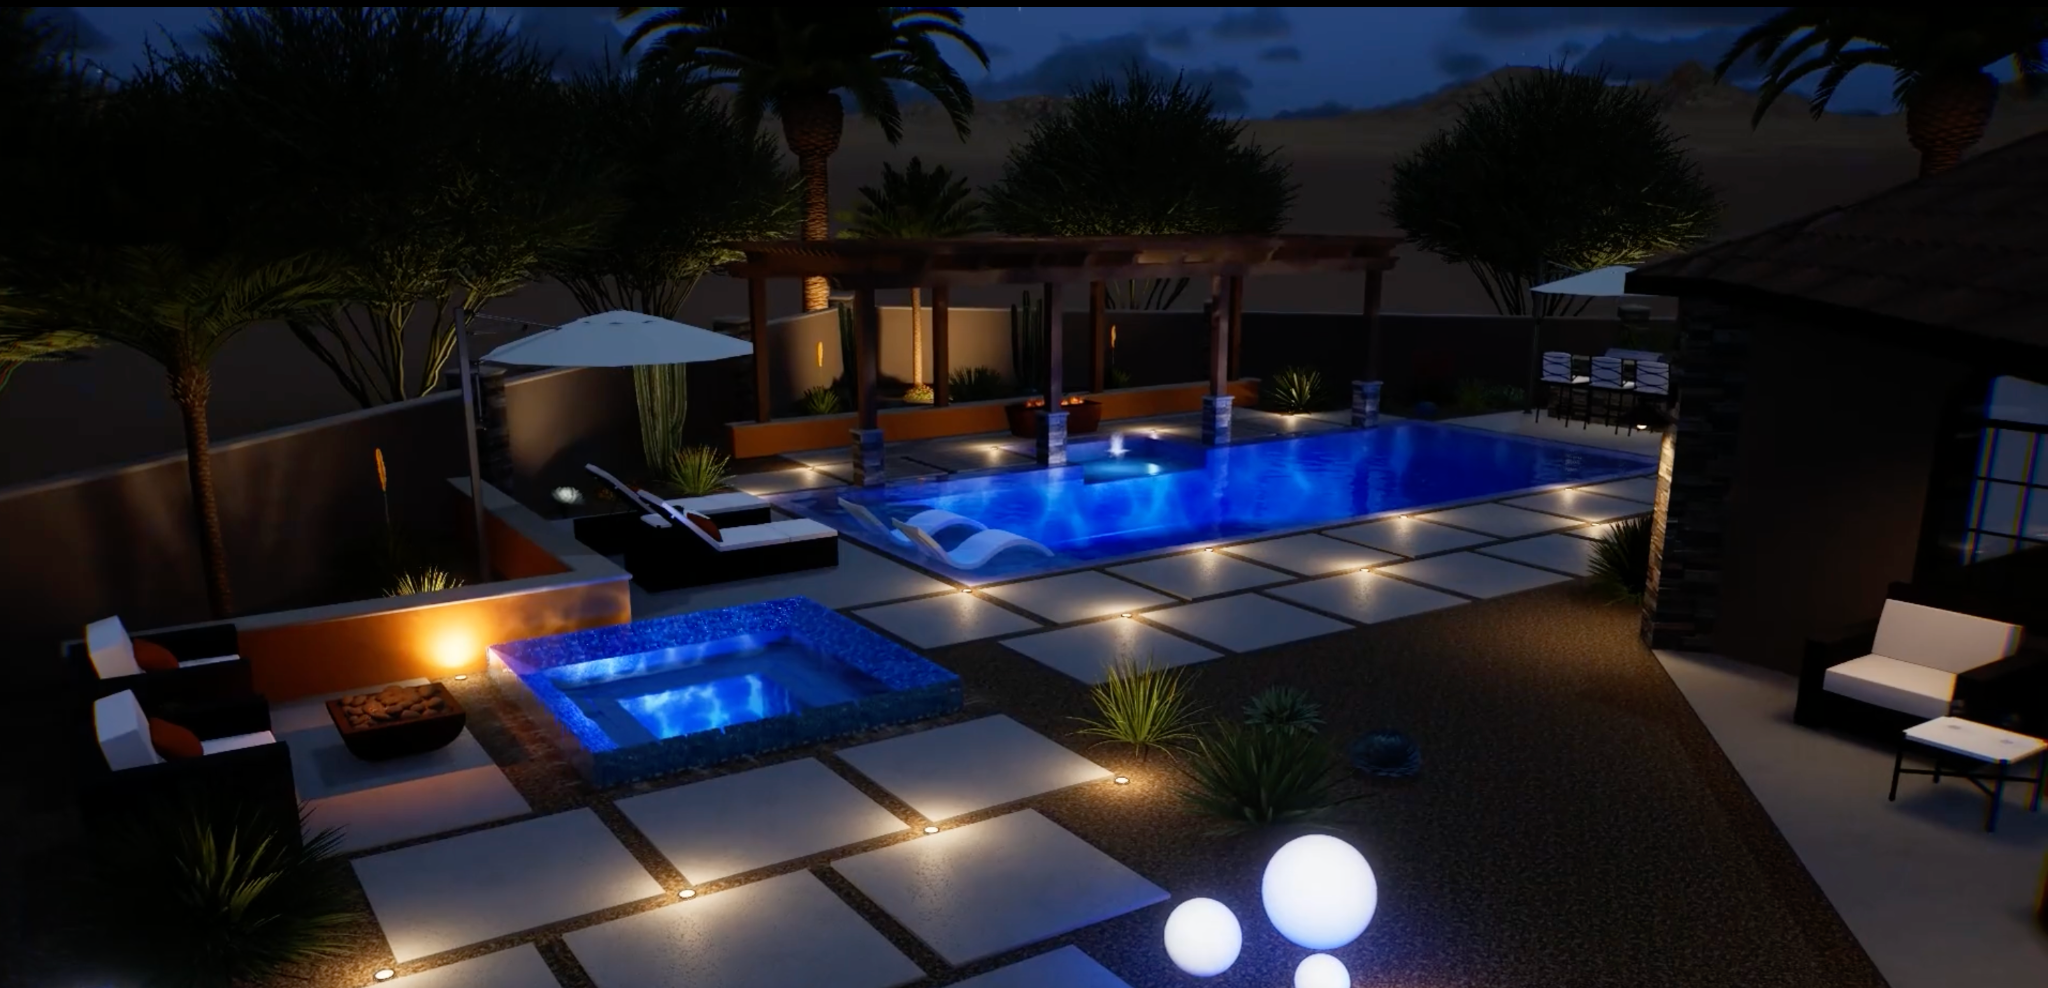
Step 7: Present the Design Live
When you’re ready to show your completed design, professional design software offers you options — including photos and videos up to 8K. But the most powerful option is often the live walkthrough: a real-time, immersive tour that lets you guide the client through the space, show the details clearly, and explain each element of the materials and the layout.
Instead of asking the client to interpret a static plan or a still image, you show them their finished space from the views that matter most. Because you’re presenting your project exactly as you created it, you can make any edits immediately — turn the white roses red, show them the view from their kitchen, even surprise them by adding their new family pet.
Since showing it beats describing it every time, the live walkthrough is often what closes the job. And once the client approves, you can produce construction plans from that same design.
Step 8: Create Construction Plans
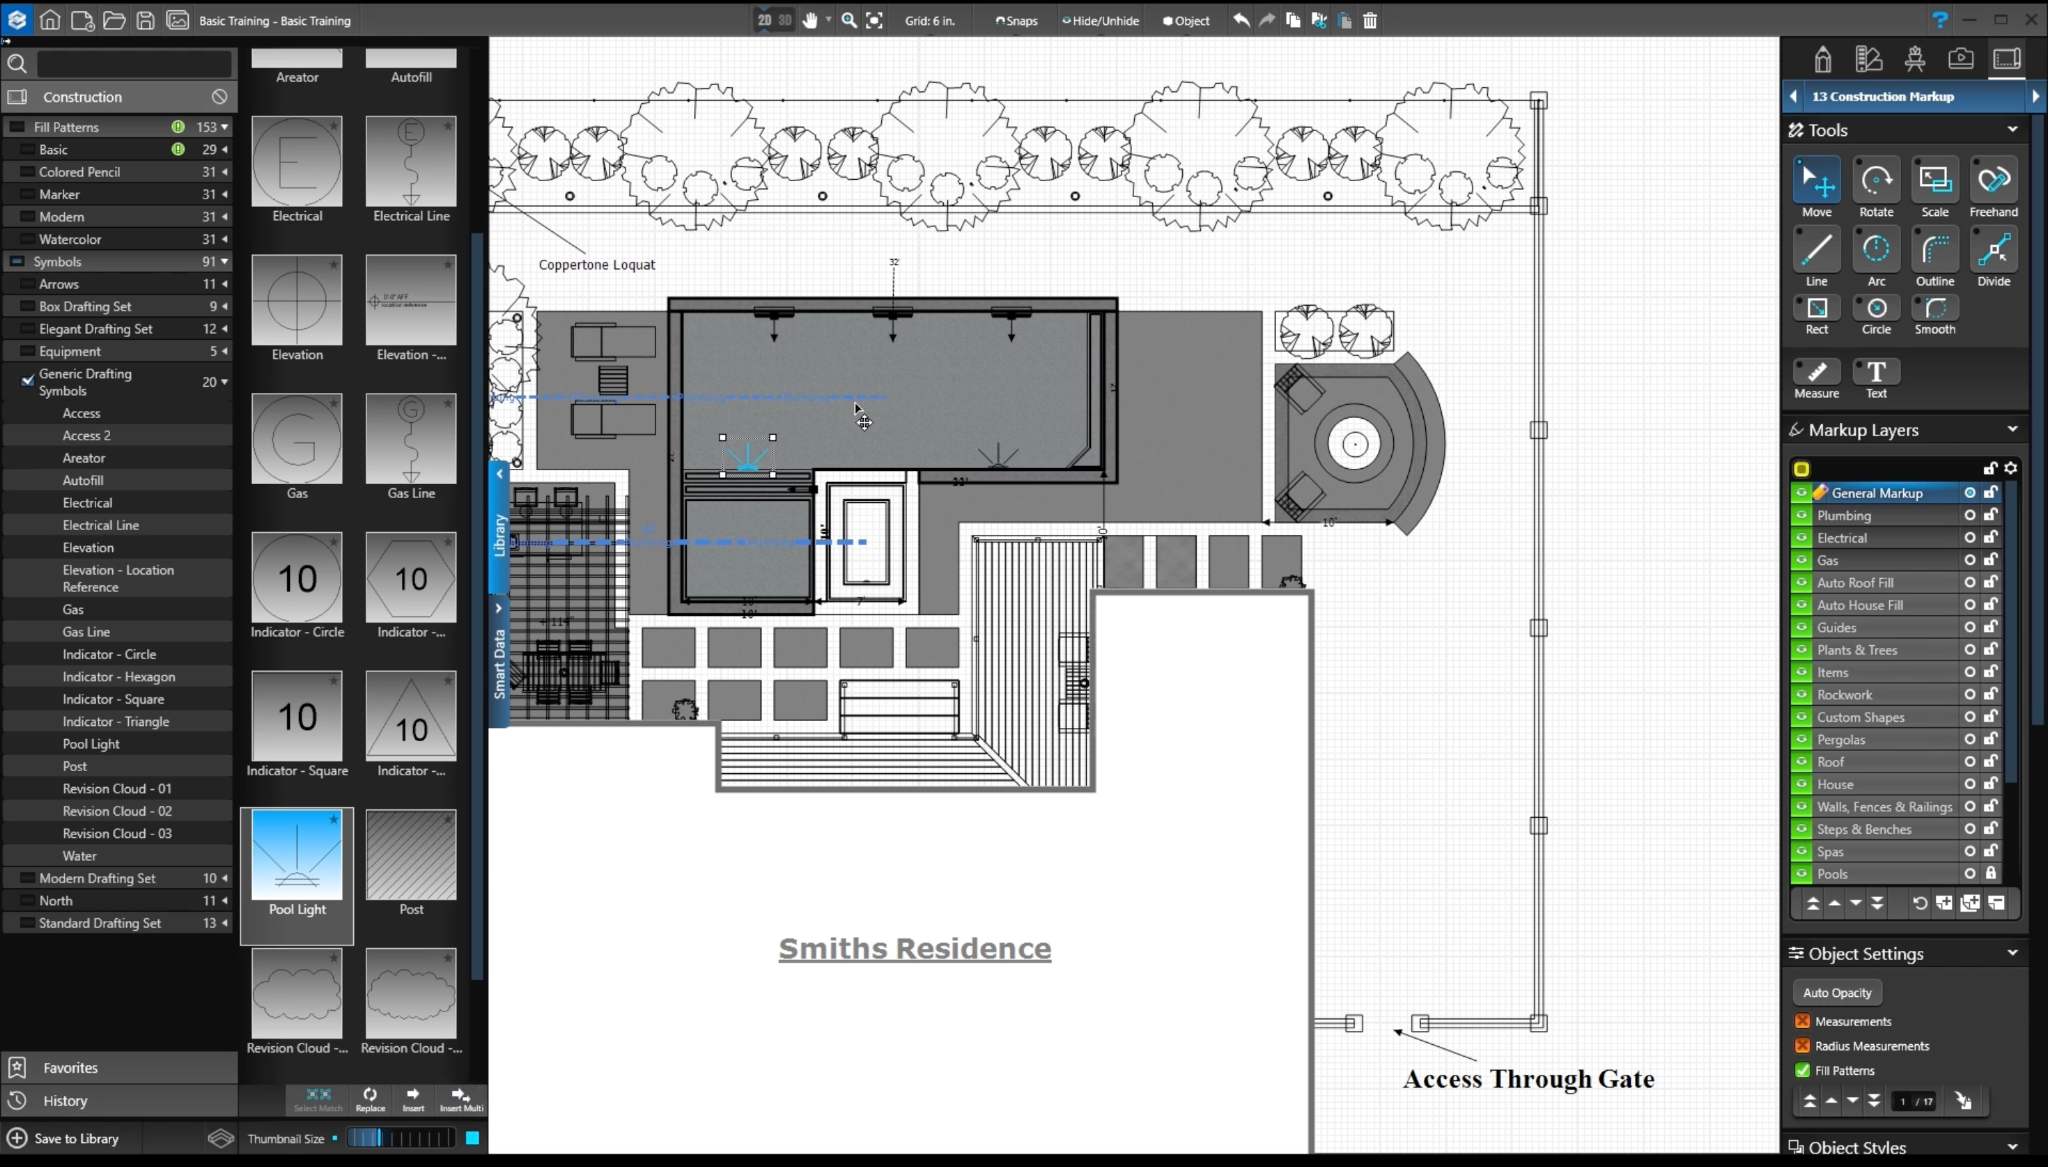
With approval secured, you can create precise construction documents without needing to rebuild anything. You can print color plans with fill patterns for HOA approval, triangulate the layout for staking and digging, and use Smart Data Blocks in Vip3D to display detailed project calculations automatically.
Because the scaled 2D plan, plant legend, and calculated material quantities all come from the same accurate design, your construction plans stay aligned with the project the client approved.
That's the real advantage of a connected 2D-to-3D design flow. You don't redraw the project after the client approves it — the project you presented becomes the plan you build from.
Tips for Creating 3D Views That Clients Trust
A 3D design is most effective when it feels accurate, believable, and connected to the actual project. The goal is for the client to understand why this design is right for them — not to overwhelm them with every imaginable detail. Here's what separates a design that wins the job from one that just looks nice:
- Keep the Scale Accurate: Scale is one of the first things clients notice, even if they do not know exactly why something feels wrong. A pool that feels too small, a tree that seems too isolated — if the scale isn’t clear to the client, the rest of the plan might seem harder to trust. When you keep the measurements you captured at the beginning of the project true to the actual site, you reassure the client that your design is right for them.
- Use Materials That Match the Real Project: Flat gray surfaces sell nothing. The bark on the trees, the grain in the decking, the shimmer of the water — those finishes make the design look like a finished project. Apply realistic materials to every surface and your client will understand exactly what they’re choosing — and when you show the upgrades in full HD, your client can see the value.
- Match the Lighting to the Site: The right lighting does more than just make views of the outdoor living space look attractive. Match the sun to the property’s orientation and show the space at the times of day that matter most. If they’ve mentioned quiet evenings on the patio, show the space after dark with landscape lighting, path and step lights, and the warm glow of the pergola or outdoor kitchen. If they plan to host dinner parties on the deck, use Vip3D’s True Shadows to show how shade will fall across the seating areas at the times they’ll use them most — so they can see exactly how comfortable the space will feel.
- Anchor the Design in Context: A pool floating in an otherwise empty space can feel disconnected from reality. Keep the home, property boundaries, terrain, neighboring context, and existing site conditions visible to help the client grasp the design, and select the right background (such as one of the high-resolution environment backgrounds) for your client’s property. The more clearly the design belongs to the client’s actual property, the easier it is for them to imagine the finished space.
Common Mistakes to Avoid
Even a well-planned project can lose clarity if the 3D presentation does not reflect the real site, the actual materials, or the way the space will actually be used. The most effective 3D designs are not just visually impressive — they are accurate, readable, and easy for the client to understand.
Here are the issues professional designers watch for before sharing a presentation:
- Adding Too Much to the Scene: More isn't always better. Packing in every possible plant, accessory, material, and light buries the space instead of selling it, so pick the elements that tell the story of the design.
- Starting Without Accurate Site Information: It can be tempting to start drawing immediately from memory or rough estimates, especially on a site you’ve walked a dozen times. But a 3D design is only as accurate as the information behind it, and a rough guess might put the pool a foot too close to the neighbor’s property. Accuracy helps limit changes once the build starts.
- Using Software That Slows You Down: General-purpose 3D modeling software can be powerful, but if you have to manually model every pool, wall, step, pergola, plant, and construction detail, the design process can take much longer than it needs to. What takes one day in purpose-built software can take up to five days in other software, which means you're either working weekends or walking into the meeting with something half-finished.
- Relying Only on Static Images: A still image shows one angle, one moment, one version. A live 3D walkthrough gives the client a better understanding of the whole space as you shift views, compare options, and answer their questions during the presentation.
- Treating the 3D Design as Separate from the Plans: If the 3D design and construction plans are created separately, changes can become harder to manage. A revision made for the client presentation may need to be redrawn somewhere else before it reaches the construction documents. Instead, rely on software that keeps the design, presentation, and construction plans aligned.
See It Before You Decide
Start a free trial and design a real project. Move from a 2D plan to a 3D design in one click, set your materials, and see what it will look like at any time of day.
When you're ready to produce build-ready plans with the measurements and material quantities you need for permitting, you'll already know exactly how the software fits the way you work.
Frequently Asked Questions
How long does it take to learn to design in 3D?
A new member typically completes their first design on the first day of training with Structure. For someone new to 3D design, any learning anxiety tends to disappear pretty quickly thanks to the intuitive, easy-to-use tools. With the software’s guided, step-by-step workflow, you choose which stage you focus on (for example, the terrain or the pool, the pergola or the materials) instead of staring down a screen cluttered with too many tools.
Do I need to be technical to use 3D design software?
No. Structure is built for designers, not engineers. You don't need a background in AutoCAD or any prior 3D experience. The workflow is guided, the steps are clear, and the software is purpose-built for the kind of work you're already doing. If you can imagine an outdoor space you’d like to create, you can design it in 3D.
Can I automatically turn a 2D plan into 3D?
Yes. This is often the part that surprises designers the most. That single moment is what members most often describe as a game-changer. It’s also the feature that separates purpose-built landscape and pool design software from general 3D software. No rebuilding from scratch. No switching between software. You simply draw the layout in 2D, click to switch to 3D instantly, and continue designing in 3D.
Is there free outdoor 3D design software?
There are free options that work well for homeowners experimenting with ideas. For a designer who needs to win competitive bids, produce construction plans, and walk a client through a live design in a single meeting, the free options tend to hit a ceiling quickly. The gap between a free browser-based planner and professional design software isn't just about features. It's about what you can actually do for your client.
Does the software also produce construction plans?
Yes. With professional design software, you create construction plans from the same design you built to show the client. Dimensions, materials, layout — all of it comes from one project. A single design handles the 3D view, the client meeting, and the build-ready documentation.