Think of this as a simplified 3D presentation. You can use all of the Presentation controls except Video.

Getting to Photo Mode: To take photos of your project in Photo Mode, go to the Presentation Stage.
Single left-click the Photo Mode button to load a 3D View with black border. To move around in 3D, use the standard mouse controls to rotate and pan and Walk (CTRL + W) and Fly (CTRL + F).

Saved Locations
Each project can have up to 99 saved locations. These locations function in both Photo Mode and Presentation Mode.
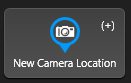 New Camera Location: Press this button to add your current 3D view as a new Saved Location. You can also press (+) on your keyboard.
By default your starting point in presentation is the first Location Slot. To start in a different location, double click on the Location Slot to set it. A small orange figure will appear on the starting Location.
TIP: To change the position of Locations, left click, then drag and drop them into the new position.

Location Slot Number: Left-click on the preview image to move your 3D view to that saved location. To move to a specific saved location while in Presentation Mode, Press the location number. For example, to move to Location 2, Press 2.
 Camera Pin: Press this button to update/change the Location Slot to the current view or different time of day. You can easily change or replace a Saved Location by moving your 3D view and pressing the camera pin icon again.

Delete: Press this button to Delete the saved camera location. You can also press Delete on your keyboard.
 Pegman: This marks the starting location in Presentation Mode. By default, the pegman is on Location Slot 1.
To change the starting location, double click a Location Slot to remove the pegman to that slot.
Thumbnail Refresh: After saving a photo mode location, the preview image will only update when there are significant changes to the design or when you reopen the saved file.
To update the preview image at any time, simply click on the Thumbnail Refresh Button.

For example, if you save the thumbnail location with specific materials applied and later make changes to those materials, the thumbnail preview will display the original materials until you press the Thumbnail Refresh button.
Copy and Paste:
To copy and paste photo locations and settings, you have a couple of options.
First, you can select the location, press CTRL+C to copy, and then use CTRL+V to paste the location within the same photo mode save file, or even to the video mode location or a new save file. This makes it easy to transfer and duplicate your photo locations across different modes and projects.
Alternatively, you can right-click on the photo mode location and choose "Copy Settings". This will copy all the settings of that specific location. Then, right-click on another location and choose the settings you want to copy to the new location. Finally, click "Paste Settings" and only those selected changes will be applied.
Here's an example: If you want to keep two different photo mode locations the same, except for the time of day, follow these steps:
1. Right-click on the first location and choose "Copy Settings."
2. Next, right-click on the second location and deselect all settings except for "Time of Day."
3. Click on "Paste Settings."
By following these steps, you'll notice that the second location remains the same, except for the updated time of day.

Stage Options
 Footprints: Press this button to enter Walk mode or press (CTRL + W) on your keyboard. Walk mode plants your feet firmly back on the ground so you can walk around. Press Esc to exit Walk mode.
Balloon: Press this button to enter Fly mode or press (CTRL + F) on your keyboard. Fly mode allows you to “fly” anywhere in the 3D view. Press Esc to exit Fly mode.
Take Photo: At any time, you can press the Take Photo button to capture a picture/screenshot of your current view. You can also press (P) on your keyboard.

To take photos of multiple Locations at once, press CTRL + Left Click or CTRL+A to select all locations.
Then press Take Photo to create a screenshot of each selected Location.
When you successfully take a photo, the Photo Saved pop up box will appear and the screenshot will be saved in the screenshots folder.
Click on the Photo Saved box to open the Media Viewer and view the screenshots.
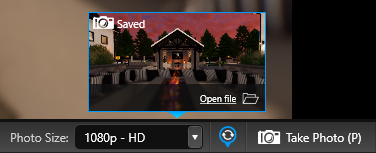
Click on the "Open File" button to directly open the photo in your default photo viewer.

To learn how to send photos to a client, see How to Attach Project Images to Email.
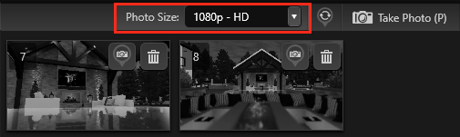
Resolution: Take pictures/screenshots at the resolution you select from the drop-down.
Here are different resolution options for capturing your photos:
- 1080p - This option has dimensions of 1920 x 1080 pixels.
- 2K - This is the default resolution with dimensions of 2560 × 1440 pixels.
- 4K - This option provides a higher resolution with dimensions of 3840 x 2160 pixels.
- 8K - For printing large format images, this option has dimensions of 7680 x 4320 pixels.
- Social Square - This aspect ratio is perfect for square social media posts, with a 1:1 ratio.
- Social Story - If you want to create tall social media posts, this aspect ratio of 9:16 is ideal.
- 360 Photo - HD - This option allows you to capture high definition 360-degree photos that can be viewed in virtual reality, on Facebook, or with 360 photo viewers.
- 360 Photo - 4K - For an even higher level of detail in your 360-degree photos, you can choose this option. However, keep in mind that this requires a computer with significant video memory and the resulting file size may be too large for some social media platforms. It is best suited for creating virtual reality experiences.
X: Press this X to close Photo Mode and return to the standard Create Presentation controls.
Professional Camera Controls (Vip3D Exclusive)
Add another level of professionalism to your photos and videos with exclusive camera controls.

Camera Lens mm: This slider allows you to choose between a focal lens of 15mm and 150mm. Fine tune in your desired lens by typing in your own value between 15 and 150.
Accurate Focus Mode: To achieve precise focus, enable the accurate focus mode and choose the specific area you want to focus on. Adjusting the F-stop will control the amount of blur in the areas that are not selected.
Add Bloom, Lens Flare, Camera Dust, Color Fringe, or a Vignette to your image.
See 🎥 Create Presentation for more details on camera and filter controls.

360° Photos
360° Photos offers you the option of sharing with your clients the easiest, most engaging way to explore every detail of their future outdoor living space. Use the mouse on your PC, or the screen on your tablet or smartphone, to invite your clients to explore your design in any direction
Take 360° Photos: Select 360 Photo from the dropdown.
- 360 Photo - HD - This option allows you to capture high definition 360-degree photos that can be viewed in virtual reality, on Facebook, or with 360 photo viewers.
- 360 Photo - 4K - For an even higher level of detail in your 360-degree photos, you can choose this option. However, keep in mind that this requires a computer with significant video memory and the resulting file size may be too large for some social media platforms. It is best suited for creating virtual reality experiences.
Once the 360° photo is taken, upload the image to Facebook to interact with it. Left click and drag the image using a PC mouse or use a mobile device such as smart phone to move the view.
While standard image viewing software will not display the image as a 360° or interactive photo, the image will upload correctly to Facebook.
